Introduction
On this series of blog posts, I am documenting my journey of delivering personalized content to end users of a mobile app.
- Sitecore personalize and mobile app projects series – part 1 – Introduction and overview of the solution
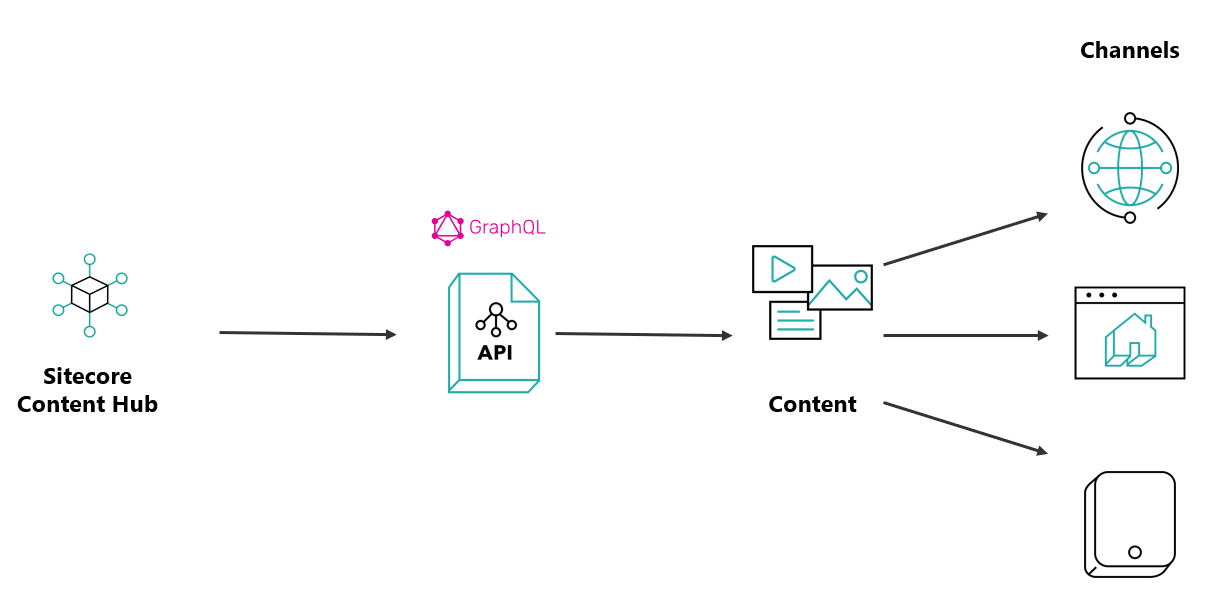
- Sitecore personalize and mobile app projects series – part 2a – Enabling Sitecore Experience Edge (Sitecore Content Hub)
- Sitecore personalize and mobile app projects series – part 2b – Enabling Sitecore Experience Edge (Sitecore XM Cloud)
- Sitecore personalize and mobile app projects series – part 3 – Connecting Sitecore Personalize to Sitecore Experience Edge
- Sitecore personalize and mobile app projects series – part 4 (this post) – Explore Sitecore Personalize APIs and security considerations.
- Sitecore personalize and mobile app projects series – part 4b – Sitecore Personalize API Flow executions.
- GitHub Repo – Contains code samples and related artifacts referenced in this blog series
- YouTube Channel – My YouTube Channel with videos accompanying this blog series
Sitecore Personalize APIs
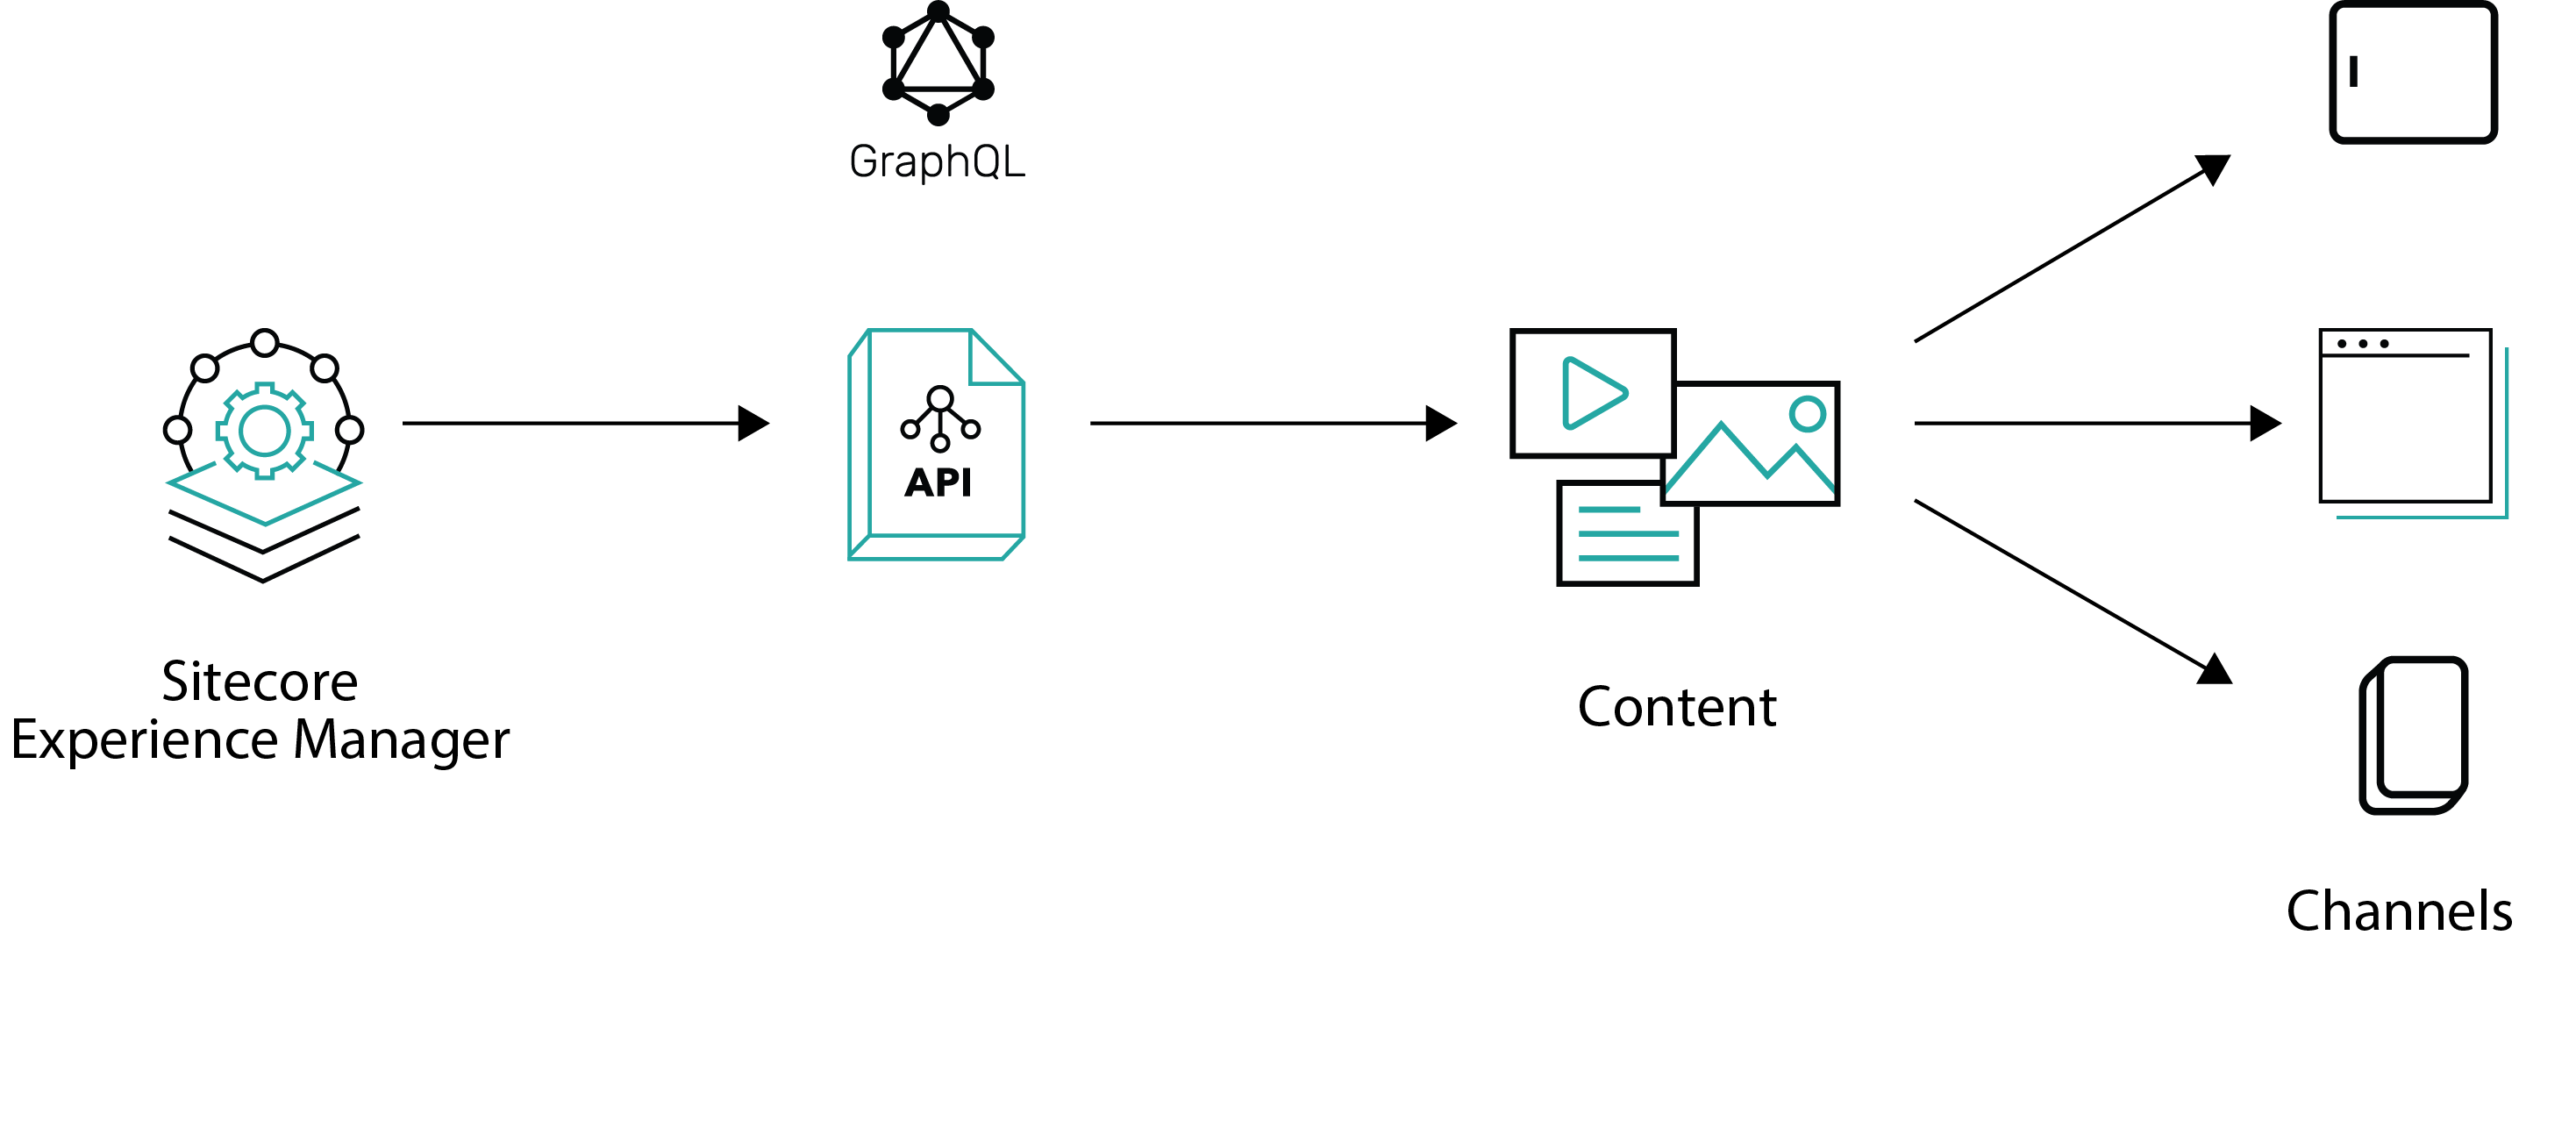
I have shared a reference architecture of the Sitecore Personalize APIs to demonstrate the different types as well as the recommended the integrations to your mobile app at the top of this page. We will now look into this in detail.
Orchestration layer
This architectural piece allows you to manage the integrations between your mobile app and Sitecore Personalize API. All it is a middleware or proxy layer that allows us to communicate with Personalize APIs. You can build this as a server-side application in any language of your choice. Alternatively, you could leverage Serverless capabilities such as Azure Function apps.
Below is a summary of the benefits:
- Securely manage Client Keys and Client Secrets. The proxy layer protects your Client Keys and Secrets from potential malicious users of your mobile app.
- Loose coupling – The orchestration layer means your mobile app is not strongly coupled with Sitecore Personalize APIs, making it easier to manage your mobile app releases and any changes to APIs.
Stream API
Stream API is designed to capture real-time, high velocity, and high-volume behavioral data. This includes both Browser and Event APIs
- The Browser API provides capabilities to extend functionality and manage cookies that help identify guests. These Browser APIs are used for capturing and consuming data. They create, update, read, and delete data. This is the first API that you will make from your mobile app, to uniquely identify the guest/user.
- The Event API provides capabilities for event driven processing, such as setting and sending custom events from your mobile app to Sitecore Personalize.
You will need a public Client key to access these APIs. You can get your key from your Sitecore Personalize tenant.
Interactive API
Interactive API is a set of REST APIs that provide synchronous interaction with CDP/Sitecore Personalize capabilities. These APIs support the CRUD operations that that you can operation on, say, guest profile data.
You will need a both public Client key and private Client secret to access these APIs by specify Basic Authentication token on the headers. You can get your keys and secrets from your Sitecore Personalize tenant.
You can access full documentation and how to send data with these events from Sitecore.
Mobile app integration
You will typically initiate an asynchronous call to Browser API (Stream API) to get a unique identifier.
Below is a sample request to achieve this.
HTTP GET
https://{{apiEndpoint}}/v1.2/browser/create.json?client_key={{ClientKey}}&message=
Where:
- {{apiEndpoint}} will be the base url to your Personalize tenant, .e.g., api-engage-eu.sitecorecloud.io
- {{ClientKey}} will be your public Client key
Below is the response, which will contain the unique browser ref
{
    "status": "OK",
    "version": "1.2",
    "client_key": "<your public client key>",
    "ref": "the unique browser ref guid",
    "customer_ref": "the unique customer ref guid"
}
Personalize API postman
Dylan Young has shared unofficial API Swagger definitions on his Git Hub. I will recommend you have a look to get started on your integrations.
Next Steps
This completes this blog, where I have walked you through Sitecore Personalize APIs and some security considerations to go with them. I hope you find this useful, and feel free to leave me any comments or thoughts.
In my next blog, I will be looking at sharing more details on my Sitecore Personalize integrations with my mobile app project. Stay tuned.