

Introduction
In the previous blog post, I introduced you to self-referencing relations in Content Hub, plus possible use-cases for them. In this blog post, I will focus on how to create and populate self-referencing entities and display them within Content Hub.
Displaying linked assets on the Asset Details page
As discussed in the previous blog post, a typical use case for self-referencing relations is to link a set of assets to a parent or master asset.
Below is a mockup of the parent or master asset details page to illustrate this use-case.

This is a typical asset details page that you get out-of-the-box with your Content Hub instance. I have done one customization to this page, to allow me to display our Linked assets panel as highlighted above.
As you can notice:
- I am displaying panel heading ‘Linked assets’.
- I have ‘+ Add existing items’ CTA button. This is the button when clicked, allows me to search for existing assets that I would like to link to the current parent or master asset.
- I have a refresh button. This allows me to refresh the linked assets list without re-loading my entire page
- A have list of linked three (3) assets shown in a tabular form, including the asset meta data of ID, Title and Article Type To Asset
We will now look at how I have built this linked assets panel.
Modifying Asset Details page
To customize the existing Asset details page, we need to view the Page designer component. From the ‘Manage’ dashboard, select ‘Pages’ component, which will open the ‘Pages’ window.

Search for ‘Asset details’ page, as shown below. As you can see, I have added a new section to the existing page layout. This section has the ‘Linked assets’ panel.

- Linked assets – this is the panel component which contains the display components for linking the assets. Below is the settings popup for this panel.
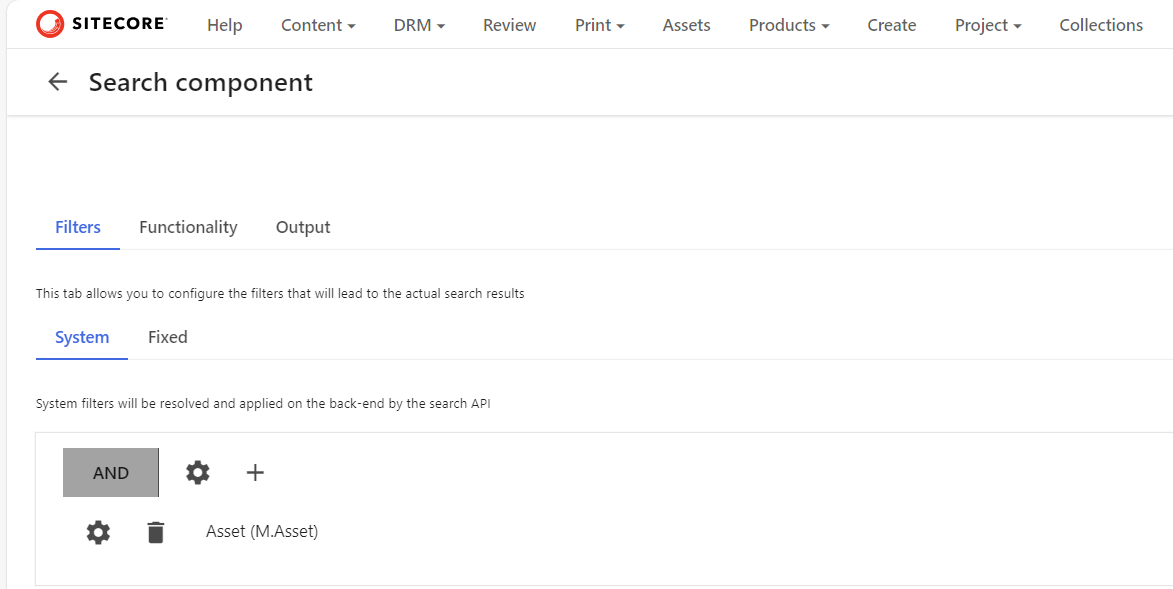
- SearchEligibleAssets – this is the Search component that I have configured to search and filter existing assets that will be linked to the parent or master asset. Below is the configuration settings for this search component.
- Notice we are searching and only linking existing assets that have not been deleted.
- The ‘SearchEligibleAssets’ component should be set to be ‘Nested’ component as we are using it from within our ‘Linked assets’ componet.
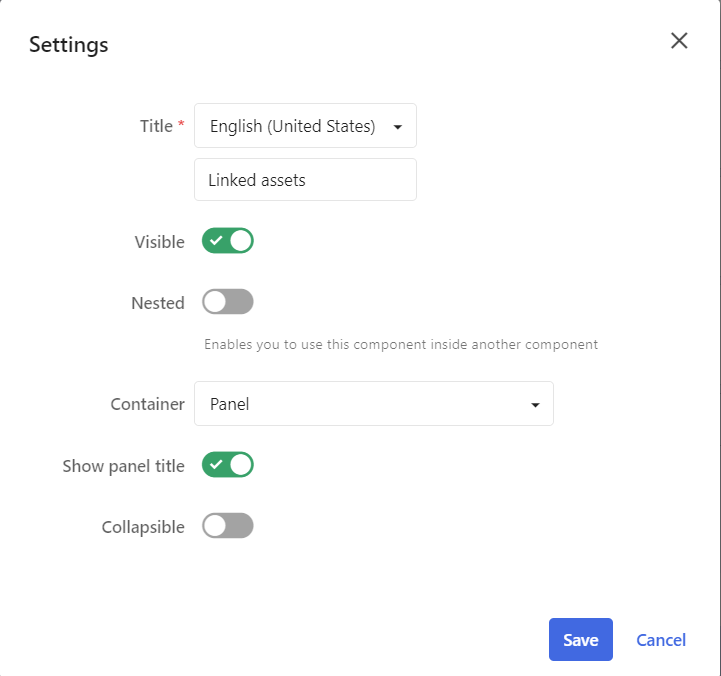

Linked assets panel component
Let us look at the components within our ‘Linked assets’ panel.
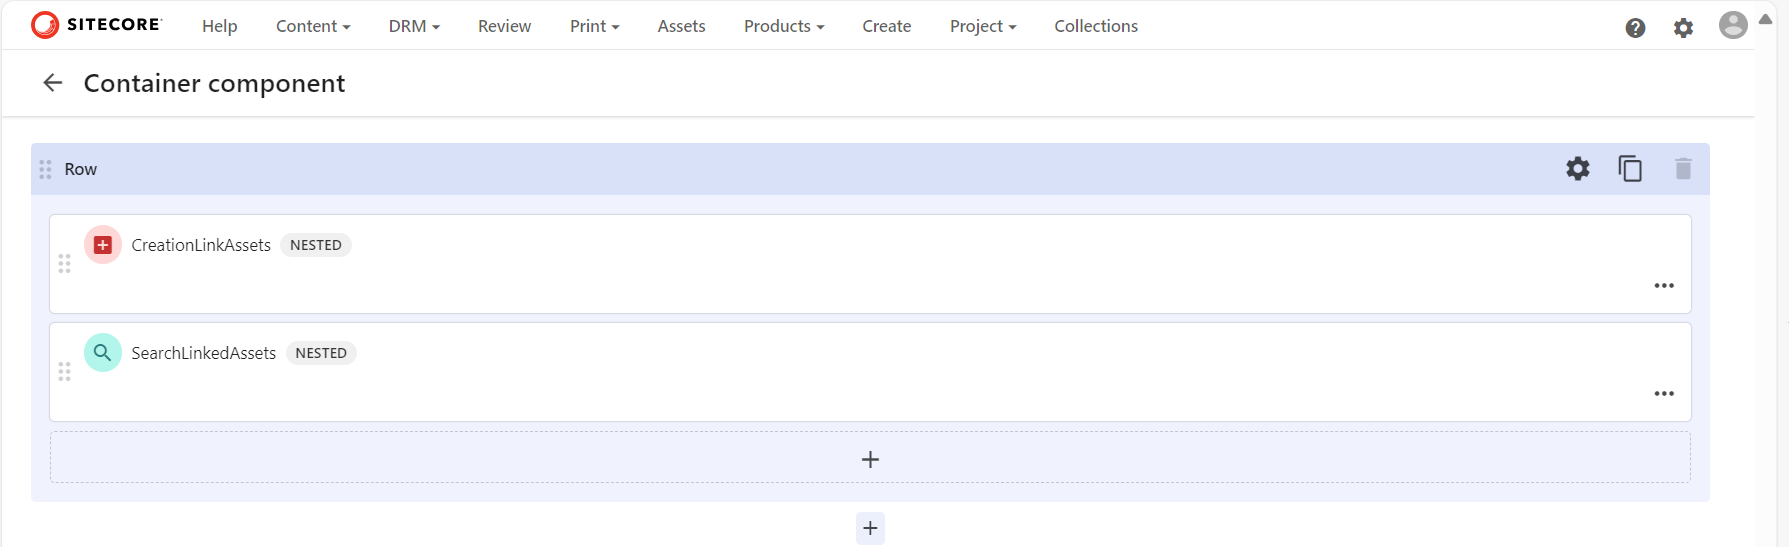
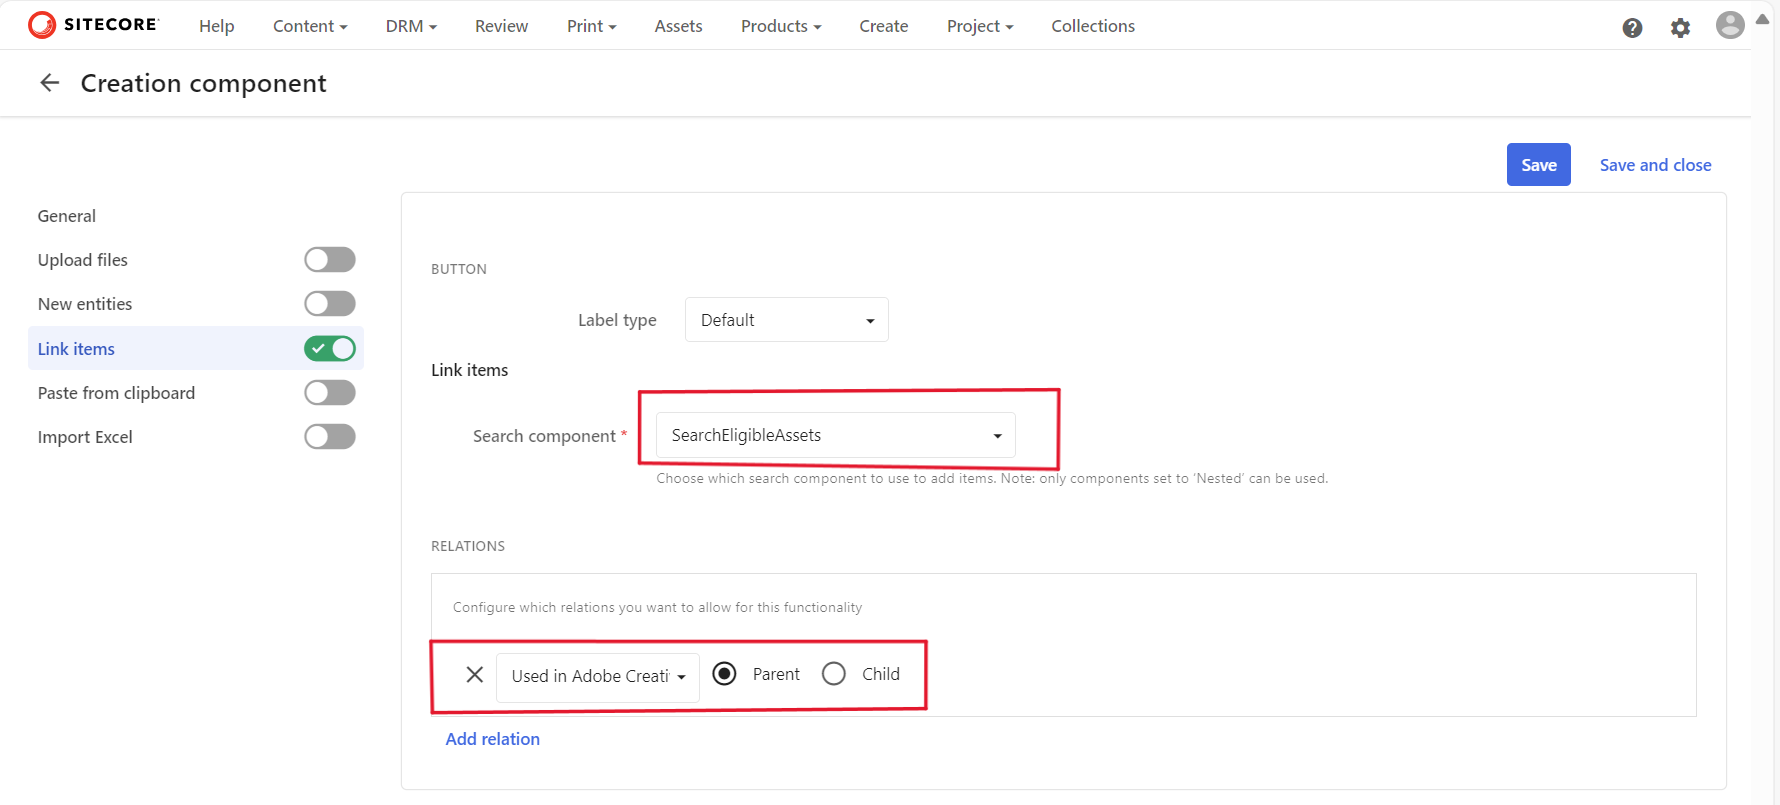
- CreationLinkAssets – this is our Creation component, that will create new links based on the selected assets to our parent or master asset. Below is screenshot showing how we using it to link assets to the parent or master asset.

-
- We need to link our ‘SeachEligibleAssets‘ Search component to the Creation component, as shown below
- The assets to be linked are using our ‘AssetToLinkedAsset‘ relation, setting the Parent as shown above.
- We need to link our ‘SeachEligibleAssets‘ Search component to the Creation component, as shown below
- SearchLinkedAssets – is is our Search component that will display all existing and already linked assets to our parent or master asset. Below is configuration to achieve this
- Ensure M.Asset is selected in ‘System’ filter
- Then within the ‘Fixed’ filter, filter out using our ‘AssetToLinkedAsset’ relation as shown below
- As specify we are displaying all assets which have the current asset (Page Entity) as their Parent using the self-referencing ‘AssetToLinkedAsset’ relation.
- Ensure M.Asset is selected in ‘System’ filter
- This is it. All done.


Next steps
In this blog post, we have done a deep-dive into how to create and populate self-referencing entities and link them up to create parent-child hierarchy and to display them within Content Hub.
Stay tuned and leave please us any feedback or comments.
