Content Hub tips & tricks: How to securely share your DAM assets with external users by leveraging collections – part 1

Background

One of the great values you get with your investments in Sitecore Content Hub platform is the collaboration capabilities with your external partners and users in your content supply chains. Siecore Content Hub provides out-of-the box the Asset Collections capability, which enables you to group your assets. Which seamlessly allows collaboration on that asset collection through comments, for example.

However, there is a catch.

When you create an asset collection and want a fine grained control on whether these assets should be downloadable, this doesn’t always seem to work as expected.

For example, you have a collection named “External” with only “Asset test 1” and “Asset test 2” included. And you need these two assets to be downloadable. However, when this collection is shared, there are scenarios when other additional assets will seem to appear within External collection, instead of just “Asset test 1” and “Asset test 2” as expected.

In this blog post, I will be sharing some top tips and tricks on how you can be in control of this process, ensuring you only share assets that need to be shared, securely.

How do I create an asset collection

The existing official docs provide step-by-step guidance on how to create asset collections. I will repeat the main steps below, for the sake of to keeping the flow in this blog post.

To create an asset collection:

  1. On the menu bar, click Collections.
  2. In the top-right corner of the Collections page, click + Collection.
  3. In the Collection dialog, populate the details of the collection you are creating
  4. Click Save.

How do I add assets to my asset collection

Again, the existing official docs provide robust step-by-step guide on how to add asset to a collection. Please note that it is best practice to add existing assets to your collection – which are at the correct stage of your content lifecycle. Avoid uploading new assets directly at this stage.

How do I share my asset collection

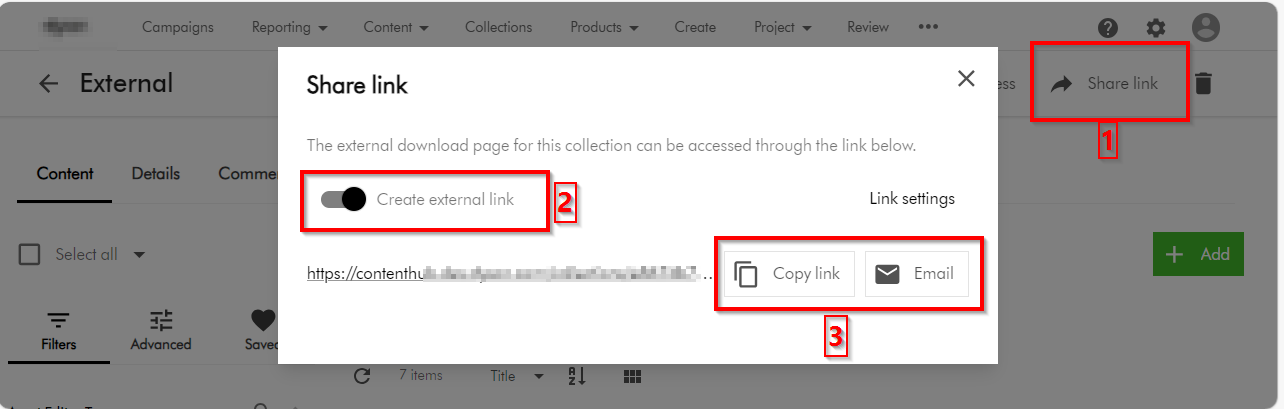
You can share the collection by following the following three main steps:

  1. On the collection details page, click Share link share link icon.
  2. In the Share link dialog, turn on the Create external link switch. This will then generate for you a link
  3. To share the link via email, use the Click Email email icon button, which should prompt for emailing details. You can alternatively use the Copy link button to copy the URL and share it as well
Tips and tricks on securing you asset collections

Now that we have covered the basics on how to create an asset collection and share it, I will focus on top tips and tricks of ensuring we are sharing the collection using best practices and for the correct external collaborators.

Top tip 1 – Leverage user groups to manage external collaborators

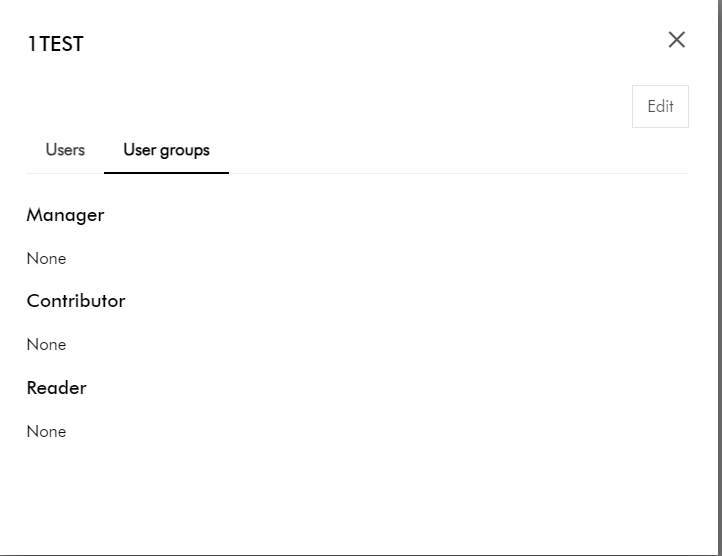
User groups underpins the permissions model within Content Hub. Members of a user group are granted permissions and privileges according to the user group policies assigned to that group. By managing permissions and privileges using groups, you can streamline how they are assigned.

  • Read-only external collaborators – Define a separate user group for your external collaborators who need a read-only access. These are not expected to make any contributions, but may be to give them a status update of your assets.
  • Contributor external collaborators – Define a separate user group for your external collaborators who you would like to give you comments and feedback on shared assets.
  • Download external collaborators – Define a separate user group for your external collaborators who you would like download your shared assets. The use case is when you would like them them to use download the shared assets for allowed activities such are offline brands channels.
  • Add external collaborators to a user group – Always add external collaborators as users in your Content Hub instance, then assign them one of the above user groupings. Sitecore Content Hub allows users belonging to an external domains to be added using Users Manager (and they can sign in with their username and passwords) Depending on your security policies and governance, it is possible to also leverage Single sign on with External domains. If you need guidance, reach out to your Security and Identity team or Sitecore Technical support.

Top tip 2 – Leverage user group policies to lock down UX and pages

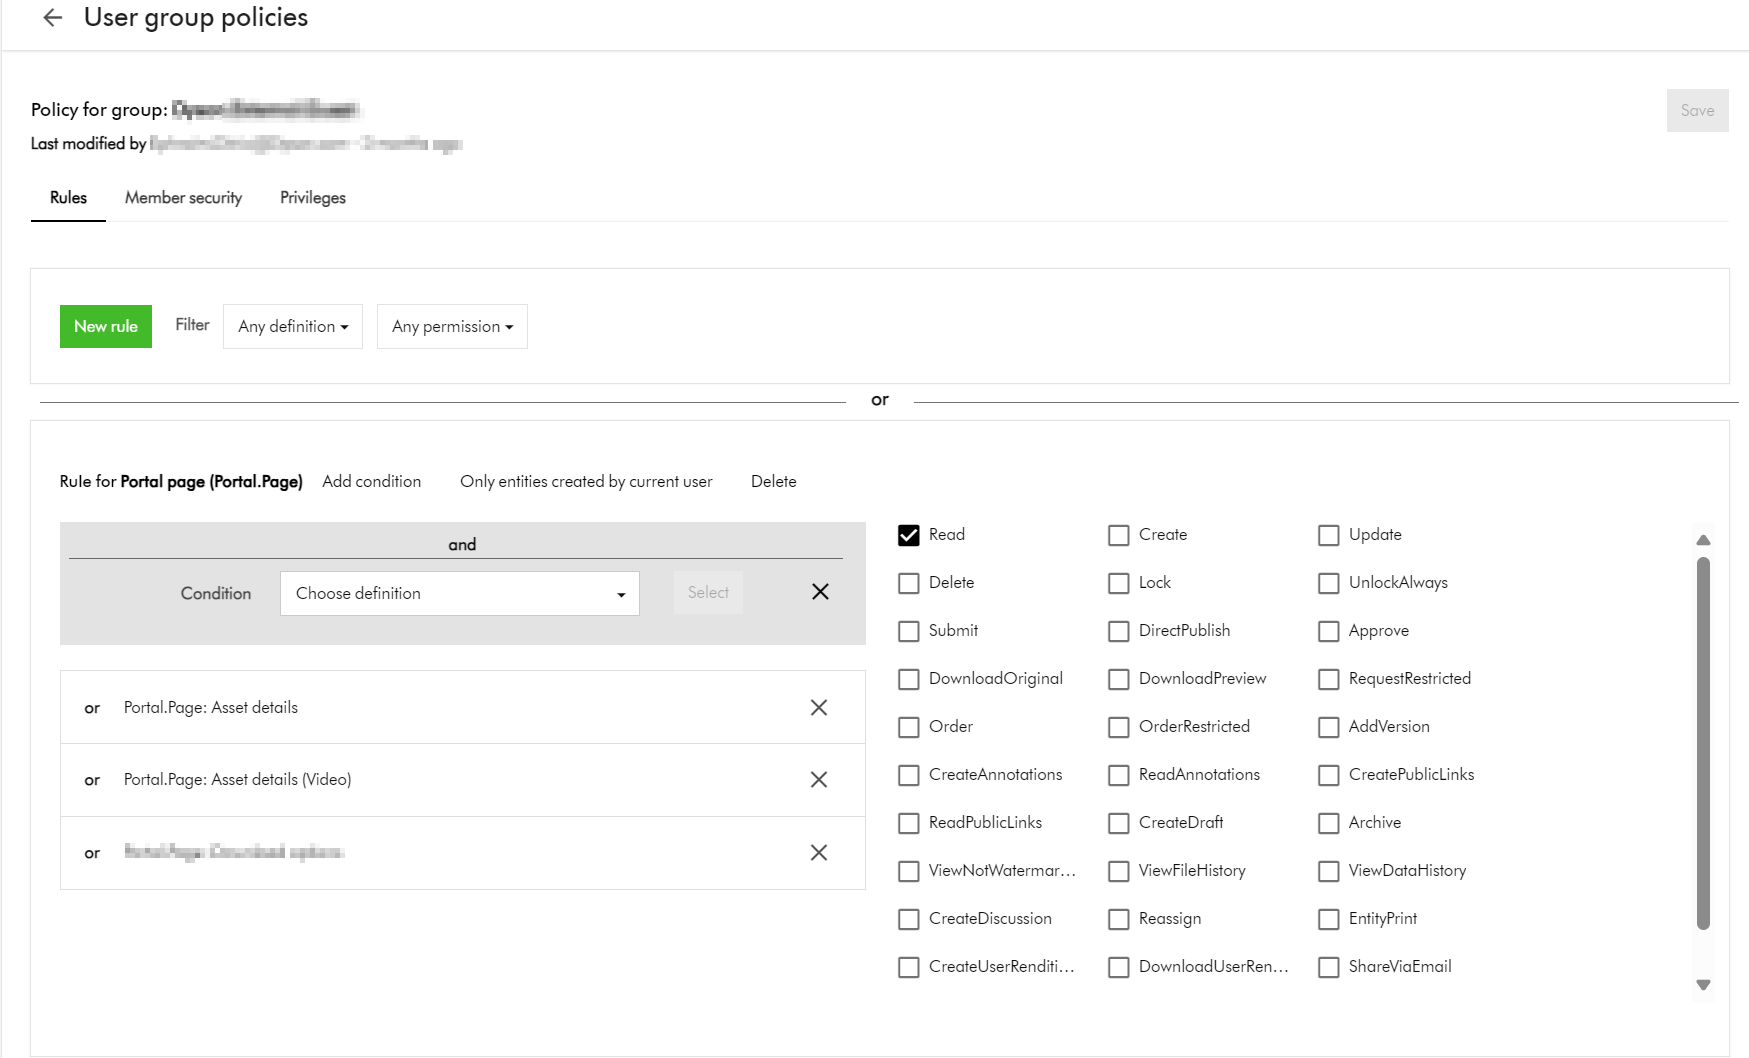
You need to make a decision which pages your external collaborators can view. For example, should they access your Asset details page, which will potentially give them access to additional meta data?

If you have followed Top tip 1 above, all you need to do is define user group policies for each relevant user groups.

Below is an example of how you can give access to allow viewing Asset details page(s) such as Asset details or Video asset details page as shown below.

Top tip 3 – Additional policies – downloadable assets based on a taxonomy value

You recall the scenario I described at the start of the blog. You have a collection named “External” with only “Asset test 1” and “Asset test 2” included. How will you go about ensuring only these two assets are downloadable?

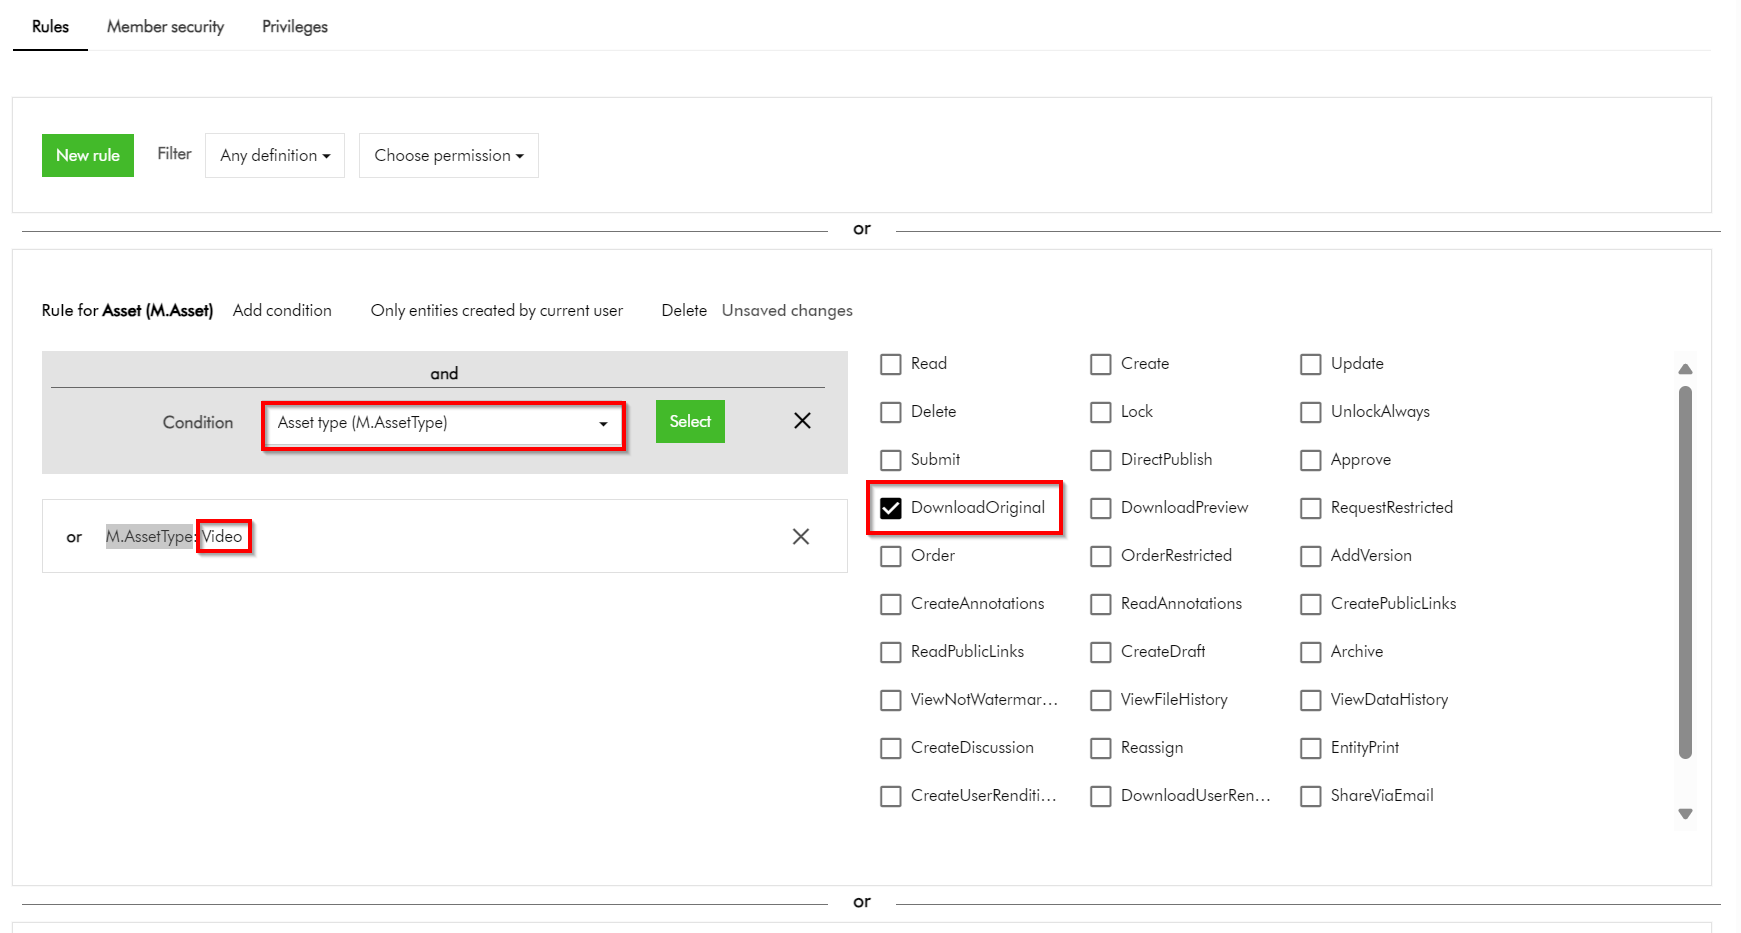
  1. Define taxonomy, use this to tag and identify external assets:
    • This option requires you to define some form of Taxonomy, say, ExternalAsset which entities Yes or No. For all externally shareable assets, you will need to tag them with value of Yes. You can then leverage this Taxonomy within your User Group policies definitions to narrow down which assets can be downloadable. As an example, this policy below shows how I can narrow which asset is downloadable based on M.AssetType value of Video
  2. This clearly works. However, with this option you will need to ensure all assets are tagged accordingly before sharing them externally. This could add more work to your content workflows.

Top tip 4 – Additional policies – downloadable assets based on current asset collection

You could be asking, why can’t I apply the additional policy for downloadable assets based on the current asset collection? Good question.

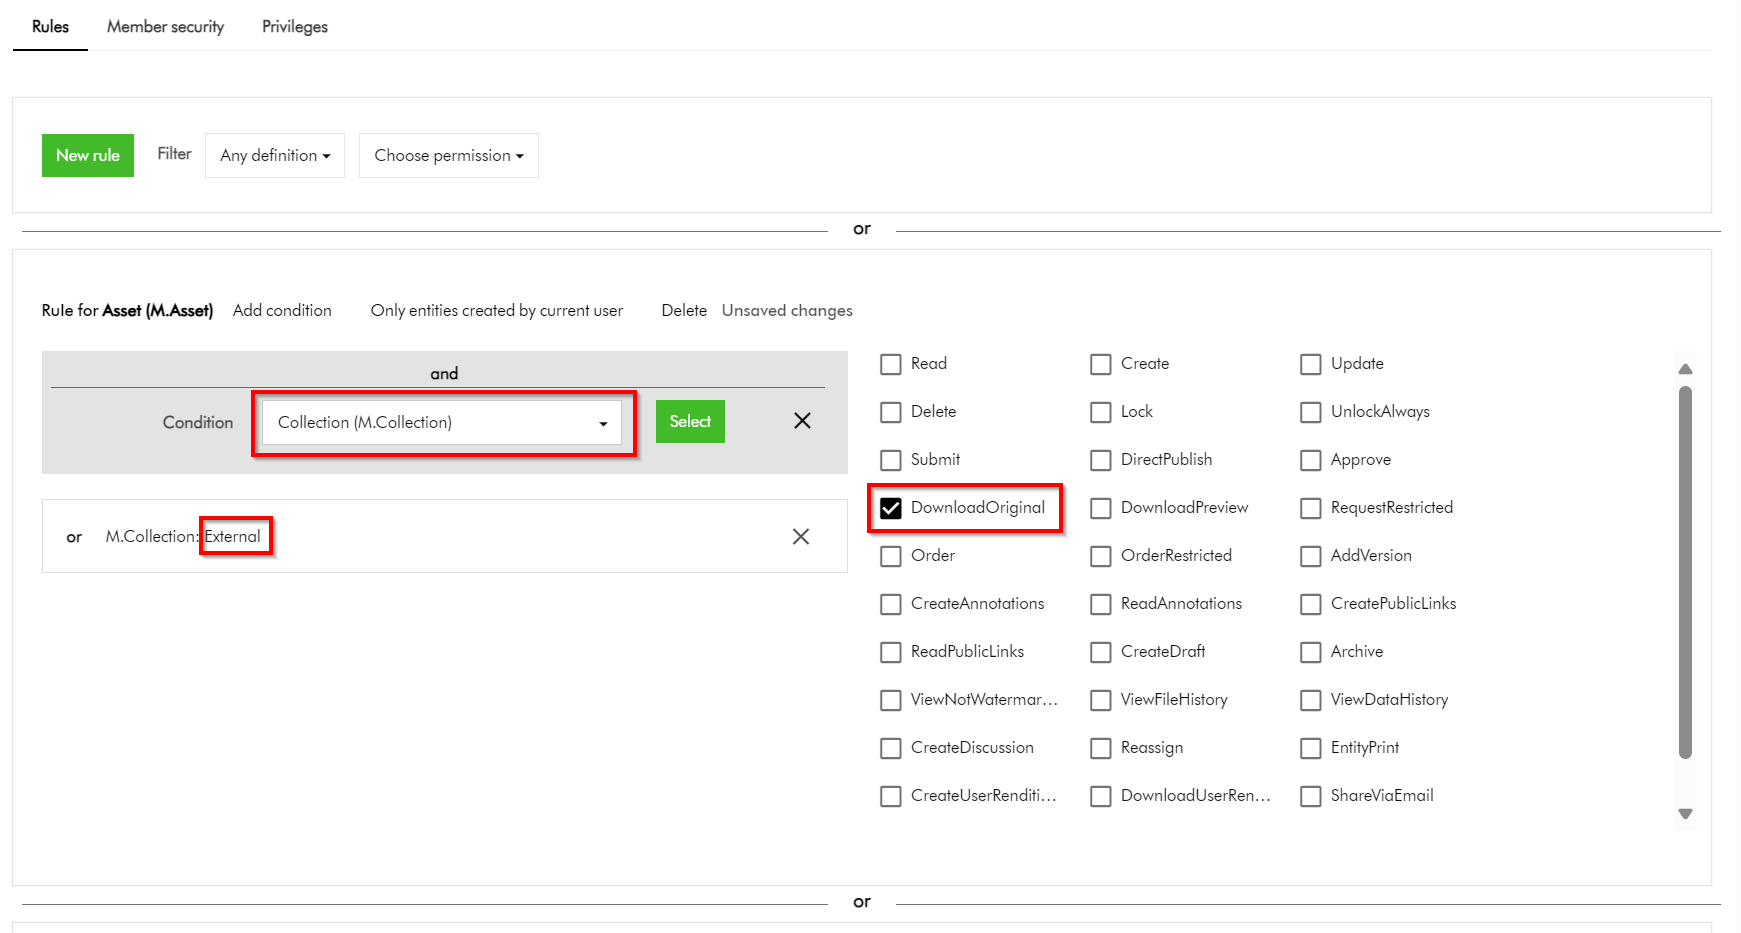
If you try this approach, your User group policy will look like this instead.

This is perfectly fine. You could have thought this will work, right?

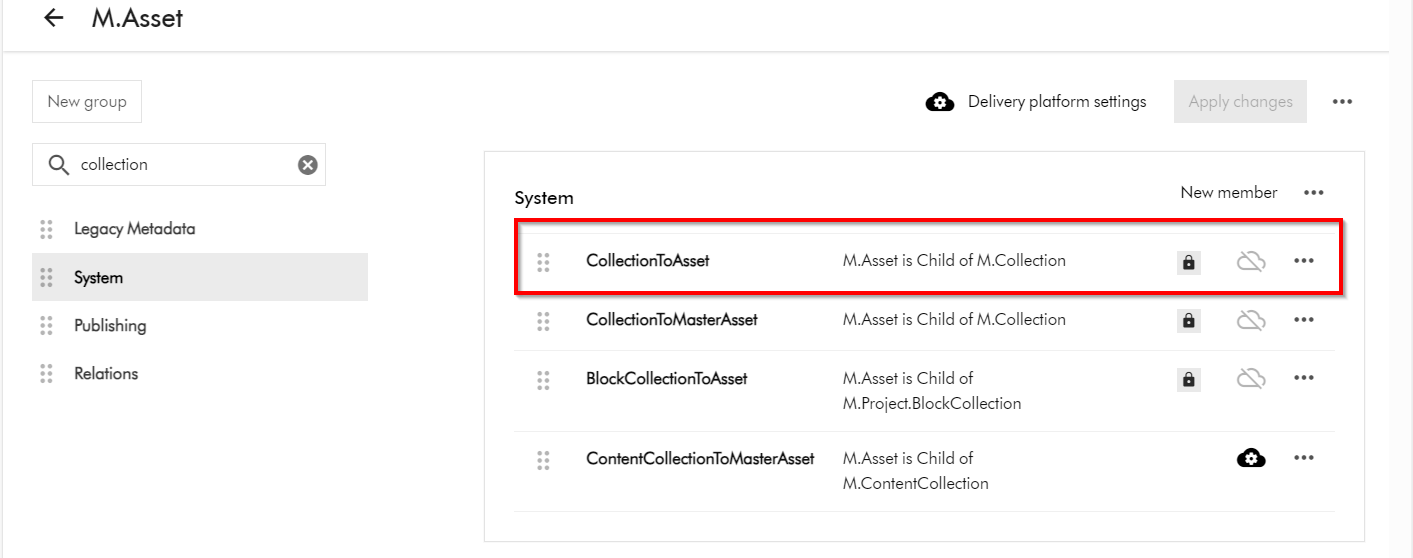
This option does not work. It seems you can not define a policy on M.Asset (model for your assets) based on M.Collection (model for your asset collections) by default.

While grappling with this issue, I reached out to Sitecore Technical support for guidance. Good news is we have a technical solution for this specific problem. Stay tuned on my next blog post when I will cover how you can make a group policy definition policy on M.Asset based on M.Collection such as in the screenshot above work.

Next steps

In this blog post, we have looked at Content Hub asset collections a great feature for collaboration capabilities with your external users during your digital assets lifecycle. We have looked at some of the top tips you can leverage to secure your collections when sharing them with your external collaborators. I hope you find this useful for your similar use cases.

On the follow up blog post, I will look into details how to resolve the specific problem identified above. Please give us any feedback or comments.

Content Hub DevOps: Managing your action script code lifecycle in CI/CD pipelines

Context and background

When working with automated CI/CD pipelines with you Sitecore Content Hub, you need to be aware of the development lifecycle for your Action Scripts. This is to ensure your source code repo for your scripts doesn’t get ‘bloated with orphaned‘ script code files. In this blog post, I will cover how to manage the development lifecycle of your Action Scripts to mitigate against this problem.

What happens when you serialize action scripts into source control

I have previously blogged on Content Hub DevOps, especially on leveraging Content Hub CLI to extract a baseline of your Content Hub components. For example ch-cli system export --type Scripts --wait --order-id command allows you to export Actions, Scripts and Triggers package. When you unzip or extract the files within this package, you will notice there is a scripts folder. This will have two types of files: .json files and .csx files (assuming your actions scripts are written in C#.NET)

Script .json file type

For each action script packaged from your Sitecore Content Hub instance, it will have two files. One of them is the script .json file.
Below is a sample action script json file:

This file contains all the relevant meta-data about the action script. In particular, you will notice that it is referencing a second file using the ScriptToActiveScriptContent relations property. Using our sample above, this json file is referencing this code file “ZOGG4GbbQpyGlTYM7r1GfA

Script .csx code file

The code file based on C#.NET, is similar to the sample shown below.

What happens when you modify the code in your scripts

Each time you make changes to your Action Script source code and successfully build it, Content Hub will generate a new code file version behind the scenes. This will be automatically linked to its corresponding script .json file.

To visualise this, you will notice that when you serialise your Action Script again from your Content Hub instance, a new code file will be generated.

If you now compare the previous code file with the new one, it will become obvious which changes Content Hub has made to the .json file. Below is a sample comparison.

What should you do with the ‘old’ code file

We have now established what is going on whenever the source code in your action script is changed and successfully rebuilt. Each time, a new file will be generated. The old file will remain in your source code repository, unused and effectively ‘orphaned’.

My recommendation is to design your DevOps process that will always clean-up or delete all files from your scripts folder in your source code, before pulling the latest serialised files from your Content Hub instance.

You can do this in an automated way leveraging the Content Hub CLI commands. Alternatively, you can do it old school way leveraging PowerShell commands to delete all files from scripts folder before serializing new ones again. Whichever mechanism you leverage, ensure old and used code files do not bloat your source code repo.

Next steps

In this blog post, I have discussed what happens when you make code changes to your action scripts. I explained why you will have ‘old’ or ‘orphaned’ code files within your script folder that will bloat your source code repo. I also covered steps you can take to mitigate this problem.

I hope my approach helps you address similar scenarios in your use-cases. Please let me know if you have any comments above and would like me to provide further or additional details.

Streamlining Content Hub DevOps: Deploying Environment Variables and API Settings to QA and PROD

Context and background

I recently worked on an exciting Content Hub project which required automation of deployments from DEV environments to QA/TEST and PROD. One of the challenges I faced was how to handle environment specific variables and settings. One particular use case is the API call Action type, which has references to some API call endpoint and using an Api Key. Typically, such an API call will point to a non-production endpoint in your QA/TEST Content Hub and a production facing endpoint for the PROD Content Hub

Sounds familiar, should be easy right?

I thought so. I thought I put this question to my favourite search engine to see what is out there. The truth is Content Hub DevOps is nothing new really. There is plenty of documentation on how to go about it, including this blog post from the community From the Sitecore official docs, you can also find details about how to leverage Content Hub CLI to enable your DevOps workflows.

However, I couldn’t come across an end-to-end guide that solves my current problem. Nicky’s blog post “How to: Environment Variables in Content Hub Deployments” was pretty good actually and I have to say I found the approach quite compelling and detailed. However, I didn’t adopt Nicky’s approach as I would like to use automated end-to-end DevOps pipelines. Unfortunately, Nicky’s approach doesn’t.

My approach

Below is a high level process I have used.

  • Leveraging Content Hub CLI to extract a baseline of your Content Hub components. For example ch-cli system export --type Scripts --wait --order-id command allows you to export Actions, Scripts and Triggers package, which you can extract all yours Actions, Scripts and Triggers as JSON files. These can then be source controlled, allowing you to track future updates on a file-by-file basis. For a full list of components that you can export, you can pass --help param as shown below.
  • Without DevOps, you will typically package and deploy your Actions, Scripts and Triggers, say from DEV Content Hub into QA Content Hub instance. You will then have to manually update any of your API call Actions with the QA specific endpoint URL.
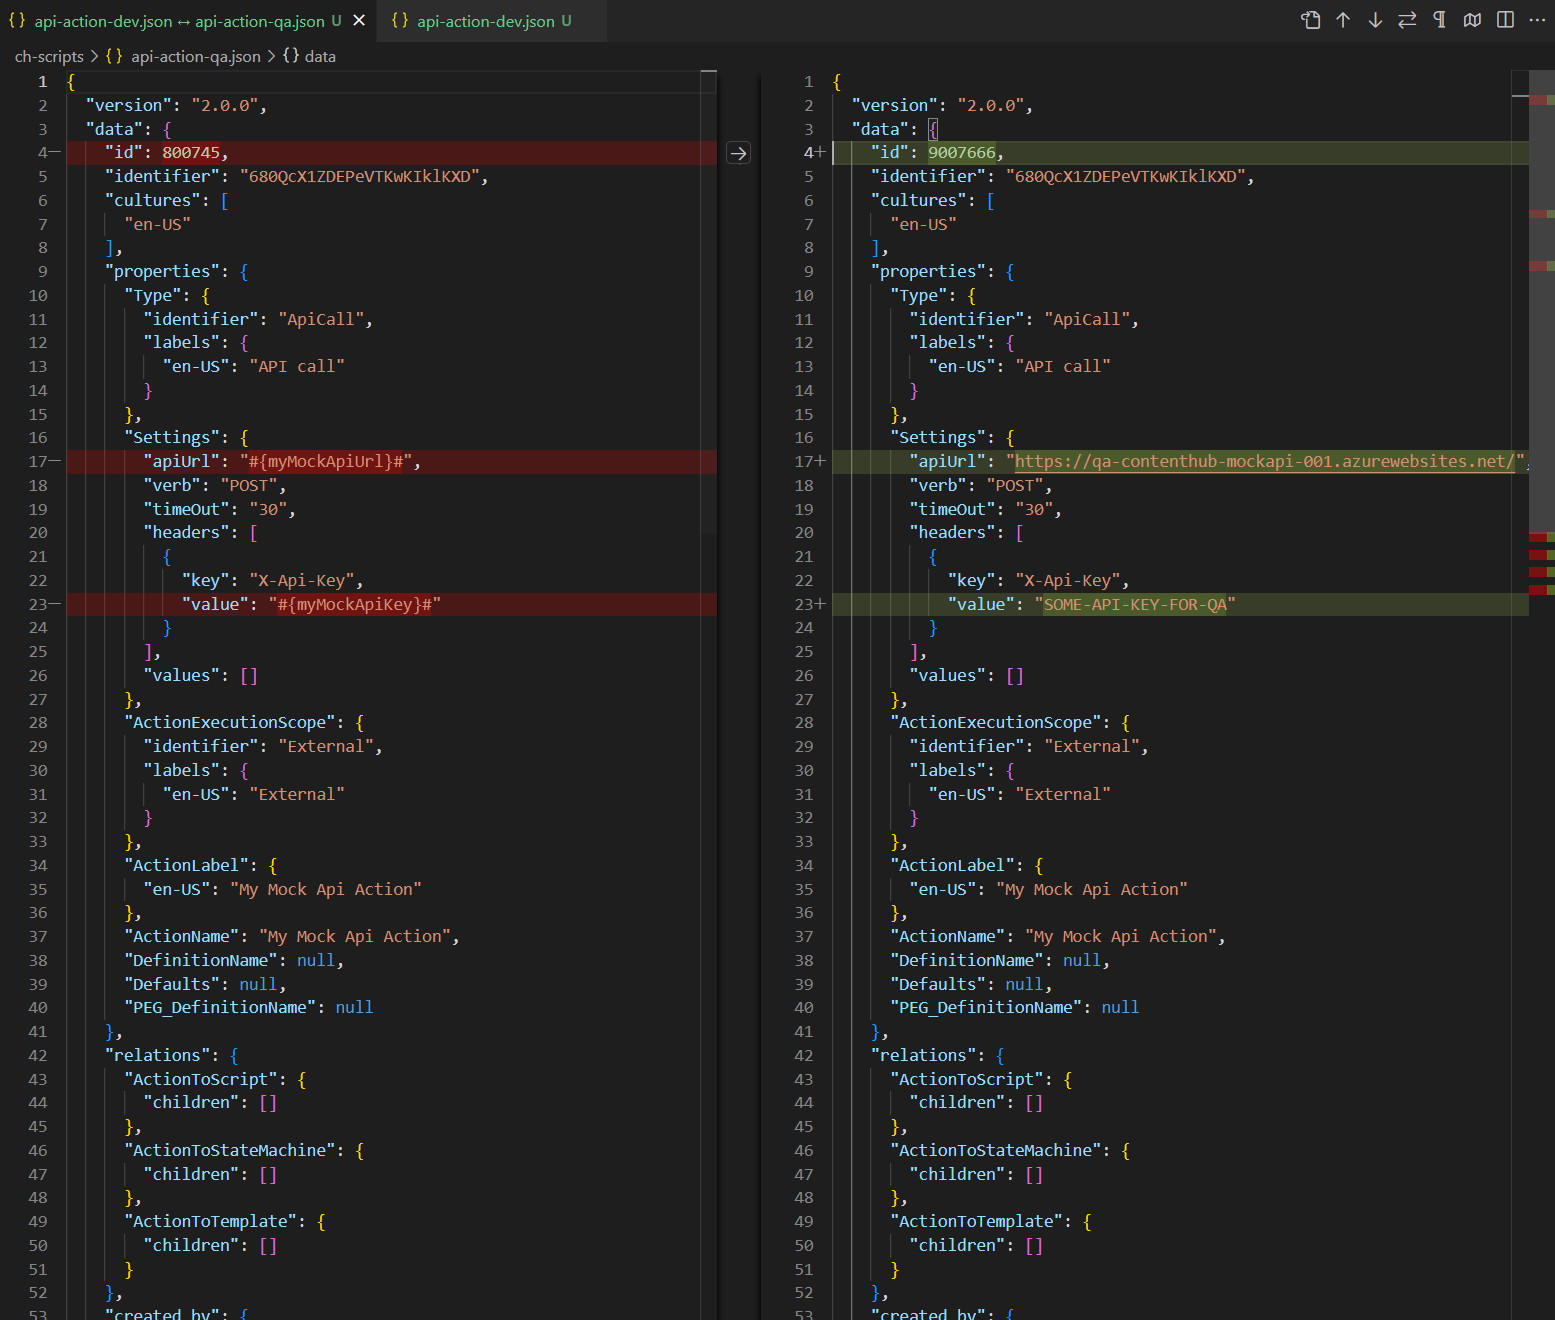
  • With Content Hub CLI, I am able to source control and compare my Content Hub DEV and QA files as shown below. Left-hand side is my DEV mock API action, right-hand side is my QA. Please keep note the identifier is the same (680QcX1ZDEPeVTKwKIklKXD) to ensure the same file can be deployed across to Content Hub QA and PROD
  • This is quite powerful, since I can take this to another level and define Environment specific variables for my mock API action, as shown below. I have identified I will need #{myMockApiUrl}# and {myMockApiKey} variables.
    • Notice I am leveraging the ReplaceTokens Azure pipelines task. Left-hand side is my DEV mock API action, this time I have parameterised the variables. Right-hand side is my QA to help illustrate the differences. During the QA deployment, my CI/CD pipelines will transform the source controlled file on the left-hand side into QA file on the right.
  • This is it, I have solved my problem. I have identified which component(s) have environment specific variables and parameters. I can now leverage DevOps CI/CD pipelines to package all my components, generate a deploy package specific for Content Hub QA environment.
  • Deploying a package using Content Hub CLI uses this command: ch-cli system import --source "path to your deploy package.zip" --job-id --wait
  • Wearing my DevOps hat, I am able to write a complete end-to-end CI/CD pipelines to automate the deployments.

Using Azure DevOps CI/CD pipelines

It is very straight forward to define and implement an end-to-end Azure DevOps CI/CD pipelines once we have defined our process and development workflows.

Azure variables template definition

One capability you can leverage is the Azure variables template definitions to allow you to define Content Hub QA and PROD variables, such as below. Please notice #{myMockApiUrl}# and {myMockApiKey} variables in this template file. They now have Content Hub QA specific values. We will need a similar file to hold Content Hub PROD variables.

Referencing Azure variables template file in main pipeline

The Azure variable template file for QA (qa-variable-template.yml, in my case) can then be linked to the main Azure CI/CD pipeline yaml file, such as shown below:

Replacing tokens in main pipelines

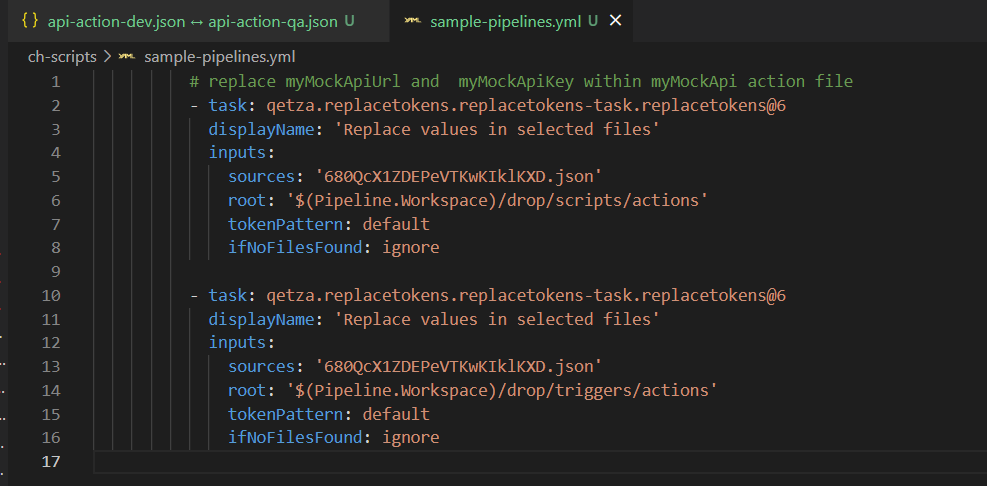
Replacing tokens sample is shown below. Please notice the API call Action Identifier 680QcX1ZDEPeVTKwKIklKXD that was referenced in my previous screenshots above

Next steps

In this blog post, I have introduced the problem and use-case when you need to manage and deploy Content Hub environment specific variables. I have used an API call Action type to illustrate this use case. I have also covered how to leverage Content Hub CLI to serialise Content Hub components and demonstrated an example of using Actions, Scripts and Triggers components. I finished with my own approach and how I did an implementation of an end-to-end automated DevOps process. I hope my approach helps you address similar scenarios in your use-cases. Please let me know if you have any comments above and would like me to provide further or additional details.

Content Hub tips & tricks – Selection component shows wrong name in linked Search component

Problem and context

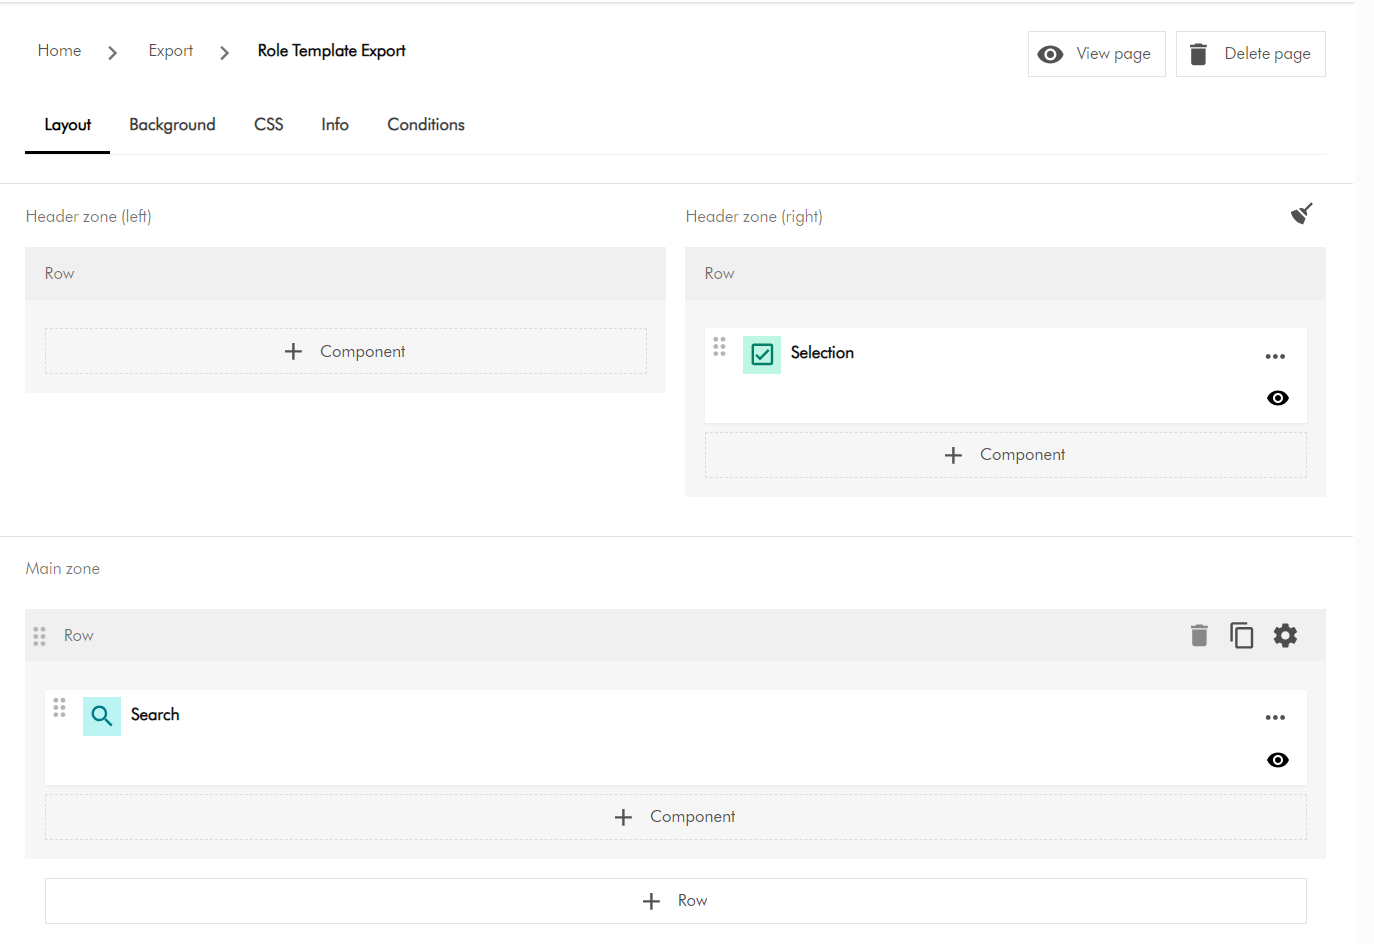
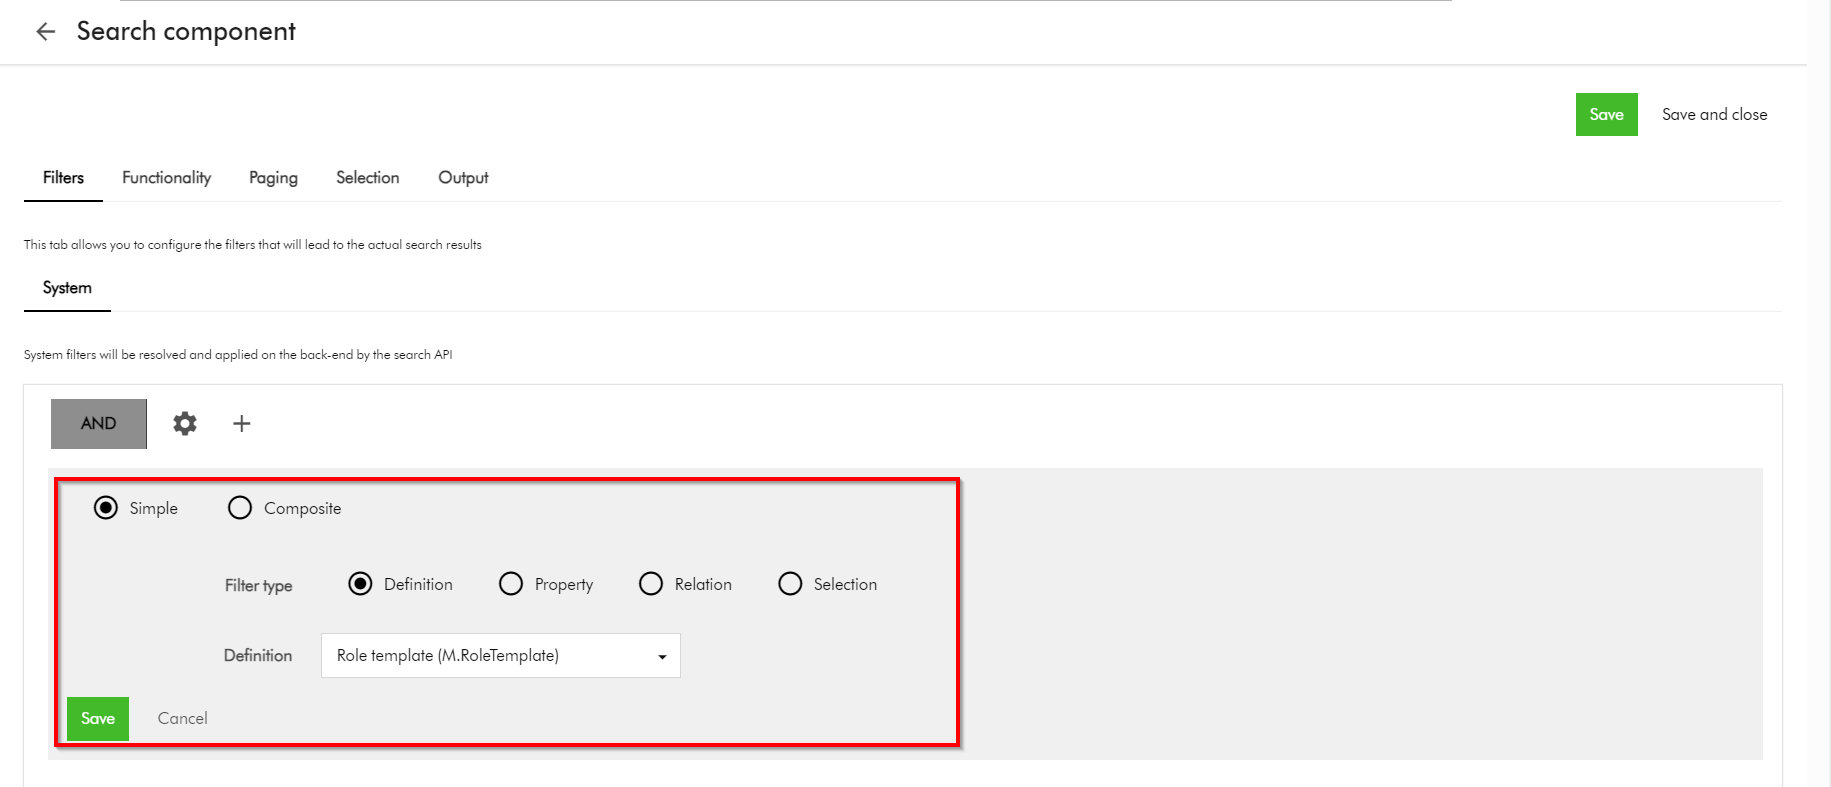
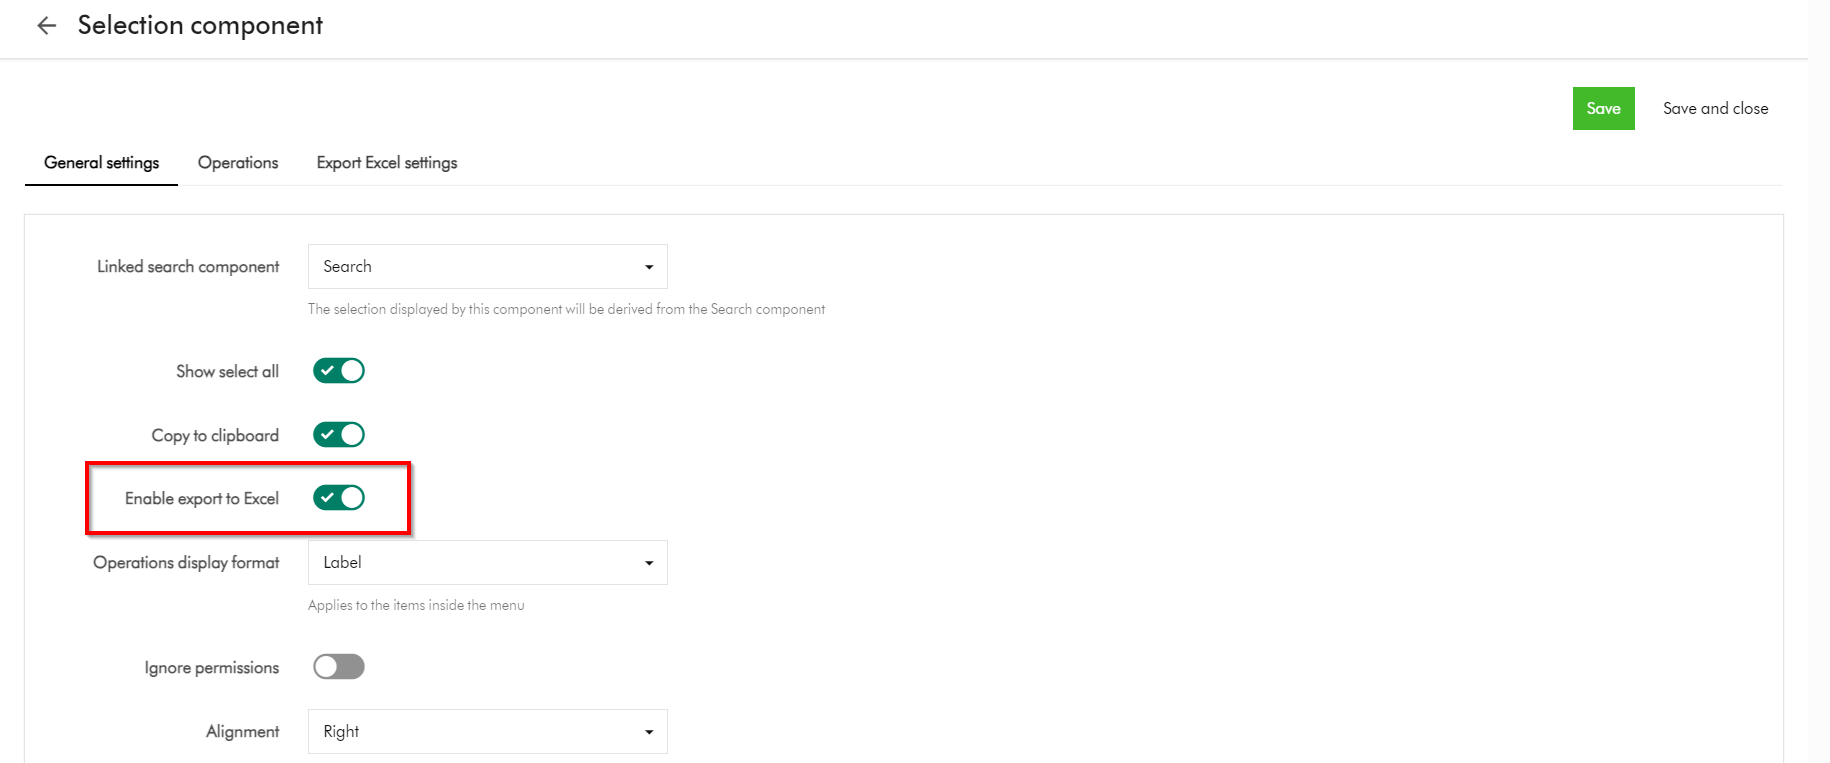
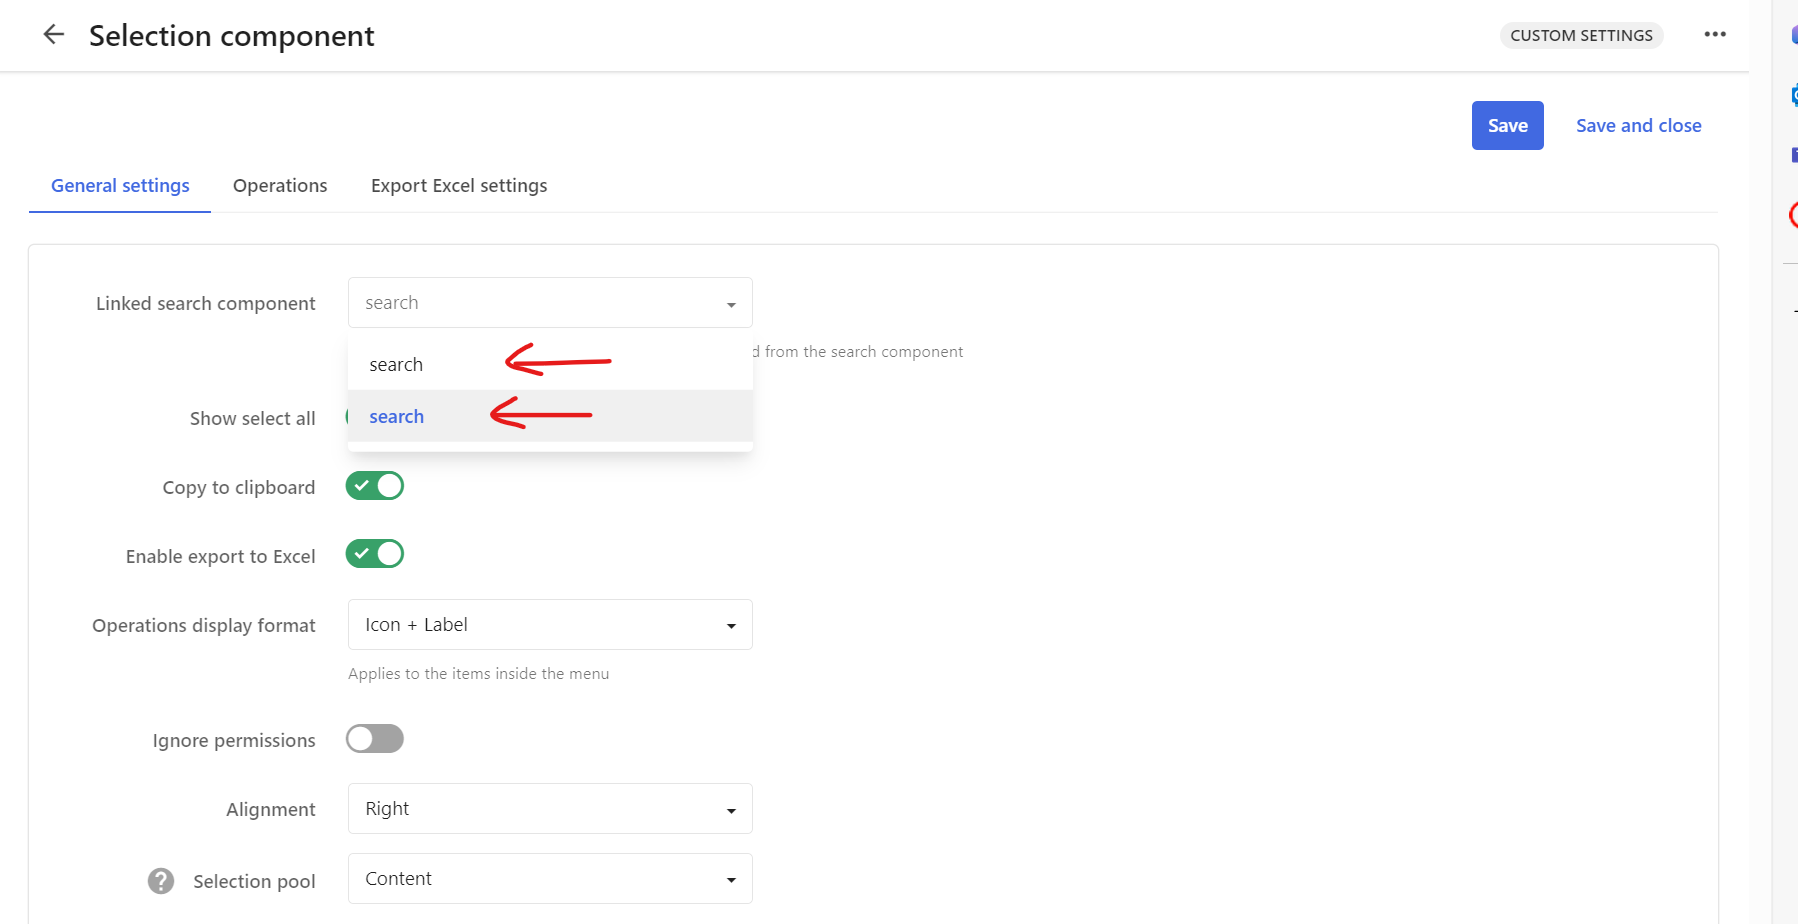
Consider the scenario as per the screenshot above. You are configuring a second Search component on your Assets search page. You make a genuine mistake and name your second Search component identical with your existing one, as shown. In this case, you would like to link your second Search component with your existing Selection component as shown.

Selection component shows ‘duplicates’

I know that I have made a genuine mistake of using the same ‘search‘ name for my second Search component. My selection component will display the following.

This is obviously confusing and we don’t know which is which. Now I will try rectify my mistake, and rename my second Search component.

Renaming Search component

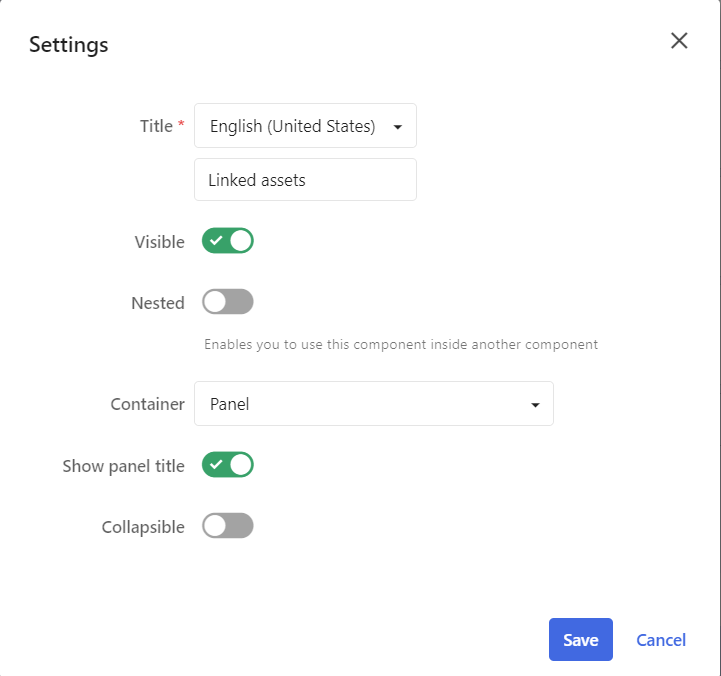
Do rename my second Search component, I click on the Settings button shown below

Which opens the Settings pop up, from where I will specify a new Title as shown below and Save it.

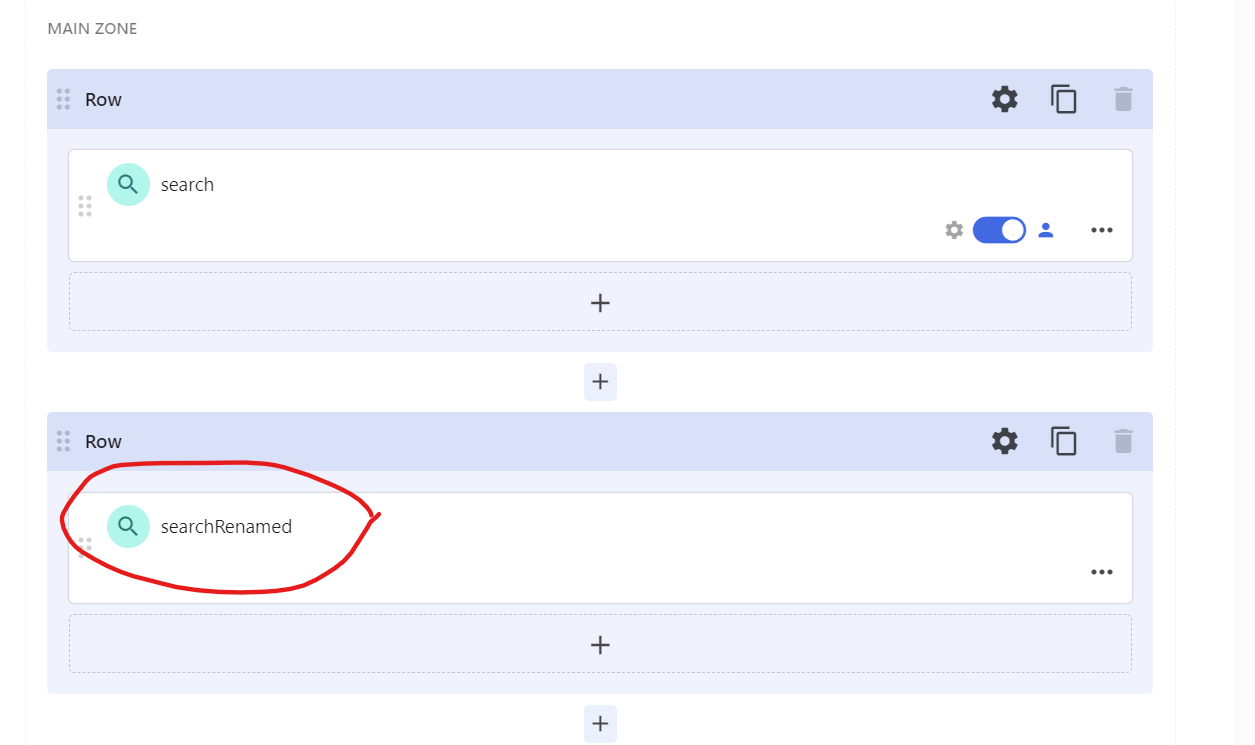
Below is the outcome showing my second Search component renamed.

Selection component still shows ‘previous’ name

After this change, I was expecting my Selection component to show ‘searchRenamed’. However, I still have the same problem as shown below.

Sitecore Technical support have logged a product bug

I reached out to Sitecore Technical support and shared my use case above. Below is the response I received.

Hi Julius,

Based on the provided information we would like to define the scope of the current case:

Issue definition: in the drop down list the PageComponent.Name property is used instead of PageComponent.Title in the Linked search component (in the Selection component).
Investigation target: we will work diligently to help find the root cause and a resolution to the defined issue.

Additional notes:

[Redacted]

The issue reported has been registered as an issue in the Content Hub product.

The reference of the bug report is the following: MONE-44866, which can be further reviewed and followed-up via the support portal in the “My Product Issue” page

Update:

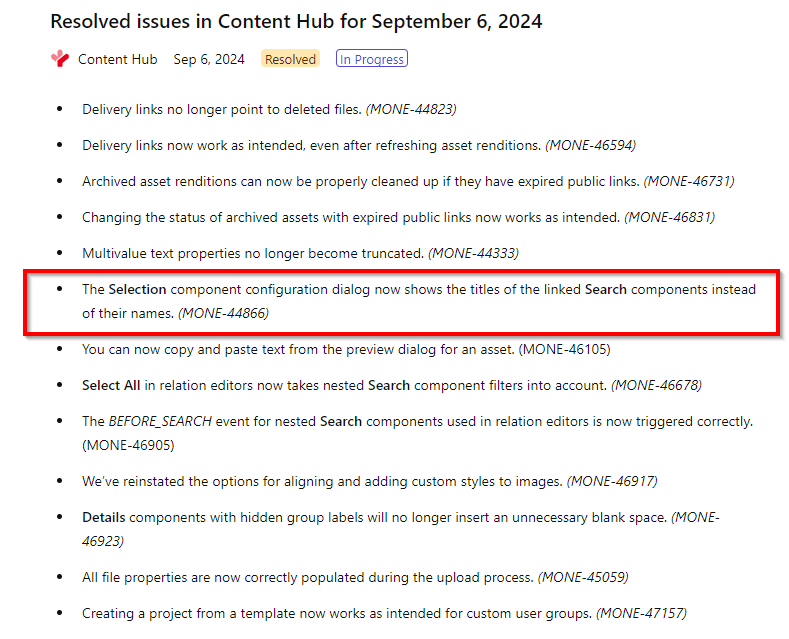
Glad to report that Content Hub product team have resolved this issue in September 6, 2024 release

Tips and tricks

Currently, the Selection component’s Linked search component drop down list uses the PageComponent.Name instead of PageComponent.Title. While Sitecore have acknowledged this as product bug, you can easily work around this issue.

  1. If you are going to create more than one Search Component, ensure you name the appropriately with distinct and easily identifiable titles. This is because the title will be used as the component name in the backend, which will ultimately be displayed on the list when linked to Selection component.
  2. If you initially assign your second Search Component the same name as the first one, then renaming the second component will NOT resolve the issue as I have explained in this blog post. Either delete the second Search component and create a new one with a unique Title.
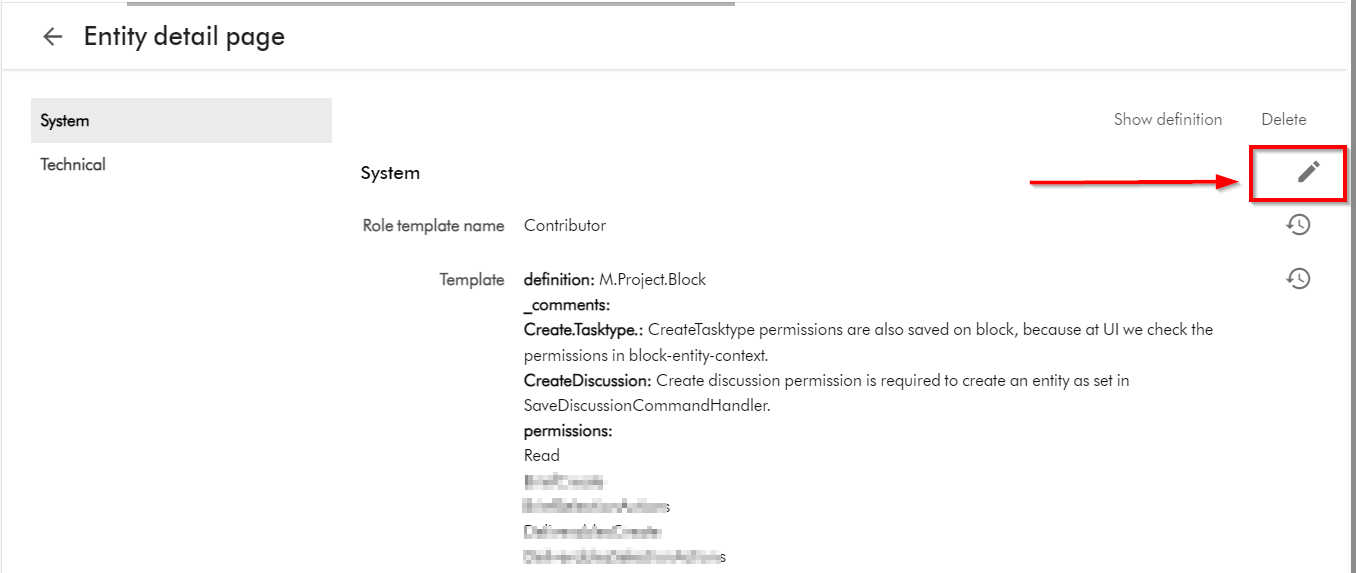
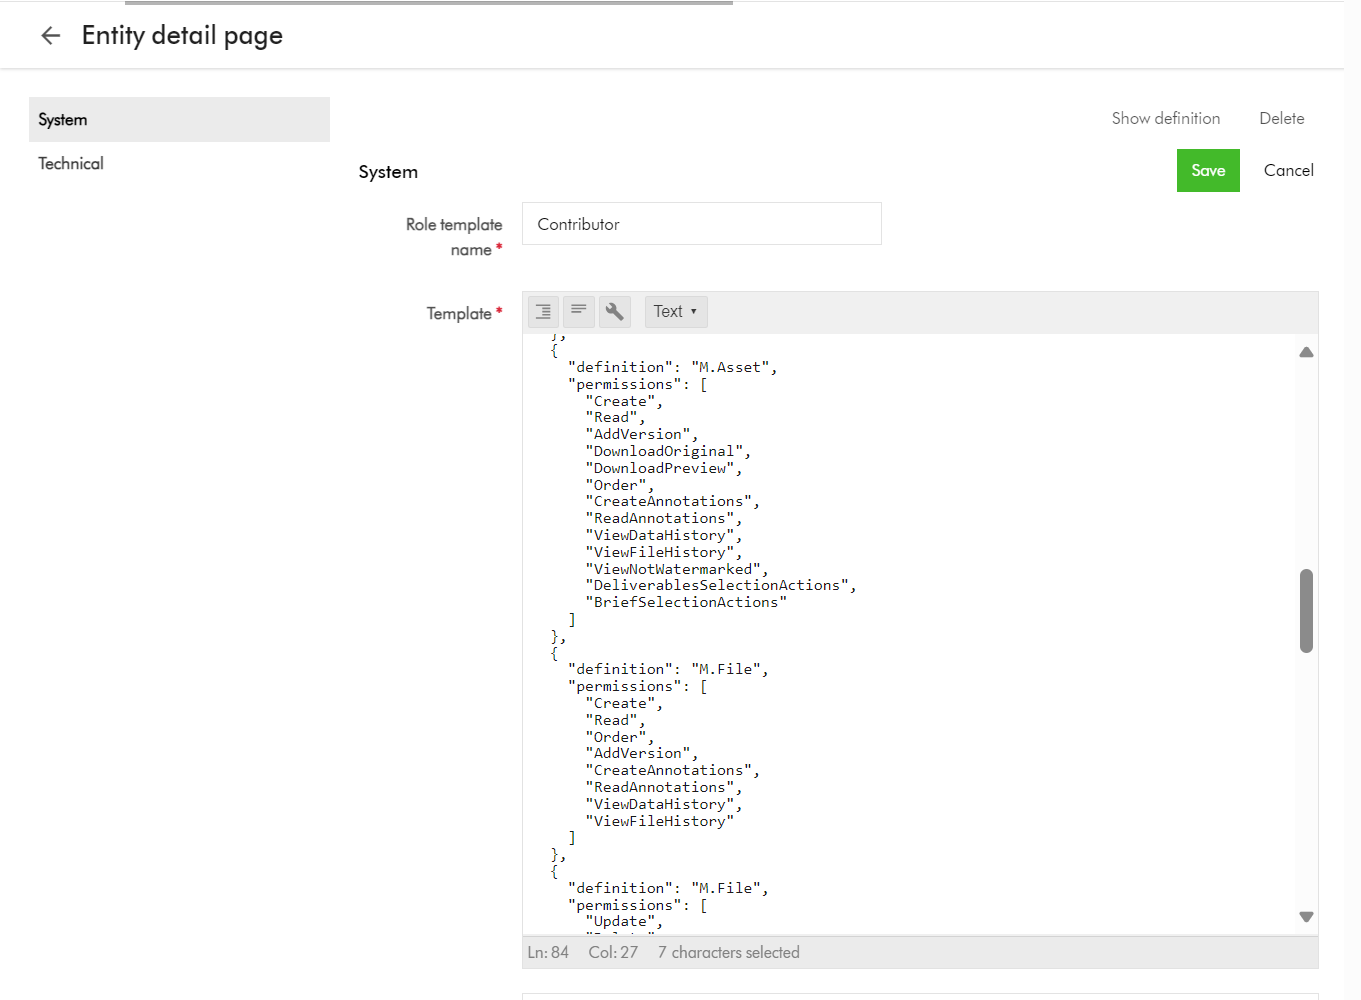
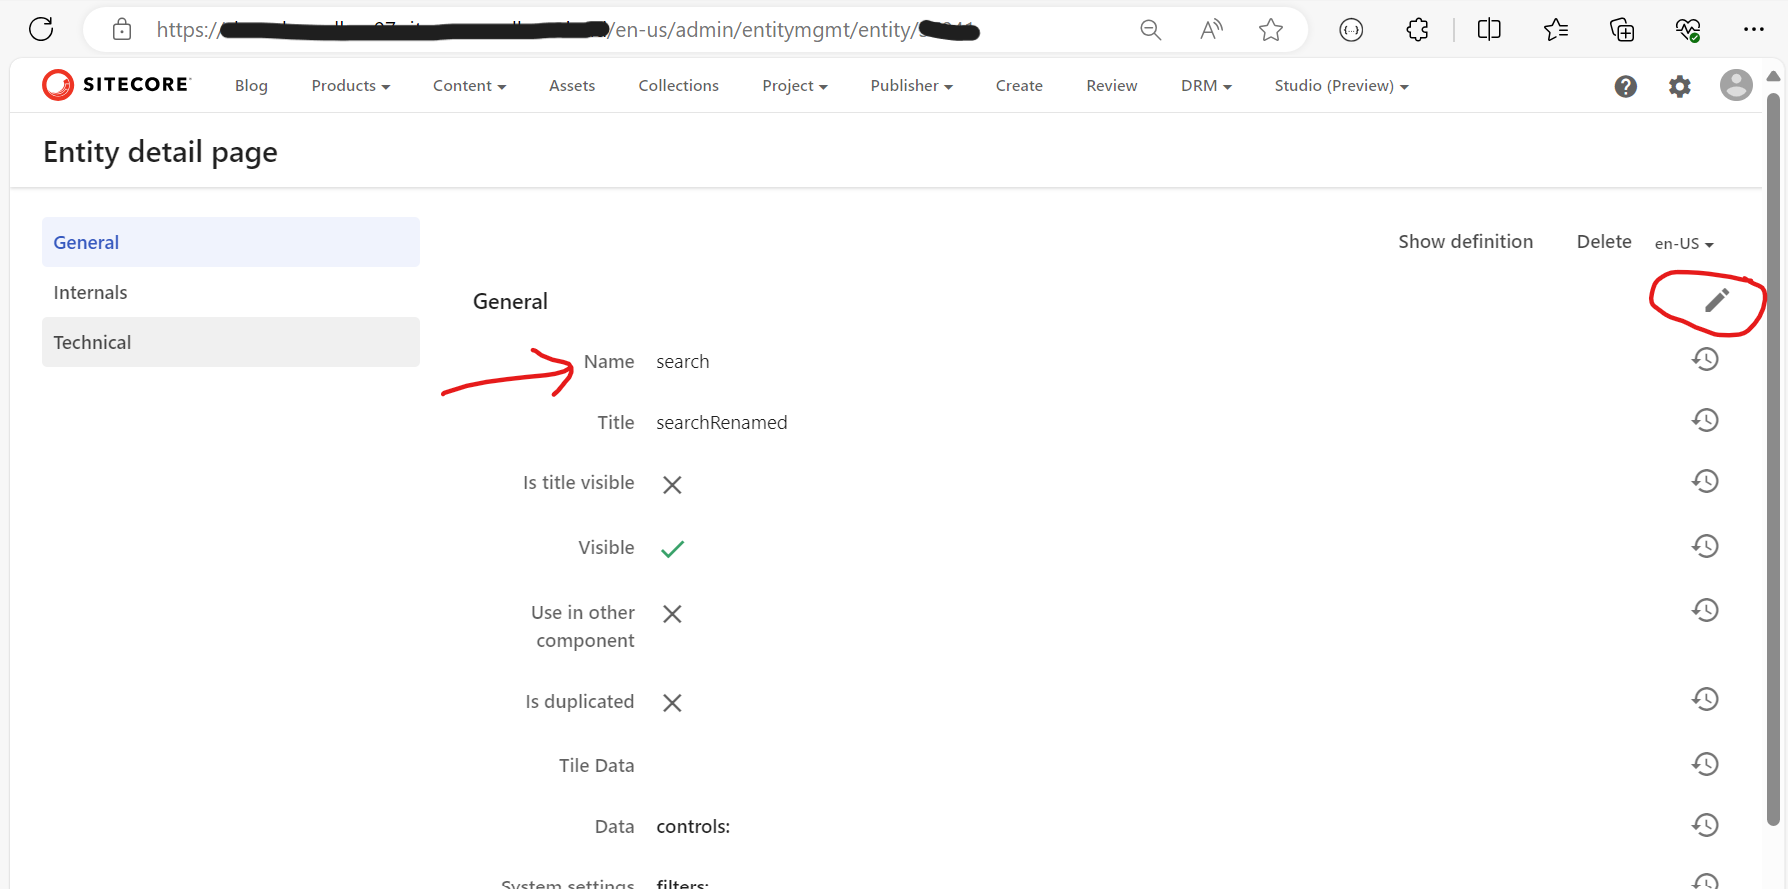
  3. Or, use the Entity Management page to rename the Name of the second Search component to make it unique, as shown below. You will need to know the Entity Id of your second Search component.
  4. Entity Management page can be accessed using the URL below
https://<your-instance-url>/en-us/admin/entitymgmt/entity/<ENTITy_ID>

Next steps

In this blog post, we have looked at a scenario where having more than one Search components with the same name causes ‘duplication’ issue with your Selection component Linked Search component list. I have shared some tips and tricks to help you work around this issue.

Stay tuned and leave please us any feedback or comments.

Content Hub – defining self-referencing relations, creating, linking and displaying entities – part 2

Introduction

In the previous blog post, I introduced you to self-referencing relations in Content Hub, plus possible use-cases for them. In this blog post, I will focus on how to create and populate self-referencing entities and display them within Content Hub.

Displaying linked assets on the Asset Details page

As discussed in the previous blog post, a typical use case for self-referencing relations is to link a set of assets to a parent or master asset.

Below is a mockup of the parent or master asset details page to illustrate this use-case.

This is a typical asset details page that you get out-of-the-box with your Content Hub instance. I have done one customization to this page, to allow me to display our Linked assets panel as highlighted above.

As you can notice:

  • I am displaying panel heading ‘Linked assets’.
  • I have ‘+ Add existing items’ CTA button. This is the button when clicked, allows me to search for existing assets that I would like to link to the current parent or master asset.
  • I have a refresh button. This allows me to refresh the linked assets list without re-loading my entire page
  • A have list of linked three (3) assets shown in a tabular form, including the asset meta data of ID, Title and Article Type To Asset

We will now look at how I have built this linked assets panel.

Modifying Asset Details page

To customize the existing Asset details page, we need to view the Page designer component. From the ‘Manage’ dashboard, select ‘Pages’ component, which will open the ‘Pages’ window.

Search for ‘Asset details’ page, as shown below. As you can see, I have added a new section to the existing page layout. This section has the ‘Linked assets’ panel.

  • Linked assets – this is the panel component which contains the display components for linking the assets. Below is the settings popup for this panel.
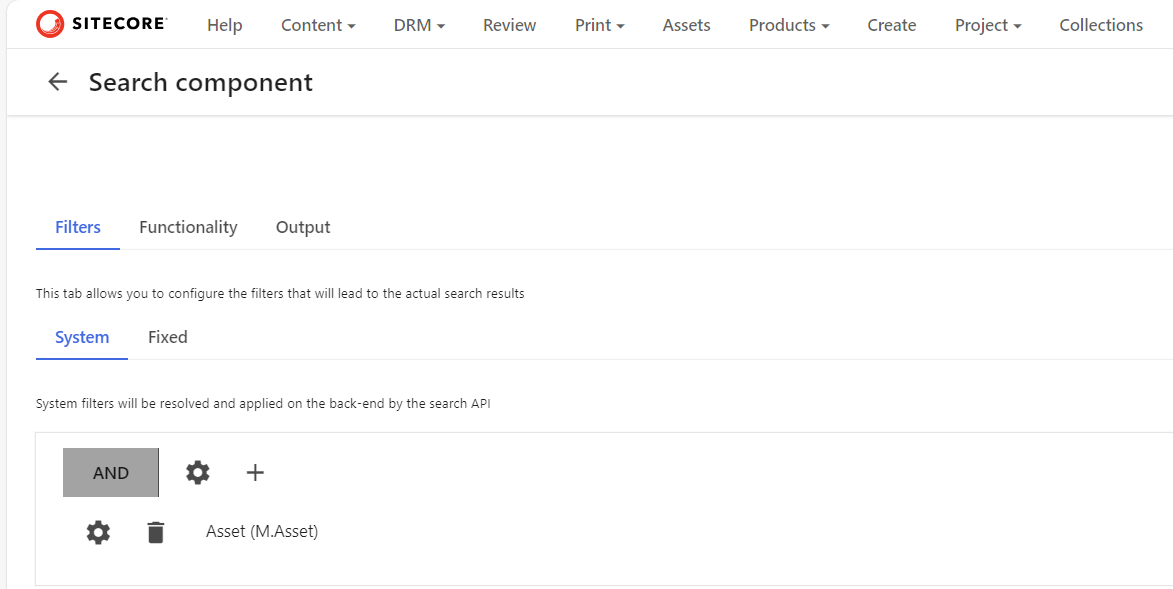
  • SearchEligibleAssets – this is the Search component that I have configured to search and filter existing assets that will be linked to the parent or master asset. Below is the configuration settings for this search component.
  • Notice we are searching and only linking existing assets that have not been deleted.
  • The ‘SearchEligibleAssets’ component should be set to be ‘Nested’ component as we are using it from within our ‘Linked assets’ componet.

Linked assets panel component

Let us look at the components within our ‘Linked assets’ panel.

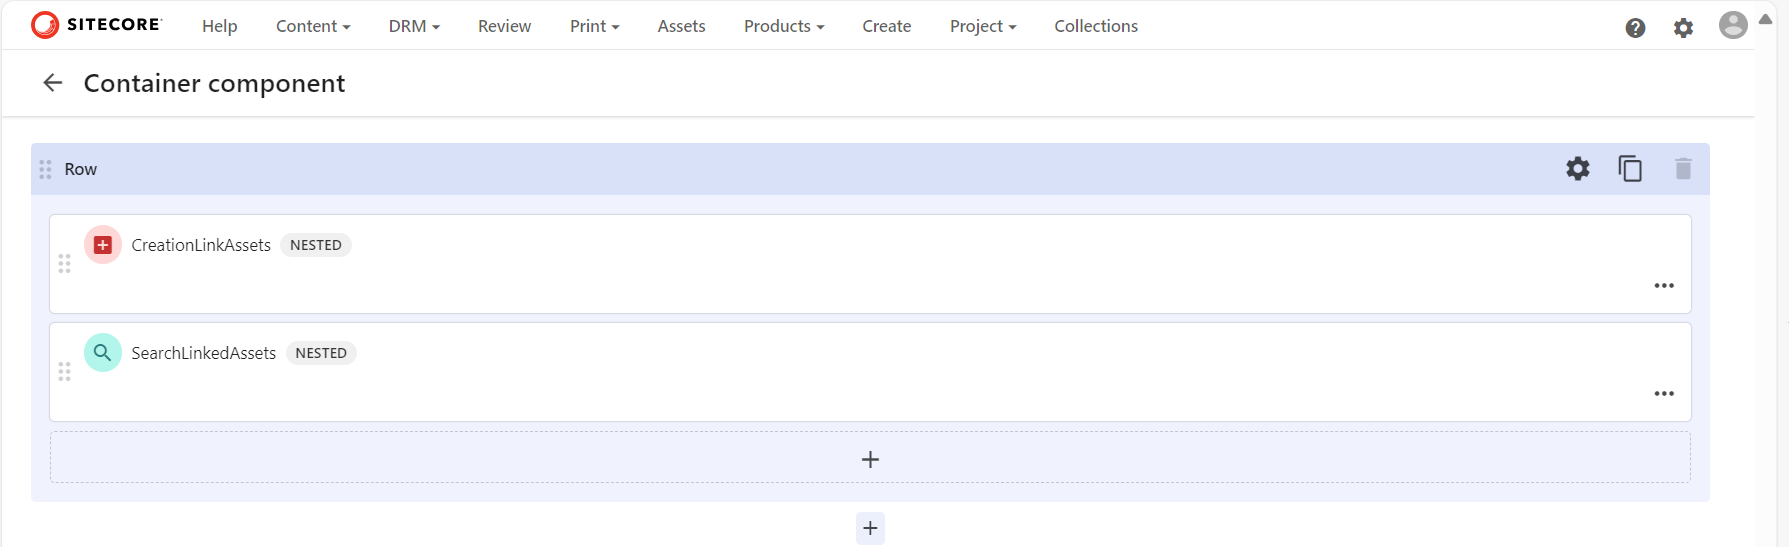
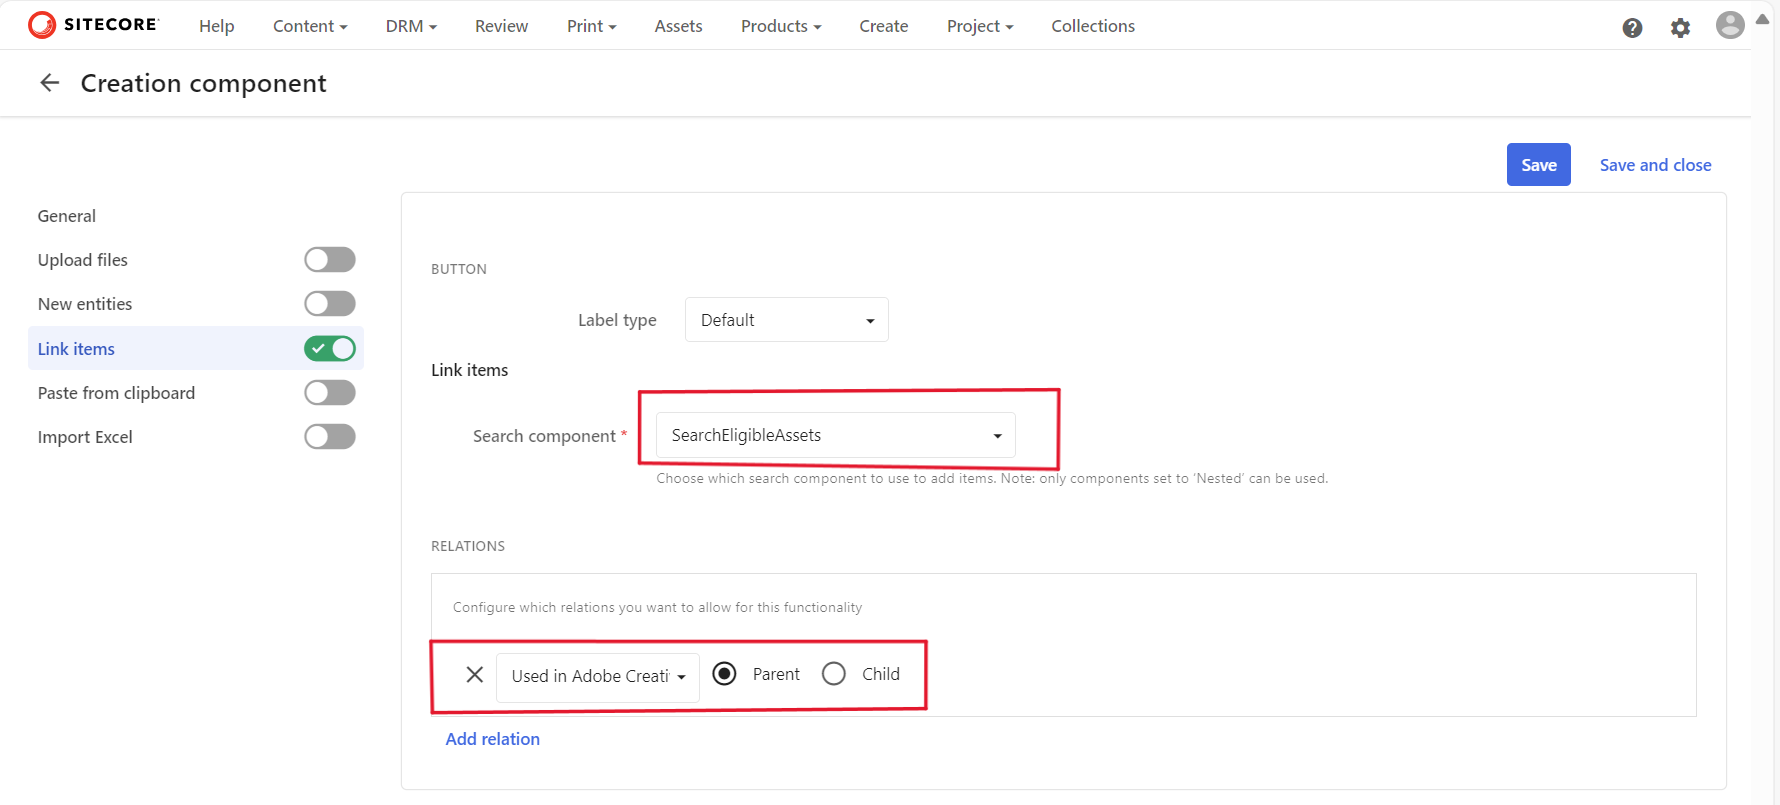
  • CreationLinkAssets – this is our Creation component, that will create new links based on the selected assets to our parent or master asset. Below is screenshot showing how we using it to link assets to the parent or master asset.
      • We need to link our ‘SeachEligibleAssets‘ Search component to the Creation component, as shown below
      • The assets to be linked are using our ‘AssetToLinkedAsset‘ relation, setting the Parent as shown above.
  • SearchLinkedAssets – is is our Search component that will display all existing and already linked assets to our parent or master asset. Below is configuration to achieve this
    • Ensure M.Asset is selected in ‘System’ filter
    • Then within the ‘Fixed’ filter, filter out using our ‘AssetToLinkedAsset’ relation as shown below
    • As specify we are displaying all assets which have the current asset (Page Entity) as their Parent using the self-referencing ‘AssetToLinkedAsset’ relation.
  • This is it. All done.

Next steps

In this blog post, we have done a deep-dive into how to create and populate self-referencing entities and link them up to create parent-child hierarchy and to display them within Content Hub.

Stay tuned and leave please us any feedback or comments.

Content Hub gems: Troubleshooting issue when creating asset public links

You may encounter this is error “The user does not have sufficient rights to create the specified entity

We will look at how to troubleshoot and resolve it. But first, what are public links?

What are public links used for?

In Content Hub, we use public links to share assets with external partners who typically do not have direct permission to download the assets. This means anyone who has access to this static URL can cache and fetch the file.

Creation of Public Links

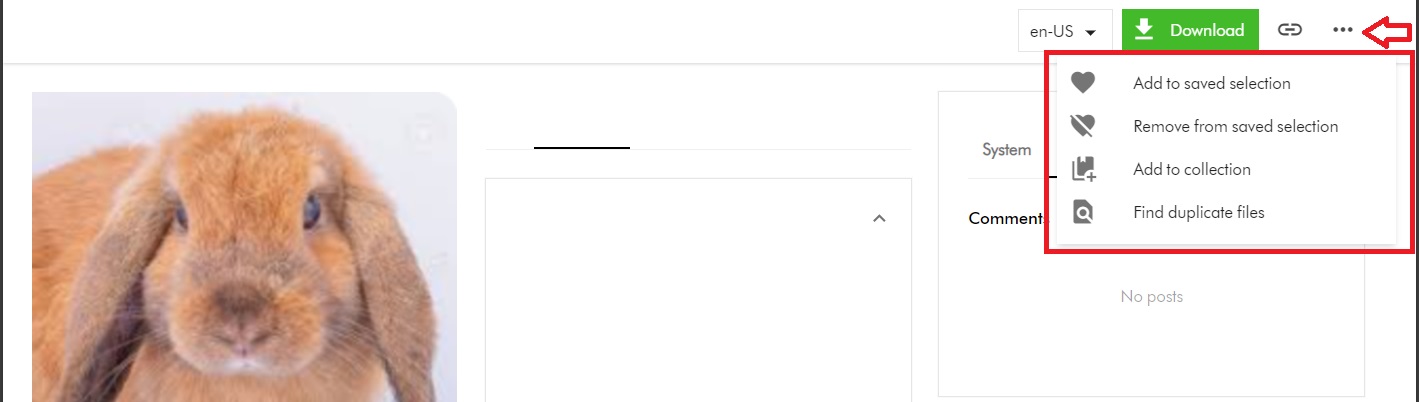
I will start with a scenario where my Content Hub user doesn’t have permission to create public links. My user belongs to my GlobalContentCreator user group. Within Content Hub, on the Asset Details page, when my user tries to access the Public links menu, they notice it is missing as shown below.

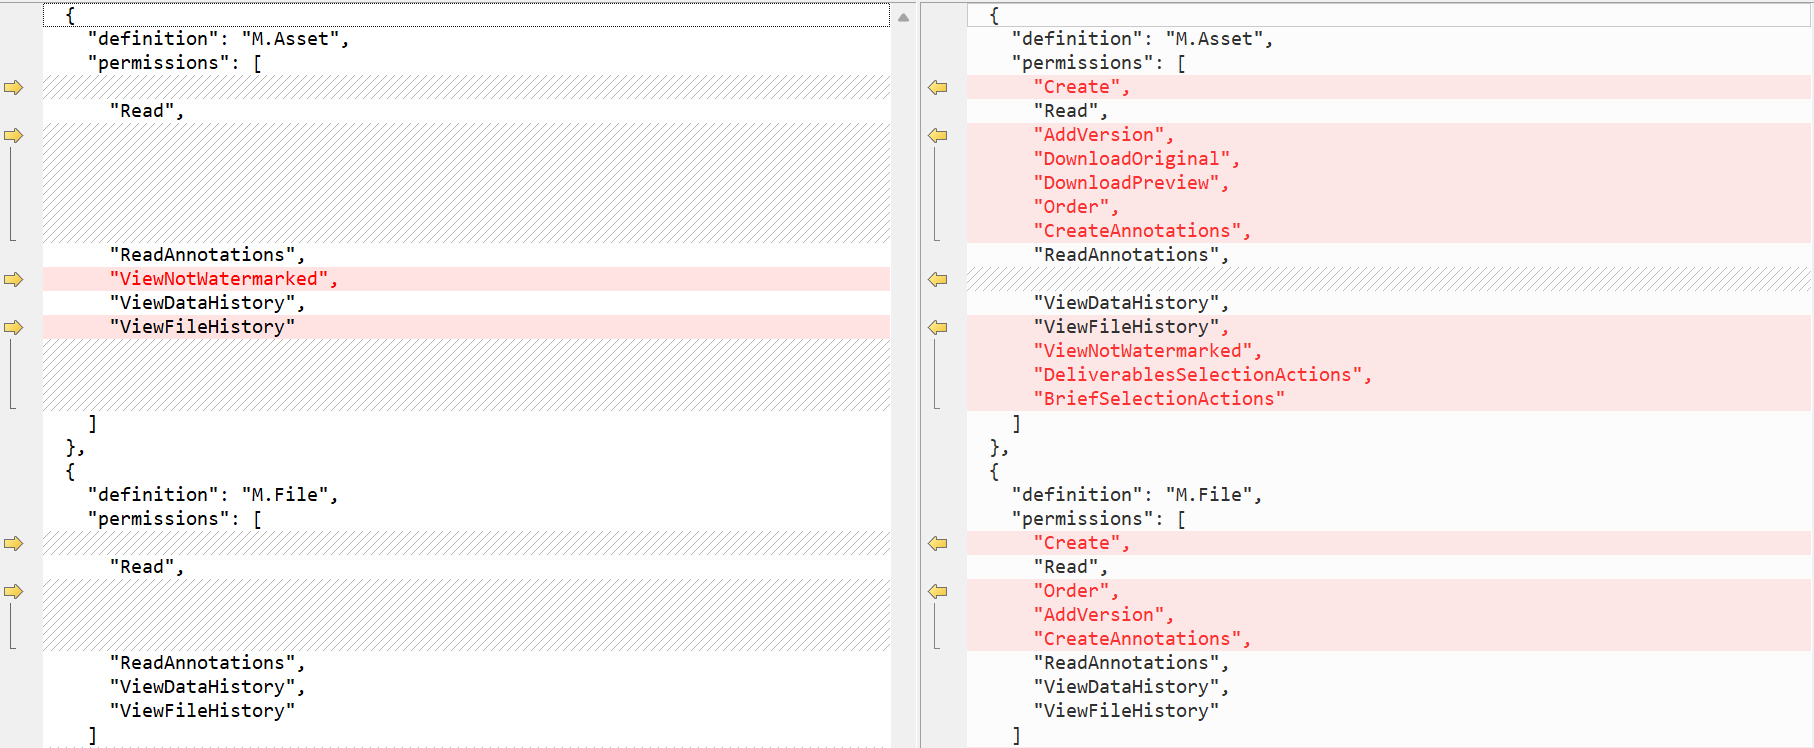
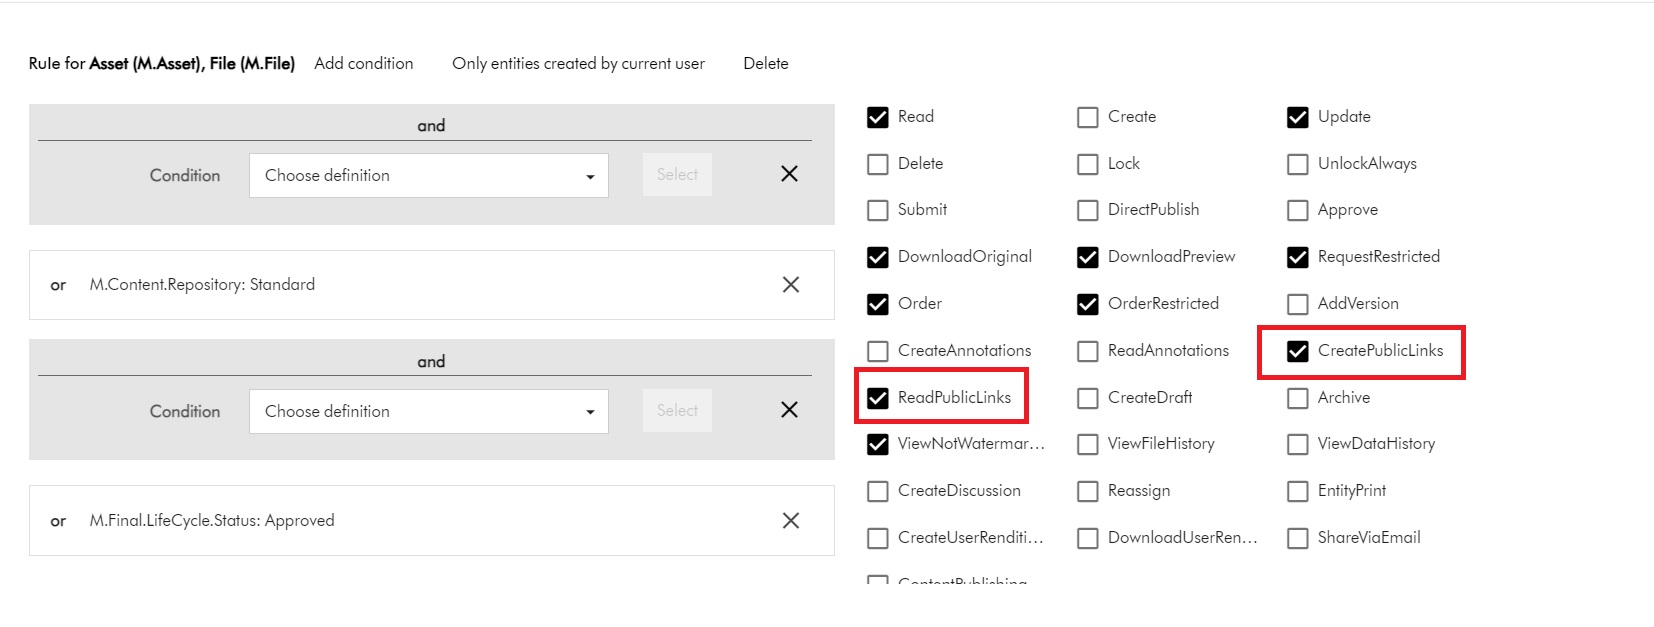
The Public links menu is missing because the required permissions have not been configured within GlobalContentCreator user group. Below is a snippet of the existing permissions for M.Asset and M.File

You notice the CreatePublicLinks and ReadPublicLinks permissions are missing. We need to enable them first, as shown below:

With this change in place, the Public links menu now appears on the Asset Details page for my user, as shown below.

Does this resolve the issue?

I will now let my user to put this to test.

As expected, when my user clicks on the Public links menu, it opens New pubic link popup window. They proceed to fill out the form and submitting it as shown below. However, they are still getting the error. What is going on?

M.PublicLink permissions are needed as well
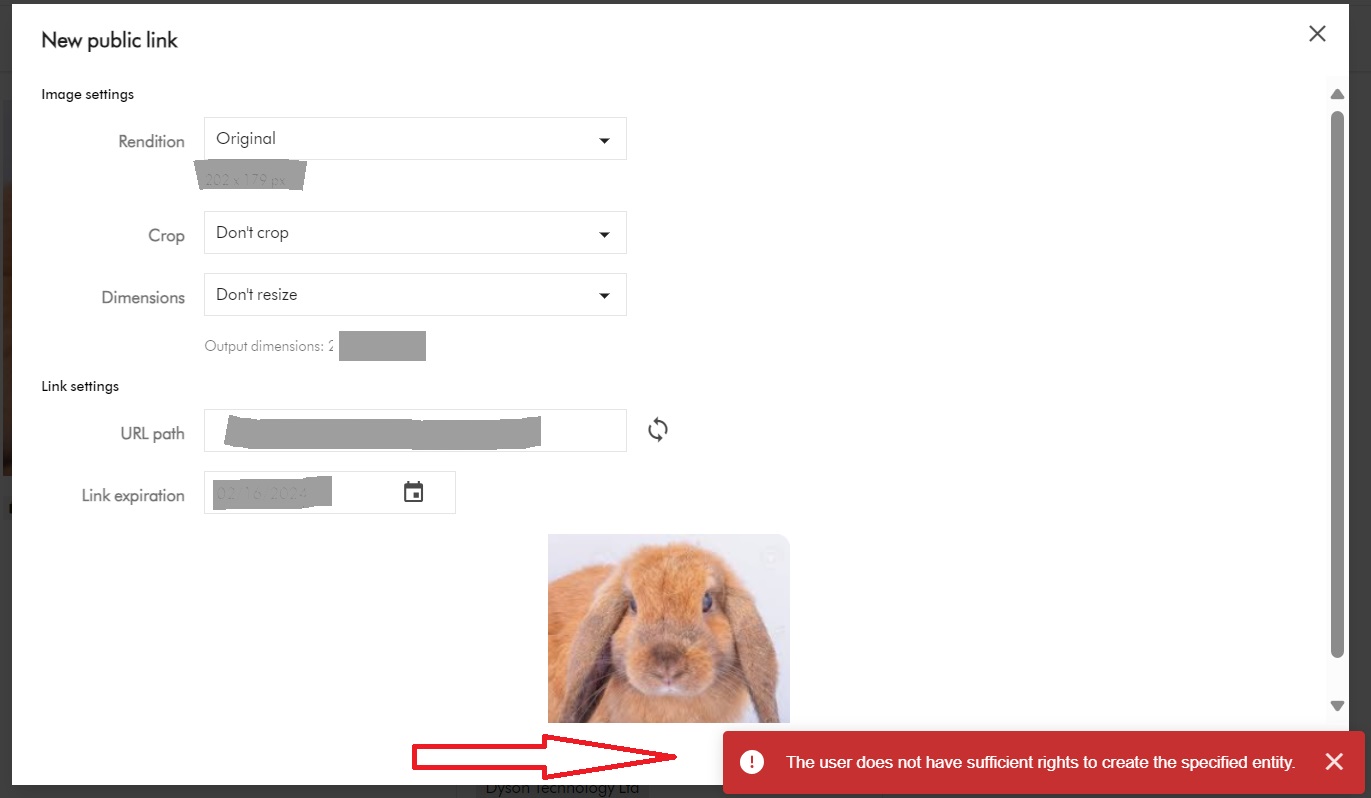
Asset public links are entities of type M.PublicLink. In fact, M.Asset is Parent of M.PublicLink (using the AssetToPublicLink relationship)

Therefore, I need to assign additional permissions for M.PublicLink. I need to update my GlobalContentCreator user group with the following changes:

The minimum permissions needed are Read and Create to create the public links. However, I have additionally allowed my users to update and delete them as well.

This is it. With this change, the issue is resolved and my users can happily generate public links. Happy days.

Next steps

In this blog post, I have explored steps you need to take to troubleshoot and resolve the issue “the user does not have sufficient rights to create the specified entity” when generating public links.

Stay tuned and leave us any feedback or comments.

Creating and publishing a Content Hub custom connector – Func app settings and debugging

Introduction

In my previous blog post, I covered how to set-up your Func app within Visual Studio. In this post, I would like to walk you through how to configure your Func app to allow you to run and debug it in your local development environement.

Func app local.settings.json file

Within your Visual Studio project, create local.settings.json file at the root of the project. A sample json file is shown below. This will be used to configure all the configuration settings to allow you to run and debug the Func app locally.

The local.settings.json file stores app settings and settings used by local development tools. Settings in the local.settings.json file are used only when you’re running your project locally.

Because the local.settings.json may contain secrets, such as connection strings, you should never store it in a remote repository.

DevOps best practices

Microsoft Azure portal func app application settings

Similarly, you will need to configure all the configuration setting on your Microsoft Azure portal for your test or production Func app instances.

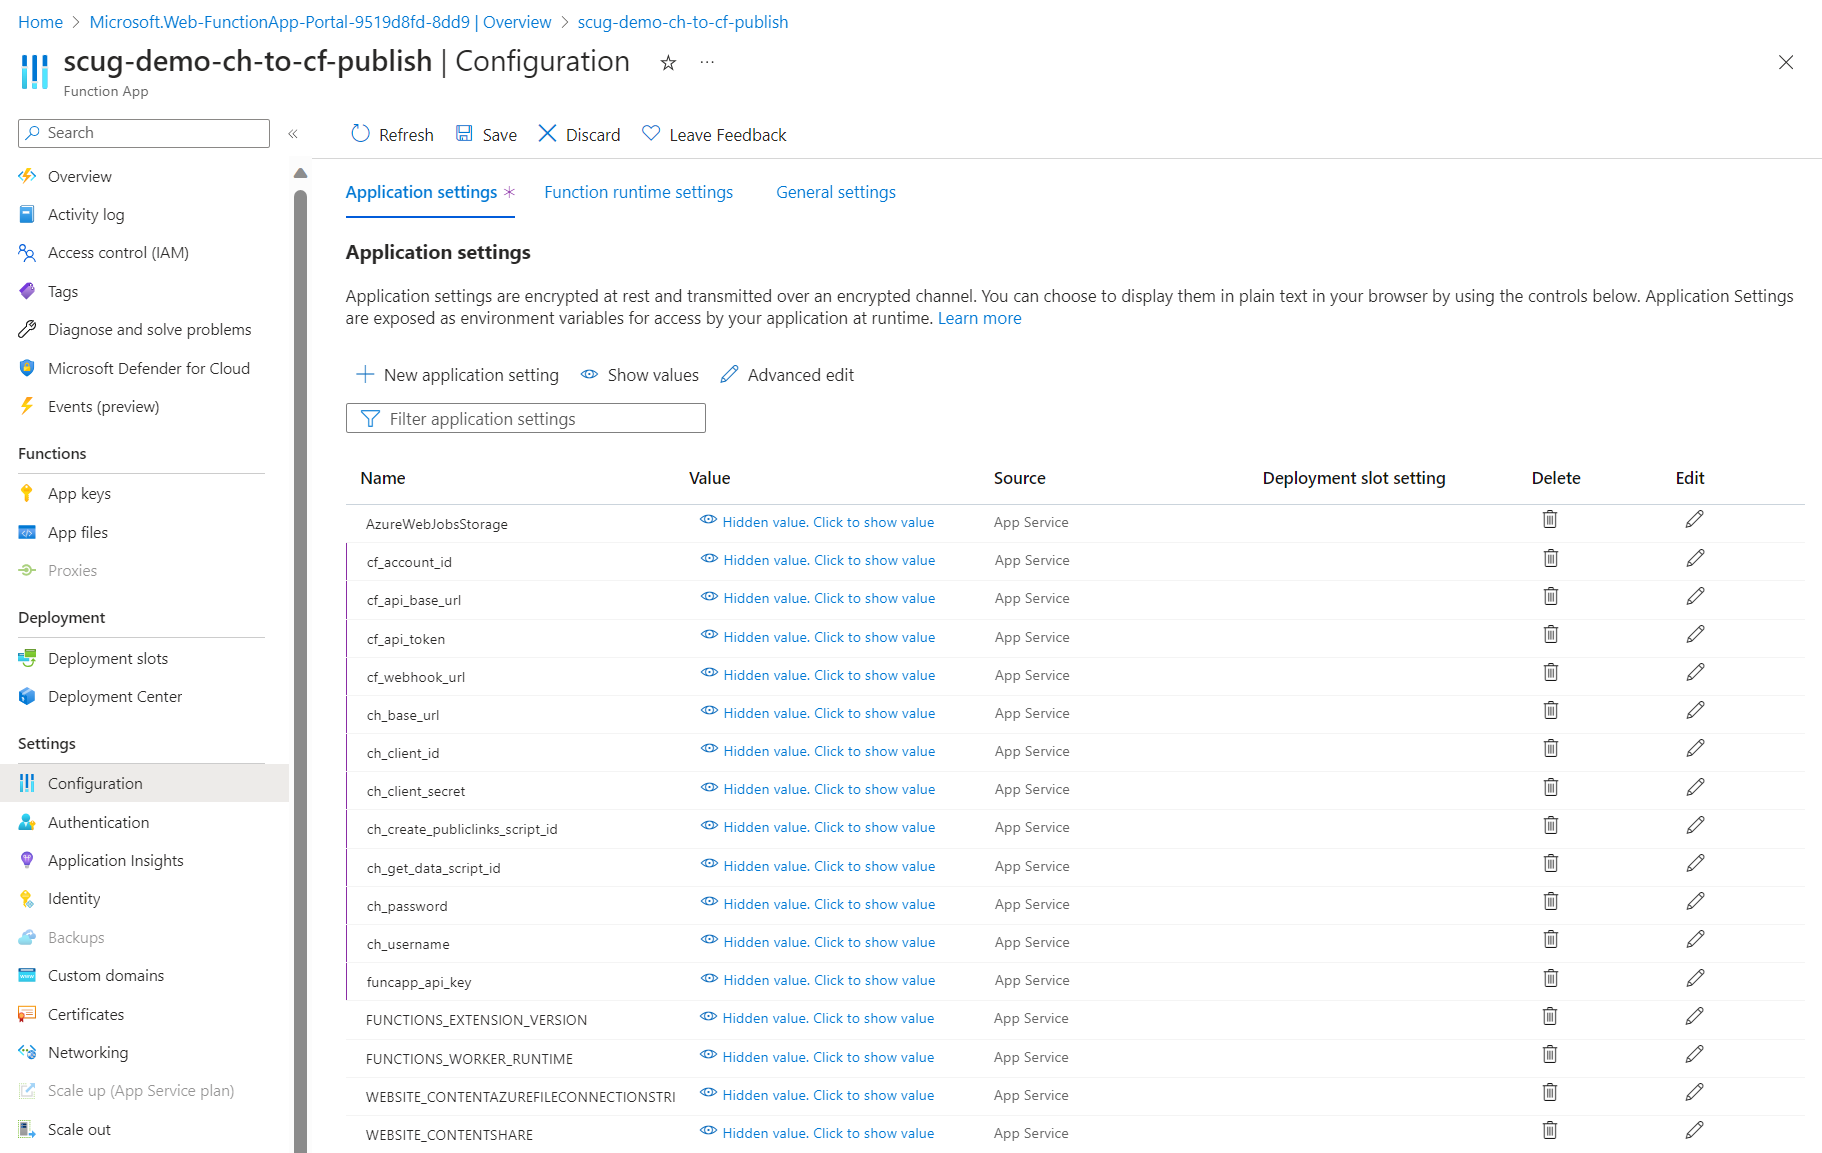
Clicking on Configuration menu, then Application settings tab will launch the page similar to the one shown below.

Depending on your needs, these application settings can be managed manually or very easily automated using DevOps pipelines.

List of required application settings

Below is a complete list of the Func app application settings

  • cf_account_id your Cloudflare account identifier
  • cf_api_base_url your Cloudflare API base URL
  • cf_api_token your Cloudflare API token
  • cf_webhook_url your Cloudflare webhook URL
  • ch_base_url your Content Hub instance base URL
  • ch_client_id your Content Hub instance client identifier
  • ch_client_secret your Content Hub instance client secret
  • ch_create_publiclinks_script_id your Content Hub action scrip identifier for creating public links
  • ch_get_data_script_id your Content Hub action scrip identifier for getting data
  • ch_password your Content Hub integration user password
  • ch_username your Content Hub integration user username
  • funcapp_api_key your custom Func app API key configured within your Content Hub integration

Next steps

In this blog post, we have explored at how to configure your Function app application settings to allow you to run and debug it in your local development environment. We also looked at configuring them on your published Func app on your Microsoft Azure portal.

Feel free to watch the rest of my YouTube playlist where I am demonstrating the end-to-end custom connector in action. Stay tuned.

Creating and publishing a Content Hub custom connector – Visual Studio project set-up guide

Background

I recently shared a video playlist on how I built a Content Hub custom connector that allows you to publish video assets into your existing video streaming platforms

On this blog post, I wanted to share details on how to setup your Visual Studio project and solution as well us how to deploy or publish the connector to your Microsoft Azure cloud.
Create a function app project

Using latest Visual Studio IDE, create a new Azure Functions project, using C# template as shown below

Choose a meaningful name for your project and progress through the next step. Ensure you select Http triggered function as show below.

Finalise the create project wizard to get your project created.

Add Content Hub web SDK reference

As shown below, add a reference to Stylelabs.M.Sdk.WebClient NuGet Package to your project.

In addition, ensure you have added the Microsoft NuGet Packages below to enable dependency injection to your Func app.

Enabling FunctionStartup in your Func app

To enable dependency injection in your project, add a Startup class similar to the one shown below. The Startup class needs to inherit the FunctionStartup, which allows us to configure and register our interfaces.

Creating Function App on Microsoft Azure portal

As explained in the video playlist, you will need to publish your Func app into your Microsoft Azure subscription.

You will need to create a Function App app in your Microsoft Azure subscription using the create template as shown below. Ensure you select relevant Subscription, Resource Group and .NET Runtime stack.

Progress through the create wizard screens to stand up your Function app in the portal.

Getting publish profile from the Microsoft Azure portal

On your newly created Function app, navigate to the Deployment Center as shown below

Clicking on the the Manage publish profile link should present a pop up window, from which you can download the publish profile. Keep note on the location where you have downloaded this publish profile file.

Importing publish profile into your Visual Studio project

Right-click on your project within VS, which should pop-up the menu shown below.

Click on the Publish… menu to launch the Publish window similar to the one shown below.

Using the Import Profile option will allow you to browse and select the publish profile file that you previously downloaded from Microsoft Azure portal. This will then successfully setup the publish profile to your Microsoft Azure subscription.

Publishing the custom connector from VS into Microsoft Azure portal

On the Publish window, you will notice your publish profile is selected, similar to one below.

Clicking on Publish button will deploy the Function app to your Microsoft Azure subscription.

Next steps

In this blog post, we have explored at how to set-up a Function app in your local developer environment, add required NuGet Packages as well us publishing it to your Microsoft Azure subscription

Feel free to watch the rest of my YouTube playlist where I am demonstrating the end-to-end custom connector in action. Stay tuned.

My Sitecore contributions in 2023

It is that time of the year once again, where Sitecore MVP 2024 applications are open.

I have had a relatively productive year compared to 2022, and below is a summary of my contributions:

Content contributions

I believe I have created content that adds value mostly within Content Hub, Sitecore Experience Edge, Sitecore Personalize among the Sitecore composable stack. I believe I have produced content that meets expectations in terms of quality, quantity, and visibility and more importantly, add value to our community. This has been through blog posts (x14 Sitecore blogs in 2023, with a total views:  2400+ so far), code sharing via GitHub, reference Architectures, YouTube content among other social channels:

LinkedIn articles:

Sitecore Hackathon 2023:

Code and architectural artifacts:

Public speaking

I am an active member of Sitecore User Group London and been working with Alex Washtell to facilitate the event held at our Avanade offices back in February 2023. I was also a speaker on the event held at Sagittarius on 9th November 2023.

Engagement

Through my social profile, I have driven engagement throughout 2023 to amplify the content I have created.

Next steps

For 2024, I look forward keeping up producing content that meets expectations in terms of quality, quantity, and visibility. Keep up and drive further engagement of wider Sitecore community by leveraging my previous MVP credentials and strong social profile. I am putting myself forward for public speaking events throughout the calendar year. I intent to continue identifying any gaps and filling them, providing product feedback, improvements, and references

Stay tuned and best of luck with those submitting the Sitecore MVP 2024 applications

Streaming Seamlessly: Integrating Content Hub with your existing video streaming platform

Background

Most businesses already have existing investments in some form of a video streaming platform, which they are leveraging to deliver marketing material such as video content to their customers. Their digital marketing teams are already familiar with tools such as YouTube, Brightcove among others, which they work with as part of their daily jobs.

Your company has recently made investments in Content Hub as strategic solution for your DAM needs in your business. With such an investment, your marketing, content, film and production teams will start using Content Hub as single repository for your videos and imagery to cater for all needs in your business.

How do you ensure your video assets within Content Hub are synced with your existing streaming channels?

You will need a connector, but we have you covered

Unfortunately, Sitecore doesn’t provide an out-of-the-box connector that you can leverage for this. You will need to build such a connector yourself, so you can have an integration between Content Hub and your existing video streaming channel.

Speaker at London SCUG on 09 Nov 2023

I had an opportunity to demonstrate this connector during the London Sitecore User Group at Sagittarius – November 09, 2023

I have also recorded a YouTube playlist on how I have build this connector, which you can watch now on my YouTube channel

See you then.

Next steps:

I will also write an accompanying blog post with links to sample code demonstrated on my YouTube channel. Stay tuned.