Context and background
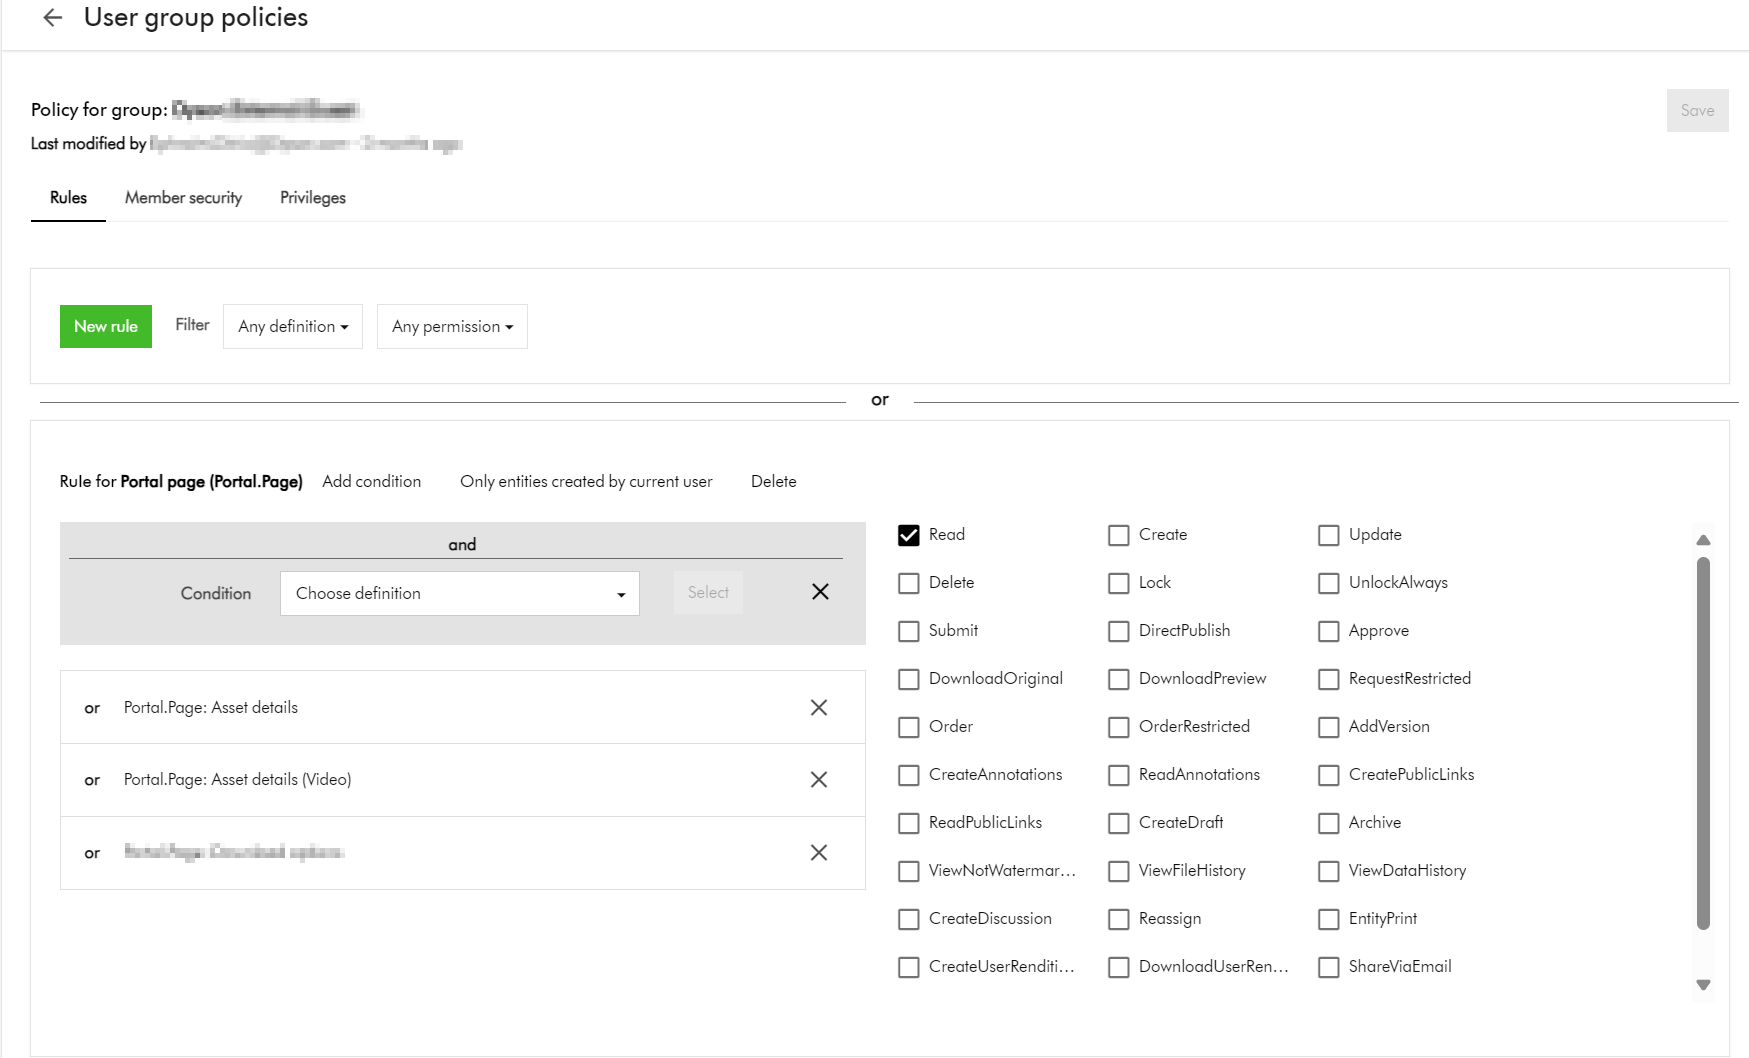
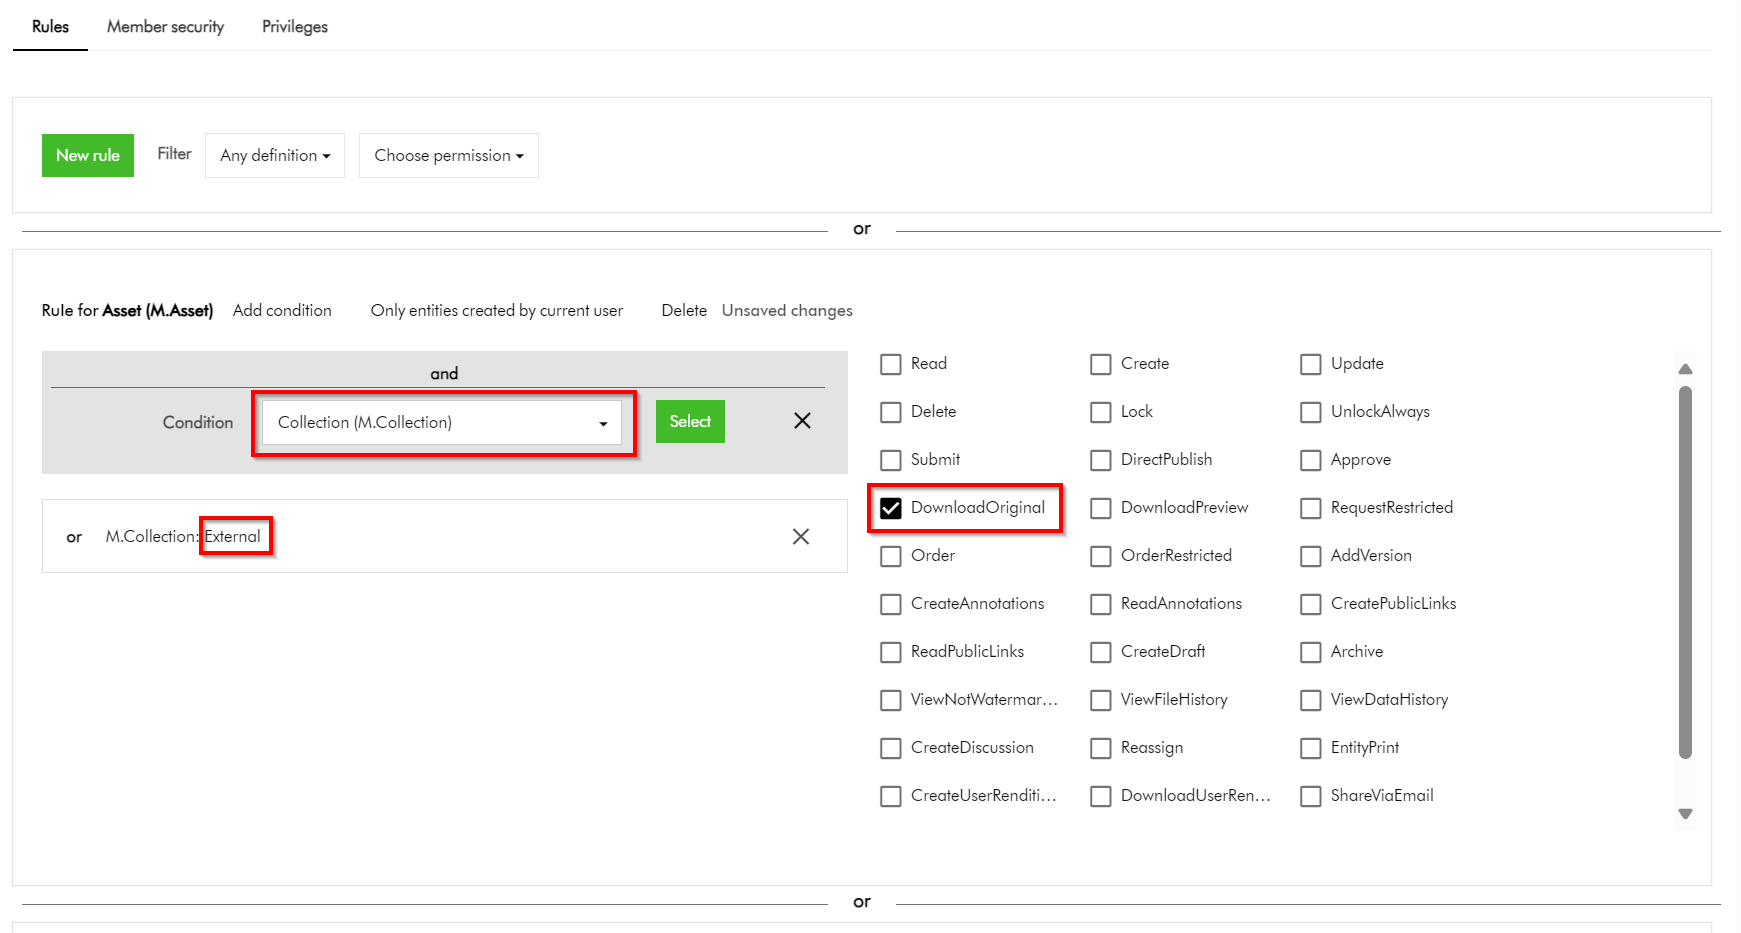
Content Hub permissions and security model is underpinned by the user group policies model, whereby Content Hub users can perform actions based on their access rights. The official docs provides clear definition of the anatomy and architecture of the user group policies. For example, a user group policy consists of one or more rules, with each rule determining the conditions under which group members have permissions to do something.
While all the technical details of group policies are nicely abstracted away from our business users, there are use cases when you will need to in fact grapple with technical details of the policies. Such as when you can’t delete your taxonomies or entities, simply because you have used them in one or more rules in your policies.
In this blog post, I will outline this pain point and recommend a solution.
Unable to delete entity ‘…’ because it’s being used
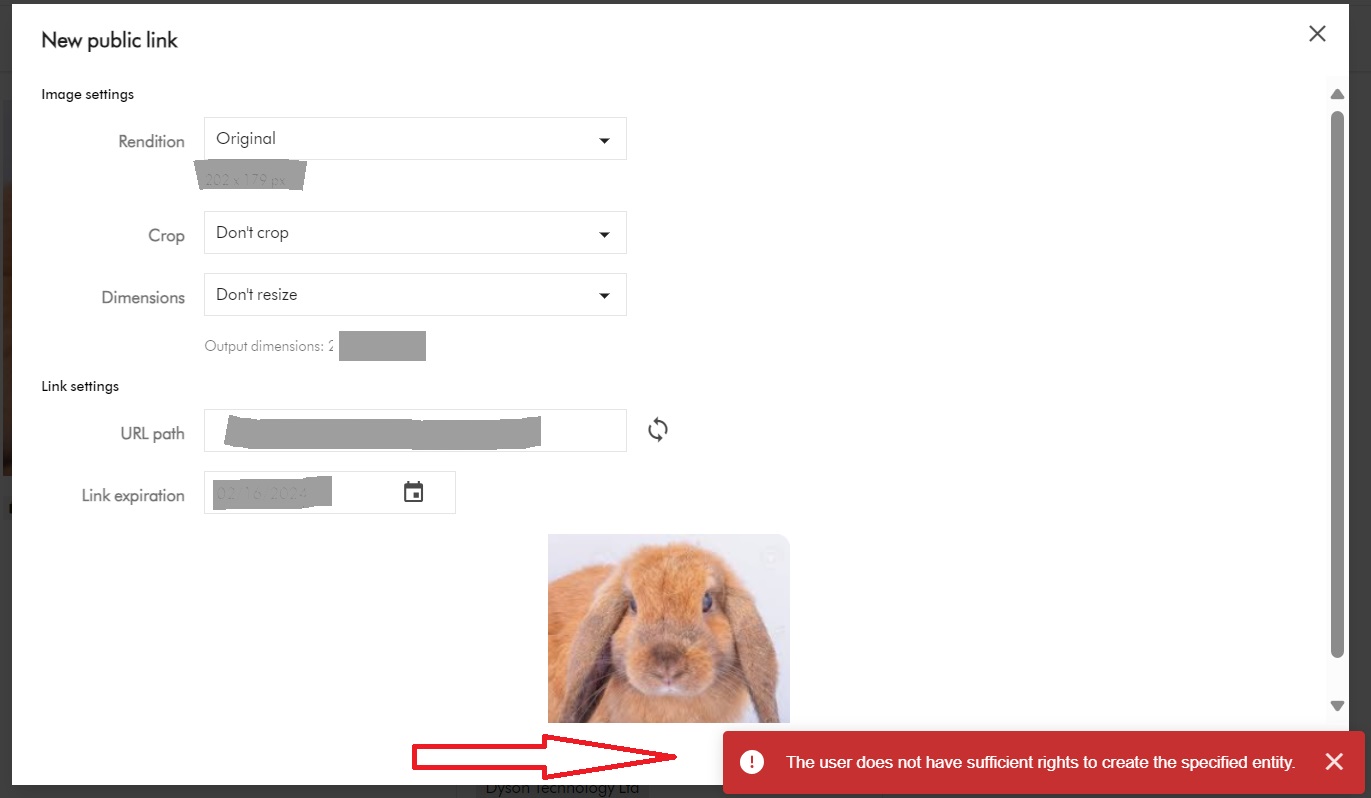
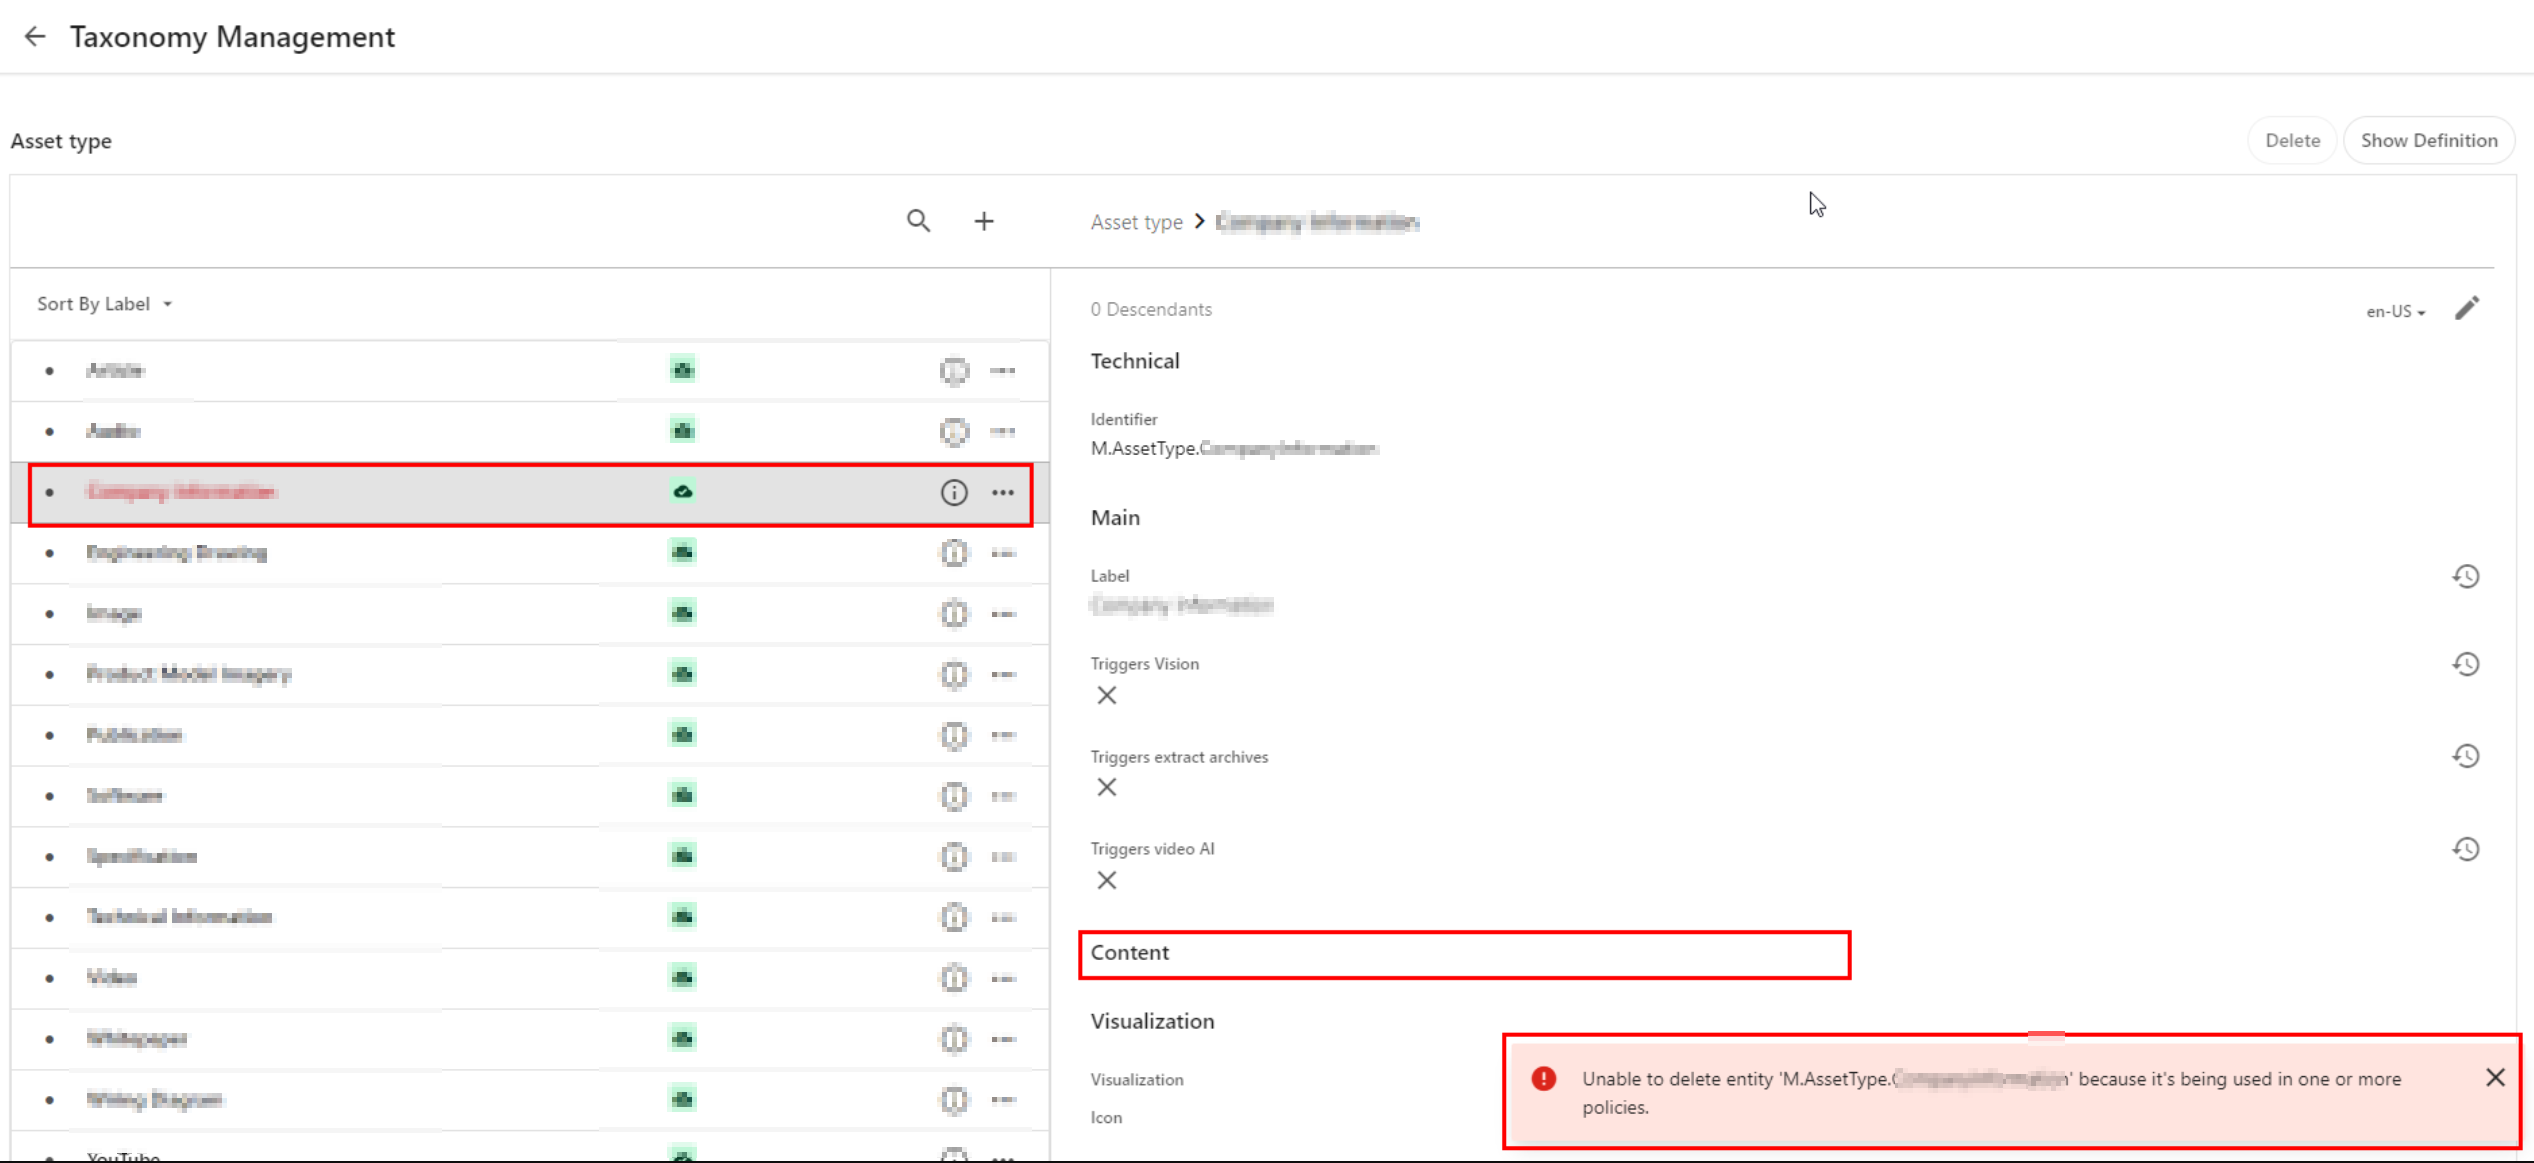
Yes that is right. If you have used a taxonomy value or some other entity as part of your user group policy definition – then it makes sense you can not delete it. That is expected logic, we have a clear dependency within the system. In which case, we need to break or remove this dependency first.
Below is a sample screenshot of this error message. In this example, the highlighted taxonomy value can not be deleted yet, until the dependency has been removed.
User group policy serialization as JSON
If you haven’t set up DevOps as part of your Content Hub development workflow, then we need to cover some basics around user group policies serialization. You can leverage Content Hub Import/Export feature to export all polices into a ZIP package, as detailed below:
- Using the Manage page, navigate to Import/Export.
- On the Import/Export page, in the Export section, select only the Policies check box and click Export. This will generate a ZIP package with all policies.
- Click View downloads at the right bottom of the screen.
- On the Downloads page, click the Download Order icon when the status of the package is ready for download. This will download the ZIP package with all policies.
- Unzip the downloaded package. This will have JSON files of all policies
A look at M.Builtin.Readers.json for example
Below is a snippet from the M.Builtin.Readers.json, which a serialized version of the M.Builtin.Readers user group (one of the out-of-the-box user groups)

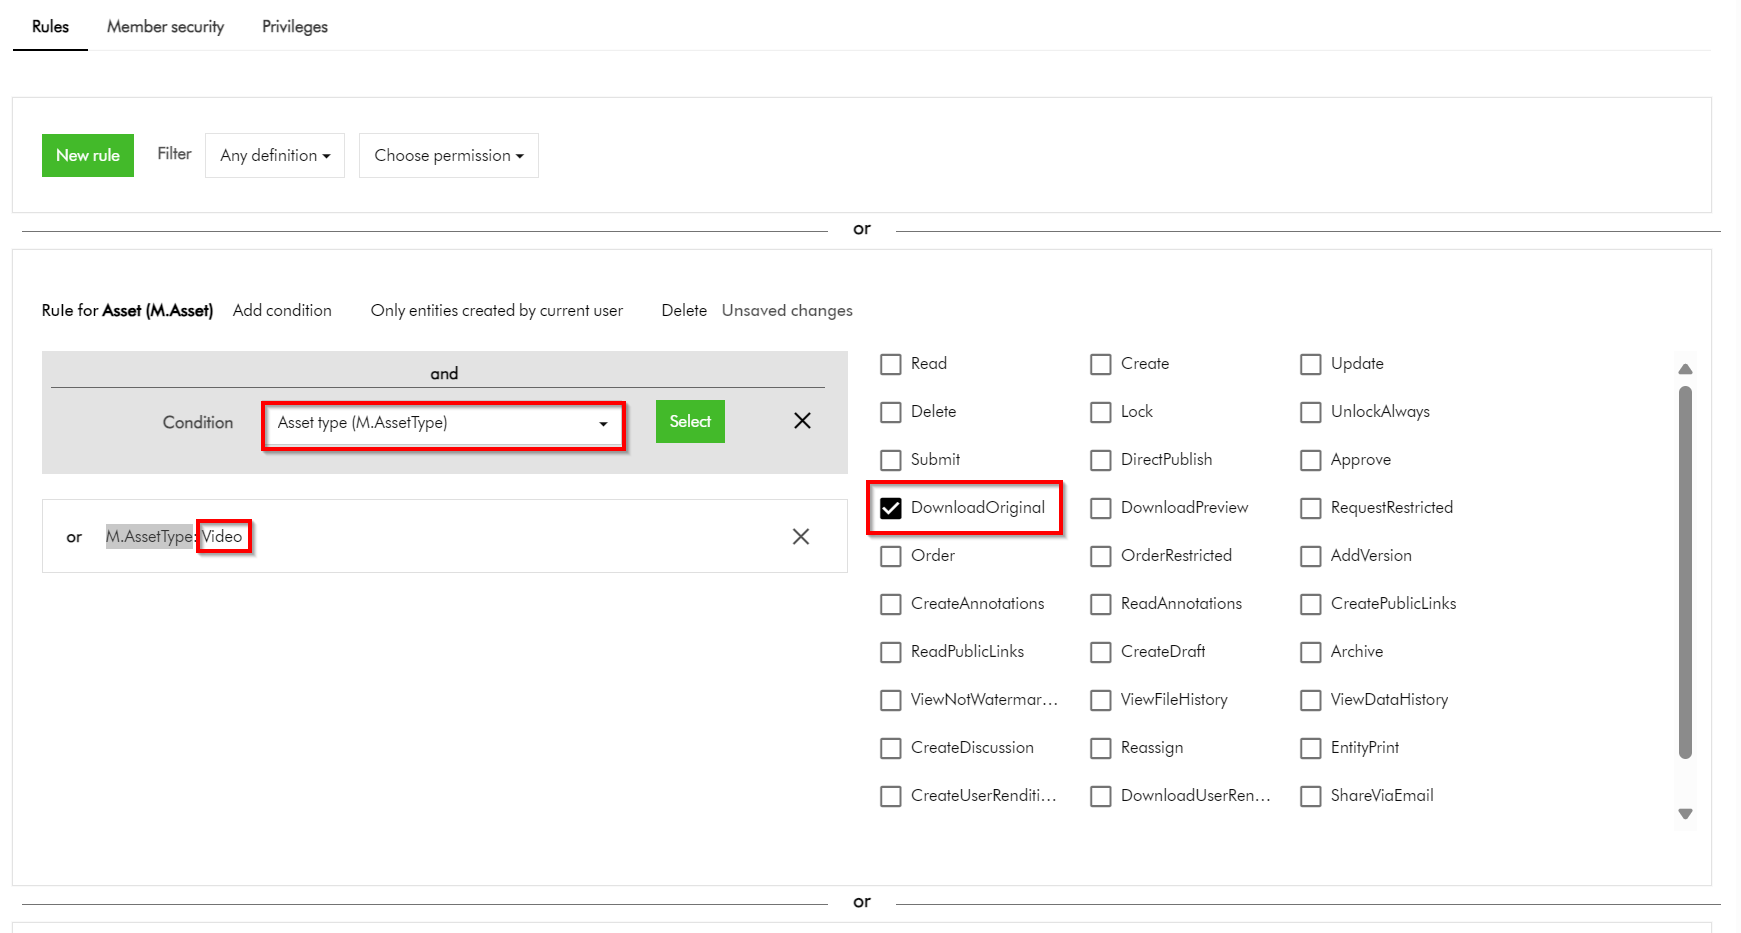
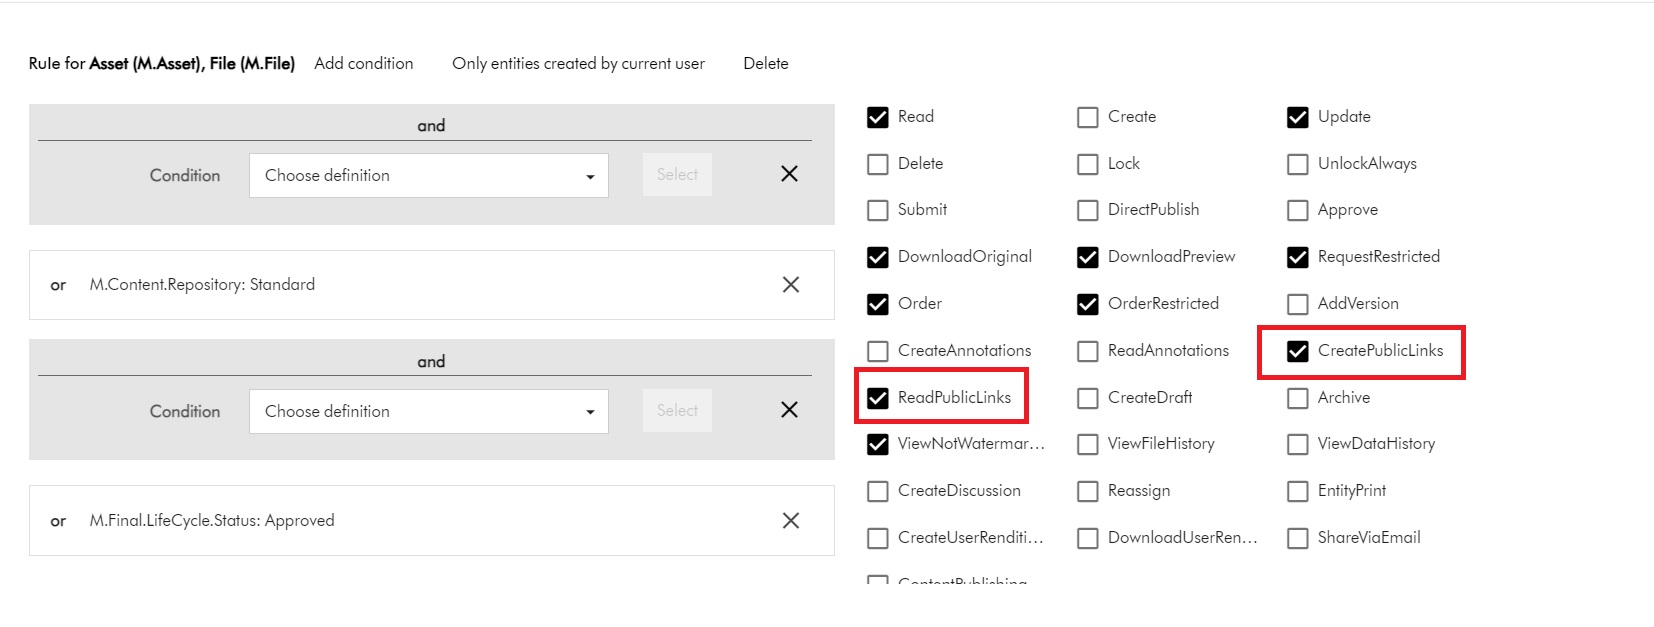
Remember a group policy consists of one or more rules, with each rule having one or more conditions under which group members have permissions to do something.
I have highlighted one of the conditions within the first rule in this user group policy. This condition shows the dependency on one of the taxonomies, M.Final.LifeCycle.Status
On line 20, the reference (“href”) indicates which taxonomy child value is being used, which is M.Final.LifeCycle.Status.Approved
The full content of this file are available from my GitHub Gist for your reference.
How to safely delete or remove taxonomy references from user group policy JSON file
The serialized user group policy JSON file is a plain text file. So any a text editor of choice can be used to edit this file, and delete all references to the taxonomy with a dependency. And then save the changes in updated JSON file. That is it.
Due care has to be taken to ensure that the rest of the JSON file is not modified.
Once all references are deleted and verified, you can create a new ZIP package with the changed files, to be imported back into Content Hub.
It is recommended your certified Content Hub developers should make these changes (and validate them, say, using a text file comparison tool such as Beyond Compare). For example, you need to compare the original ZIP package with the newly created one to make sure that their structure is the same.
Finally, the newly created ZIP package can be imported using the Import/Export functionality as detailed in official docs.
DevOps: Automating removing taxonomy or entities references from user group policies
I have previously blogged about enabling DevOps as part of your Content Hub development workflow.
The current pain point becomes a bread-and-butter problem to solve assuming you already embraced Content Hub DevOps.
With some business logic implemented as part of your CI/CD pipelines, all references to taxonomy values or entities can be safely and reliably deleted from user group polices. This can be done with automation scripts and other tooling that comes with DevOps, truly bringing you ROI in your DevOps infrastructure.
Sample/suggested CI/CD pseudo code
- Define a CI/CD “user group policies clean-up” step to be invoked whenever we are deleting “entities” from your Content Hub instance.
- Using a Regex, scan and systematically delete such entities from your user group policies JSON files (depending on how you’ve setup your DevOps, all policies should be serialized to policies folder)
- Ensure your “user group policies clean-up” step runs ahead of any deletion of the entities (or taxonomy values). Remember you can’t delete an entity if it is being referenced in your user group policy.
- Work with your DevOps engineers to validate the steps and test any changes in non-production environment(s), before applying to production environment.
Remember to also look at my related blog post on DevOps automation for your Action Scripts.
Next steps
In this blog post, I have discussed a common pain point when you are Unable to delete entity because it’s being used in one or more policies. I explained why this is the case, and looked into technical details of user group policy architecture. I provided a solution, which can be automated with a robust DevOps culture adoption for Content Hub.
I hope my approach helps you address similar scenarios in your use-cases. Please let me know if you have any comments above and would like me to provide further or additional details.
 .
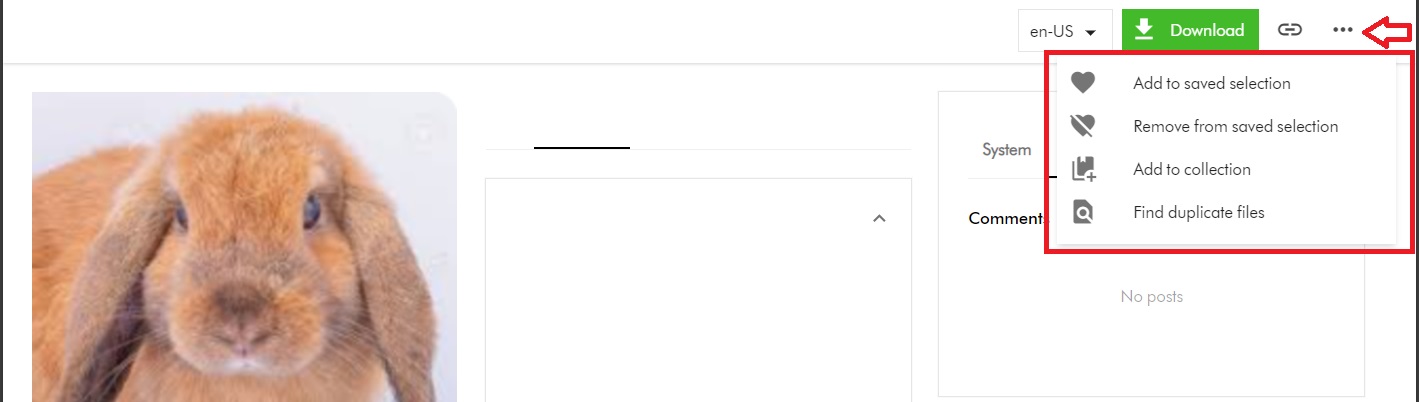
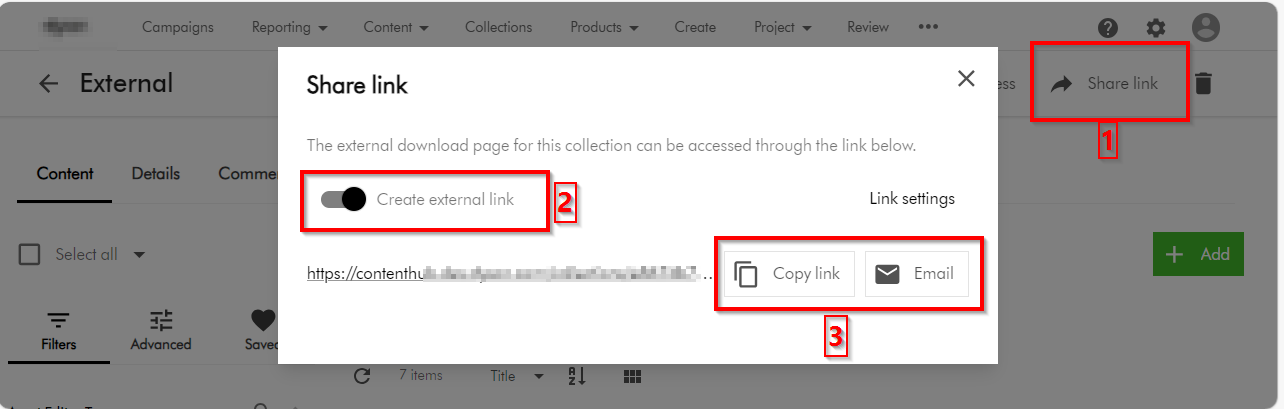
. button, which should prompt for emailing details. You can alternatively use the Copy link button to copy the URL and share it as well