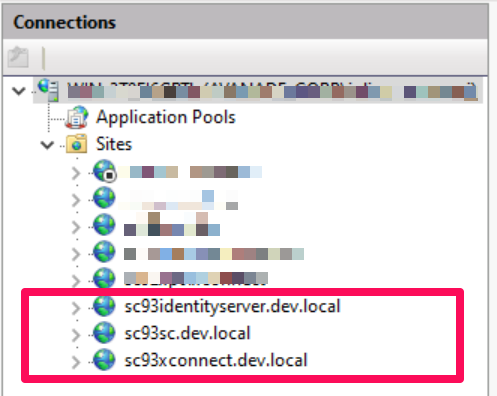
Sitecore Identity Server

In this four part series of blog posts, we will examine in detail the Sitecore Host platform and what benefits this brings to Sitecore Experience Platform. We will also have a closer look at Sitecore Host Applications as well as the Sitecore Host plugins. I will encourage you to please read through these blog posts starting with part one, through part four. I have also provided links below if you would like to jump and have a peek on the other parts as well. All code snippets referenced in the blog posts can also be found on my public Github repo using the link provided below.
- Sitecore Host part one – Introduction to Sitecore Host, Sitecore Host applications and Sitecore Plugins
- Sitecore Host part two – Sitecore Horizon 9.3
- Sitecore Host part three – Sitecore Identity Server (this post)
- Sitecore Host part four – Creating and extending Sitecore Host Plugins
- Code samples in my Github Repository
What is Sitecore Identity Server?
Sitecore Identity Server is a mechanism to log in Sitecore for both Sitecore Users & External Users
Key Highlights
- Introduced in Sitecore 9.1 and it builds on Federated Authentication introduced in Sitecore 9.0
- It is based on IdentityServer4 which is an OpenID Connect and OAuth 2.0 framework for ASP.NET Core
- Acts as a federation gateway to configure multiple identity providers
- As a federation gateway, this enables developers to focus on customization. This means IdentityServer can be customized to fit your Your developers can write code to adapt into what makes sense in your scenarios
- In Sitecore 9.1 and later, Sitecore Identity enabled by default
- The identityserver–contrib-membership package allows ASP.NET 2.0 Membership database to be used as an IdentityServer user store
Enabling Azure Active Directory (AzureAd) Identity Provider
By default, IdentityServer comes with AzureAd Identity Provider that is disabled. You can enable this provider using the following steps.
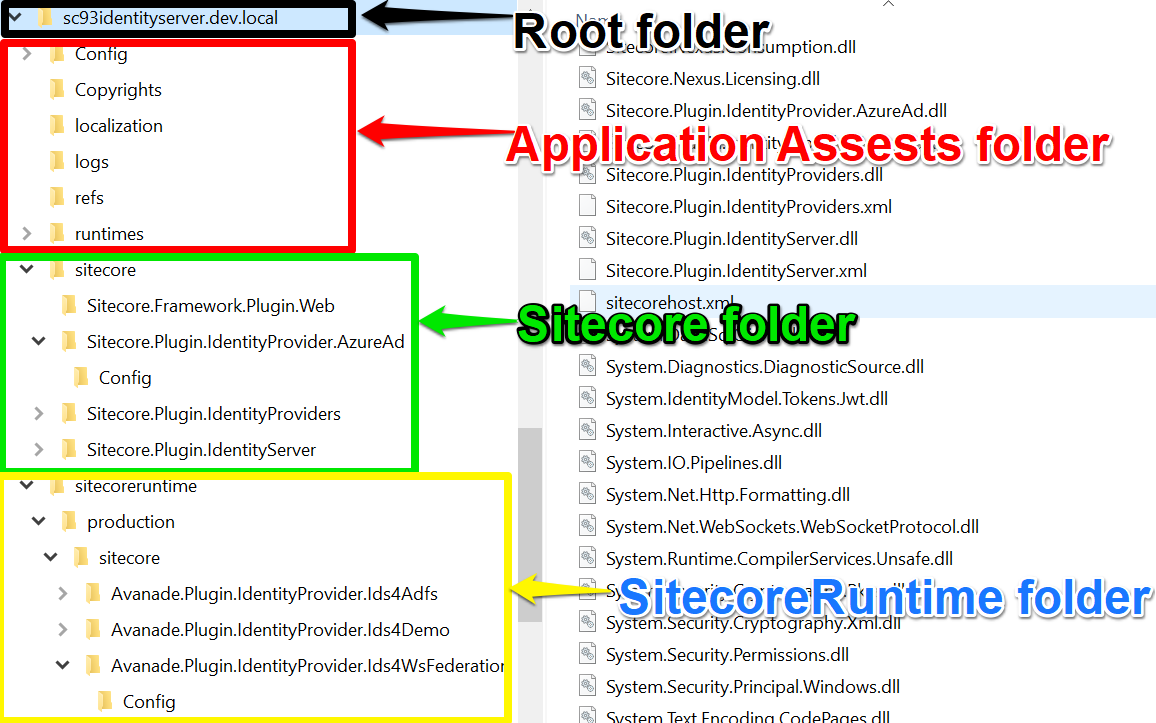
- Locate the Sitecore.Plugin.IdentityProvider.AzureAd plugin on your IndentityServer instance as shown in screenshot below:

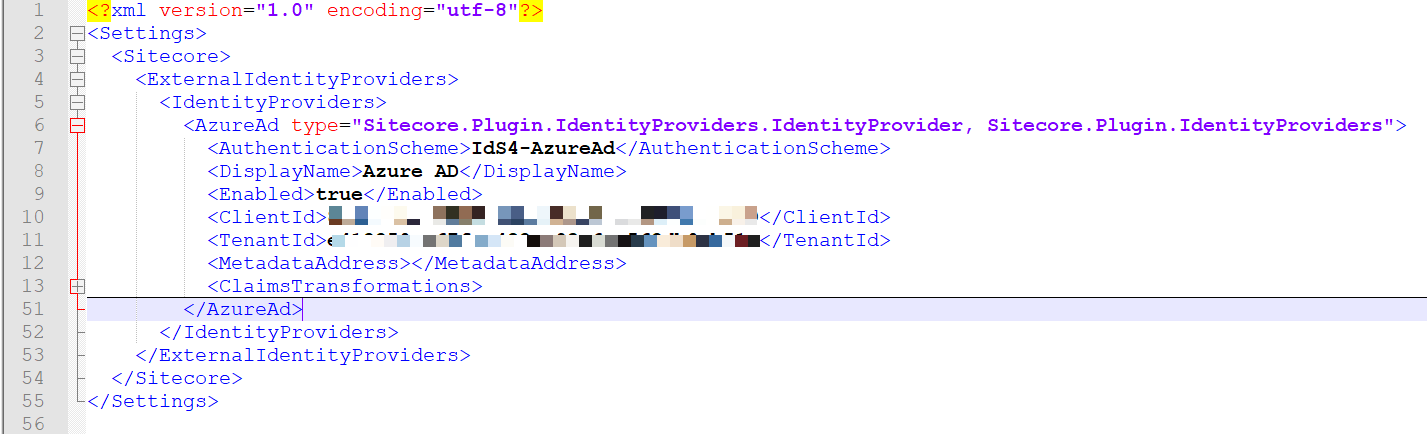
- DisplayName – specify the caption of the login button, for example “Login with Azure AD”
- Enabled – set this to true
- ClientId – specify your Azure registered Application ID. More guidance about this is provided later in this blog
- TenantId – specify your Azure Tenant ID for your registered application. More guidance about this is provided later in this blog
- ClaimsTransformations – specify claim mappings of AzureAd source claims to Sitecore Identify normalised claims. As a federation gateway, IdentitySever shields your client applications from the complexities of external providers by performing a claim transformation to what Identify server has control over.
Configuring Claims Transformations
By default, Sitecore Identity operates with the following custom scopes: sitecore.profile as an identity resource and sitecore.profile.api as an API resource.
You can find default scope definitions in the {SI_server_root_folder}\sitecore\Sitecore.Plugin.IdentityServer\Config\identityserver.xml file.
The sitecore.profile and sitecore.profile.api scopes both contain the following claims:
- name
- role
- http://www.sitecore.net/identity/claims/isAdmin
- http://www.sitecore.net/identity/claims/originalIssuer
The screenshot below shows examples of mapping AzureAd specific claims into normalised claims above in IdentityServer

To give users roles:
- Map a particular incoming claim to the appropriate role claims. The above screenshot shows an example of transforming the 8b0acd88-5eaf-4776-a637-d2952f2321ae Azure AD group to the sitecore\Developer role role
To make a user an administrator:
- Add http://www.sitecore.net/identity/claims/isAdmin and set the value to true (being an admin user in Sitecore is not about having a particular role). The screenshot above shows an example of making all users from f30226fc-16e1-4d7e-bf5d-2f4b8df553aa Azure AD group into Sitecore Administrator users
Mapping the IdentityServer normalised claims into Sitecore
Normalised claims are mapped into Sitecore using the configuration: sitecore:federatedAuthentication:propertyInitializer:maps node.
The {Sitecore_Instance_Root_Folder}\App_Config\Sitecore\Owin.Authentication.IdentityServer\Sitecore.Owin.Authentication.IdentityServer.config file has an example of this, as shown below:

As shown above there are mappings into IsAdministrator, Email and FullName
Configuring Azure AD Client on Azure Portal
Follow steps from Microsoft on authorizing access to web applications using OpenId Connect and Azure AD
Testing AzureAd External Provider End-to-End
If you have configured everything as expected, then you should see an additional login button on your IdentityServer login page as shown below
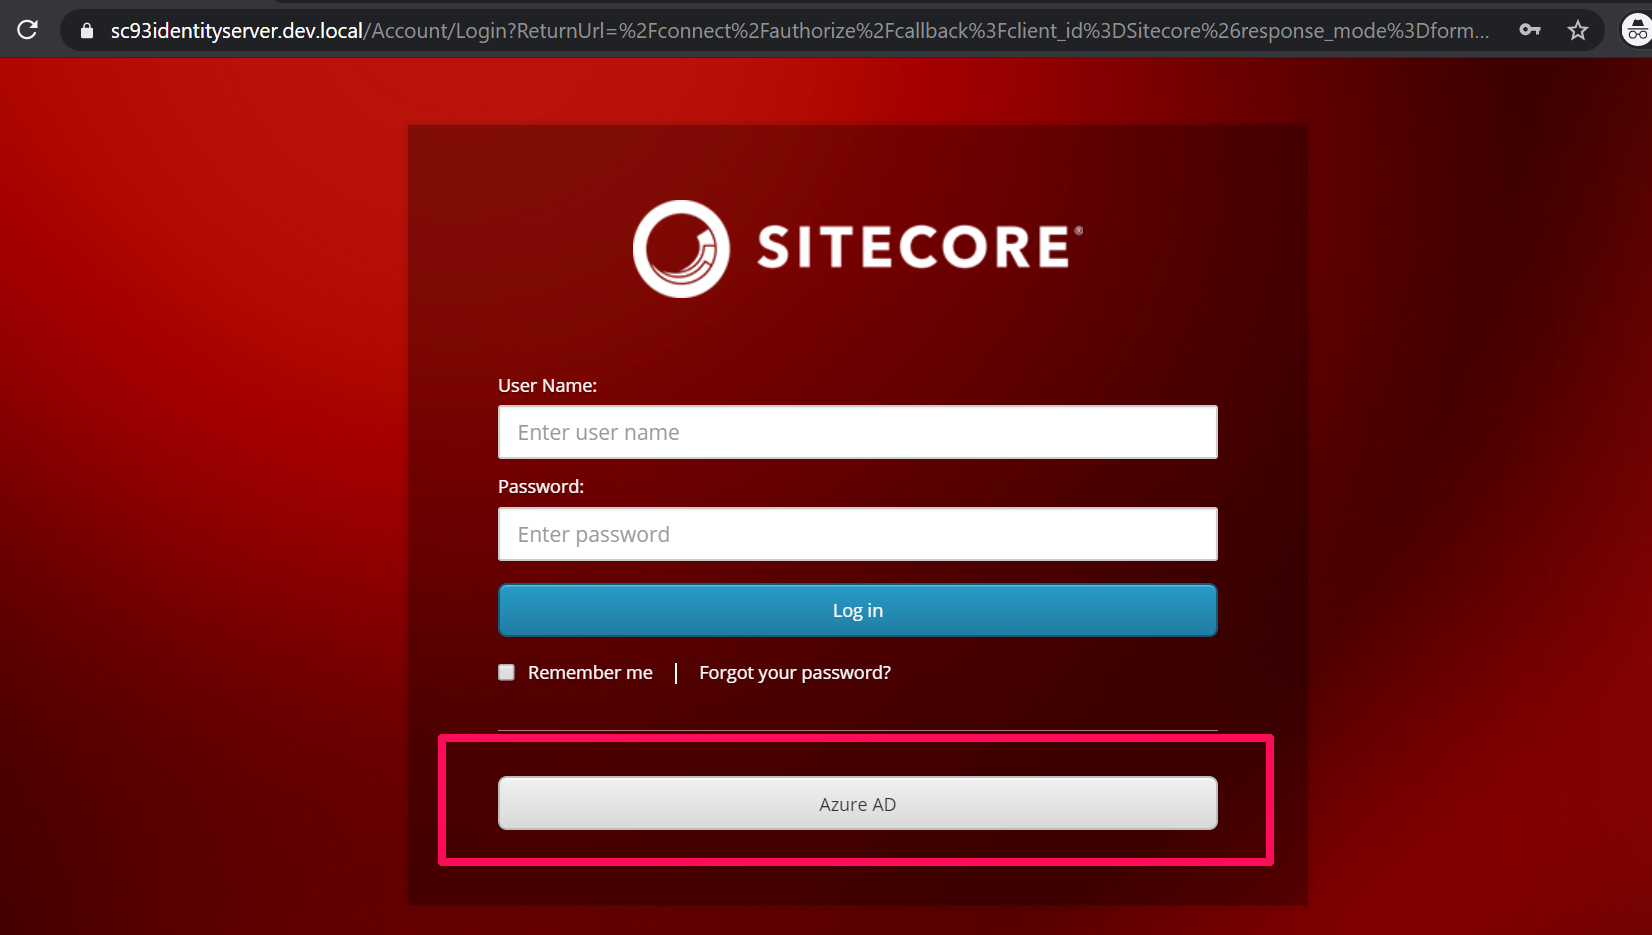
Clicking on the “Azure AD” button will redirect you to the AzureAd login page, from which you can then login with your AzureAd users
Sitecore user name generation
Once successfully logged in via AzureAd external provider, you should have this user persisted within Sitecore User Manager. The screenshot below shows a sample user from AzureAd
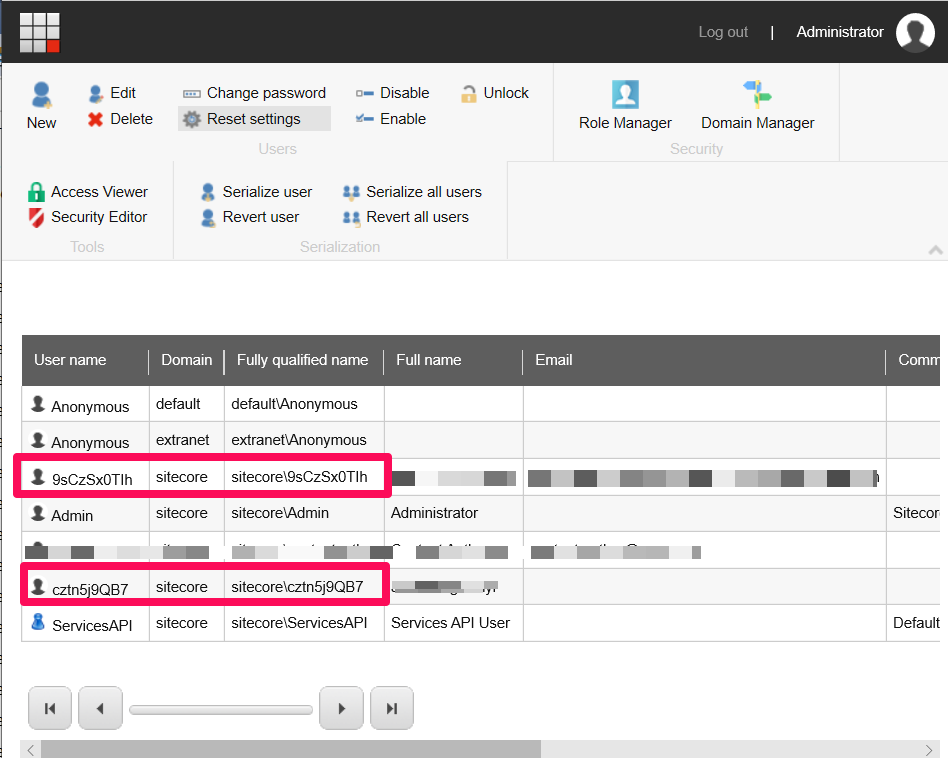
User names must be unique across a Sitecore instance. You cannot use user names from different external providers as Sitecore user names because this does not guarantee that the user names are unique.
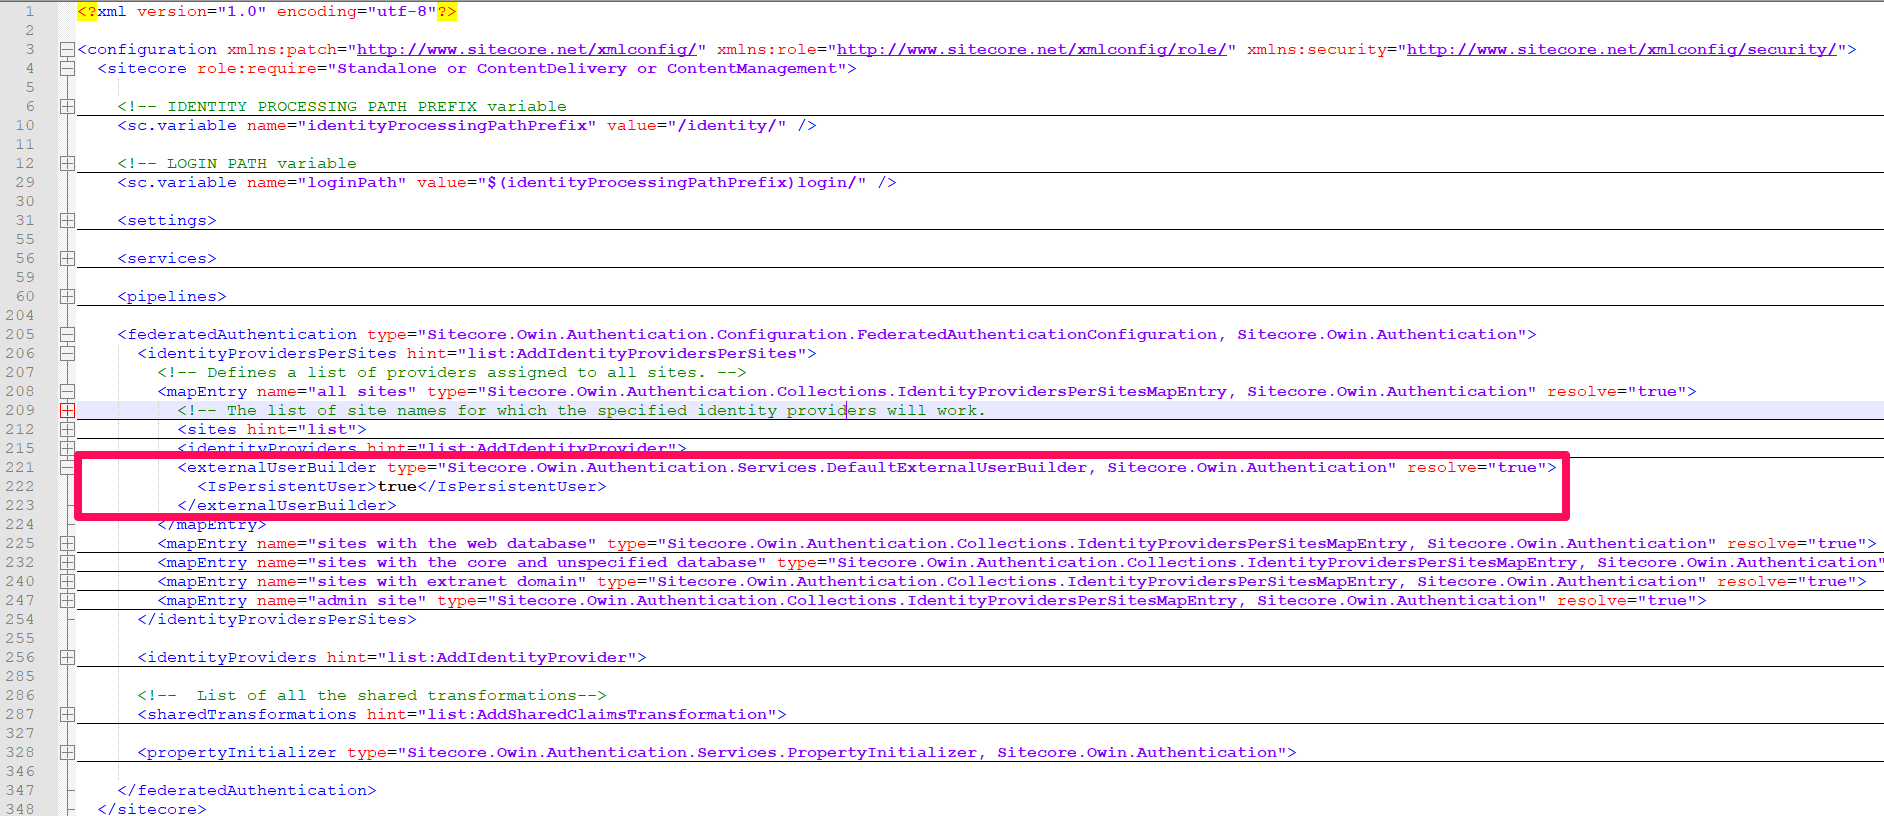
The DefaultExternalUserBuilder class creates a sequence of user names for a given external user name. It then uses the first of these names that does not already exist in Sitecore. The values in the sequence depend only on the external username and the Sitecore domain configured for the given identity provider.
Should you choose to customise your user names, you can provide your own implementation, such as the one suggested in Sitecore.StackExchange.com
Please note the default implementation is provided in Sitecore.Owin.Authentication.dll
Then you will need to register your custom implementation within the configuration file {Sitecore_Instance_Root_Folder}\App_Config\Sitecore\Owin.Authentication\Sitecore.Owin.Authentication.config
Screenshot below shows what you need to change:
Claims mappings troubleshooting using ASP.NET 2.0 Membership Tables
When performing end to end testing with your AzureAd external provider, you may come across issue with claim mappings into IdentityServer. The good news is that all the source claims originating from AzureAd are captured and stored in the Core database, within the ExternalUserData table, as shown in the screenshot below

Each external user successfully persisted will have an entry in this table, and the [Data] column has the JSON payload of their source claims, which looks like in the screenshot below

Ensure your IdentityServer claim mappings match those in this Json, otherwise your mapping will not work.
Conclusion
In this blog post, we examined what is Sitecore Identity Server in detail and explored the powerful feature of federation gateway. We also explored the default use case of Azure Active Directory and how to configure Sitecore Identity to work with Azure AD as external identity provider
In the fourth and final part of this four-part series, we will examine Creating and Extending Sitecore Host Plugins in detail. We will walk through creating a Sitecore Identity subprovider plugin for Active Directory Federation Services (ADFS)
Please feel free to leave us your feedback and/or comments below.