Sitecore Content Hub DevOps: Fixes to Import/Export v2 released on February 6 2026 included tickets I raised

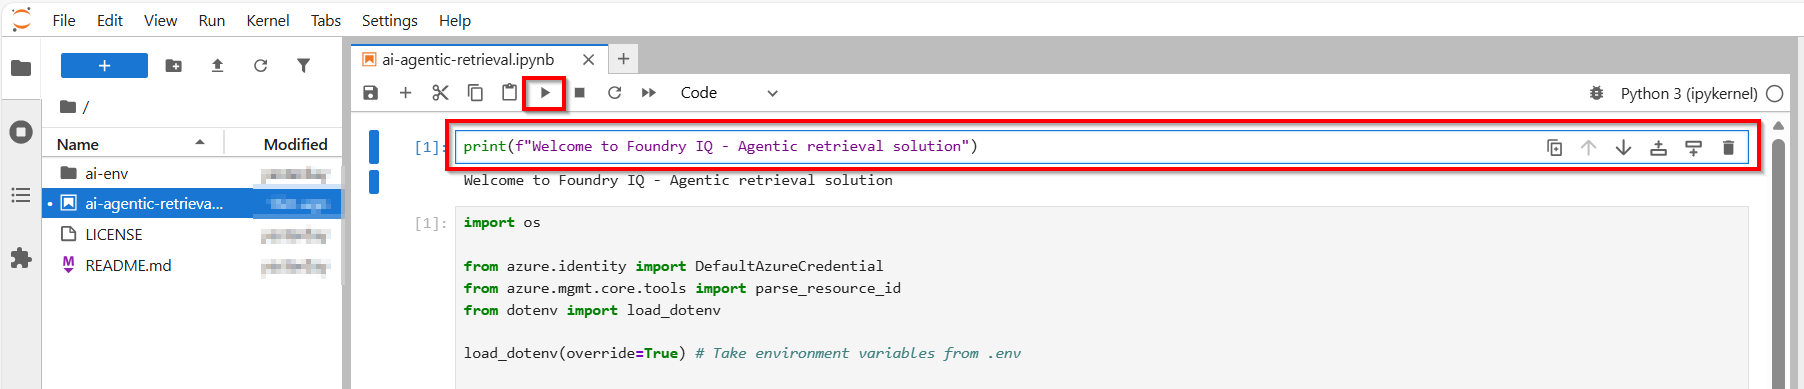
Context and background

Content Hub now has a new Import/Export engine (version 2) which should now be the default in your environments. Sitecore have updated the underlying Content Hub packaging structure to organise content by resource type rather than by export category as it was previously the case. This change makes navigation more straightforward and ensures greater consistency throughout the package. You can read more about the changes introduced in my previous blog post where I took a deep dive into the changes and impact on CI/CD pipelines.

While refactoring CI/CD pipelines to work with the new Import/Export engine in early January, I came across two main blockers which at the time meant I couldn’t progress any further.

That is when I reached out to Sitecore Support and raised two product issues, which Sitecore recognized and embarked on fixing them. These issues were MONE-55068 (support ticket CS0655802) and MONE-55007 (support ticket CS0655833).

The great news is that Sitecore are doing a fantastic job in channeling resources to get these fixes out of the door. In less than a month, we have fixes to the two issues above plus additional fixes that were shipped on February 6, 2026. This is incredible work from Sitecore!

Support ticket CS0655802 and product issue MONE-55068

Below is a screenshot from the issue I encountered when importing a brand new Taxonomy definition.

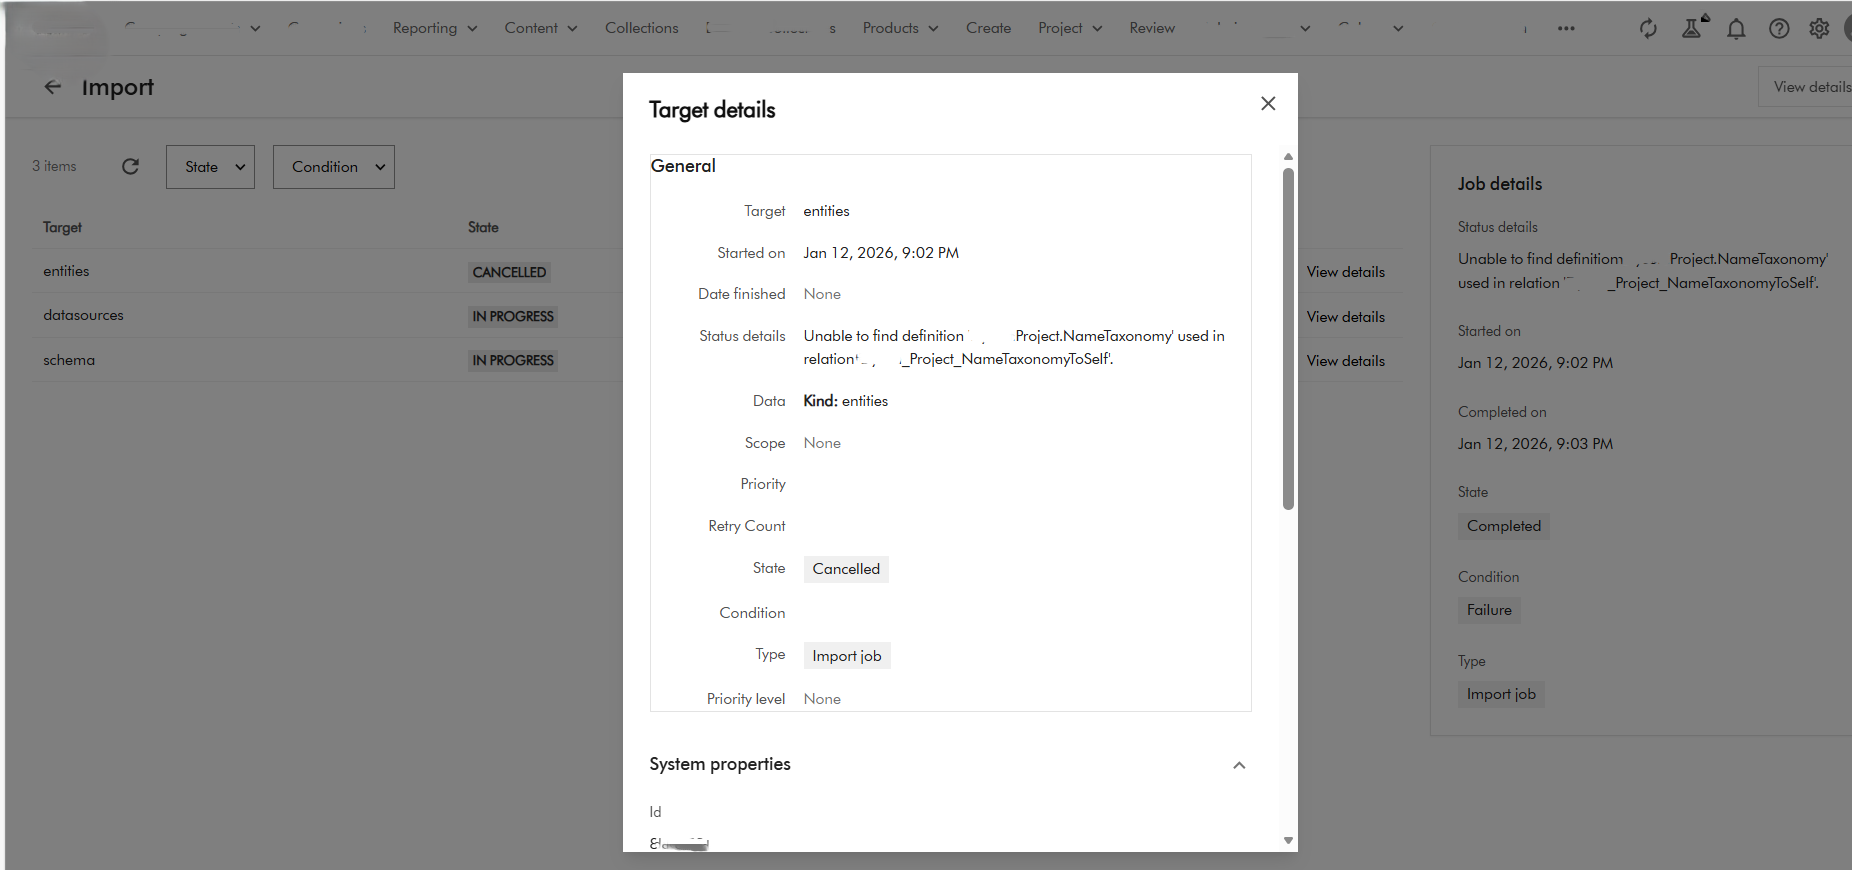
The raw error message is also shown below

Raw Output: xxxx Details Unable to find definition 'XXXX.Project.NameTaxonomy' used in relation 'XXXX_Project_NameTaxonomyToSelf'.
filename: entities.zip import_type: Package import_dry_run_feature: True Targets Target: entities Status details:
Unable to find definition 'XXXX.Project.NameTaxonomy' used in relation 'XXXX_Project_NameTaxonomyToSelf'.
Kind: entities Target: datasources Status details: Kind: datasources Target: schema Status details: Kind: schema

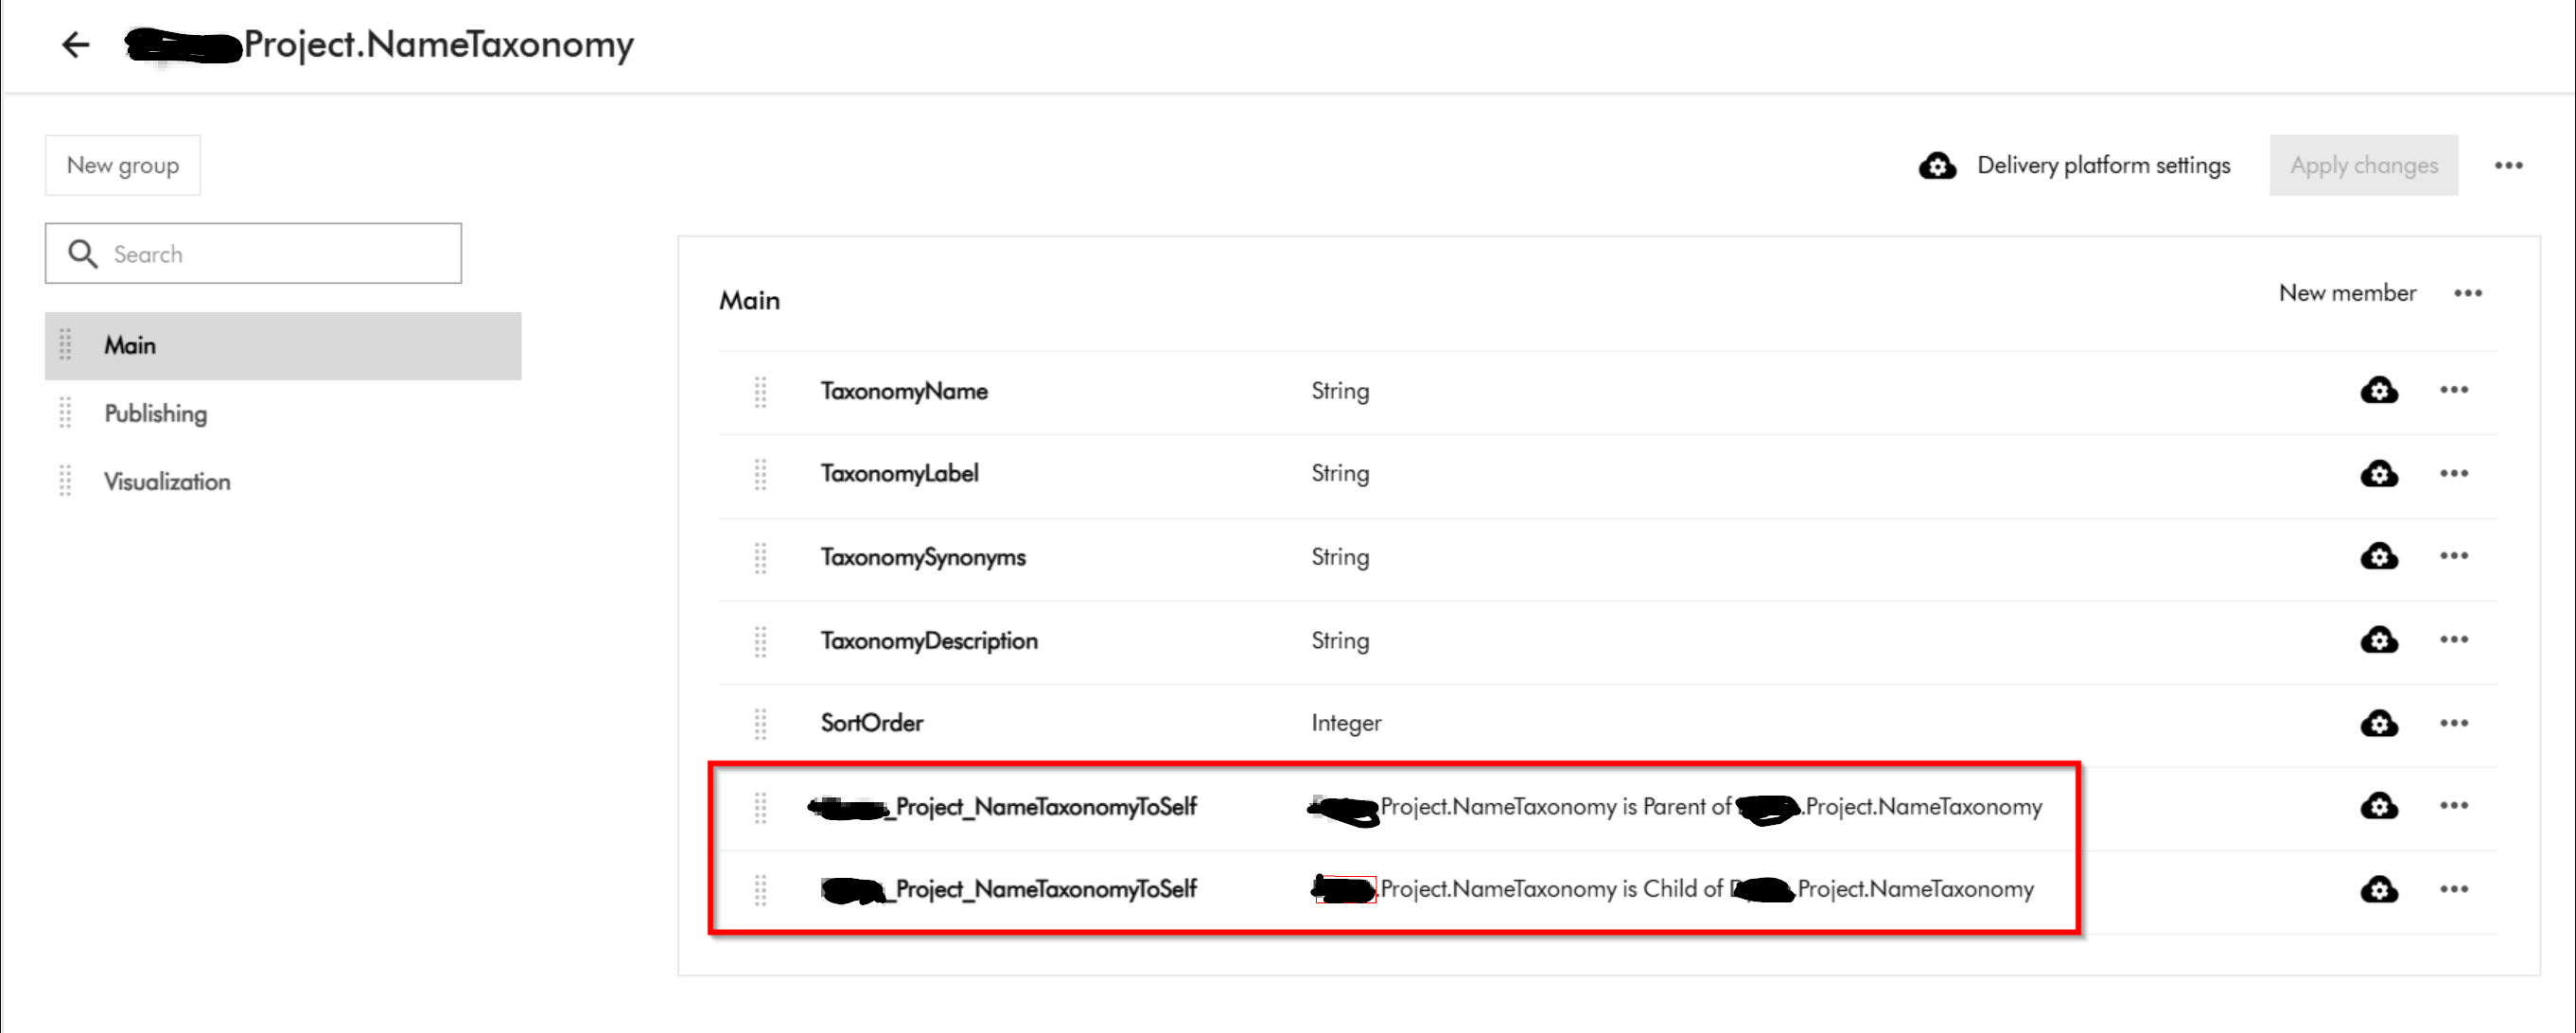
This was a clear defect within the Product since we know Taxonomy entities have self-relations and therefore should not be the reason a taxonomy entity will fail to import successfully. Below is my taxonomy definition

Fix provided by Sitecore

Fixed an Import/Export v2 issue that caused an error when importing packages with new definitions. (MONE-55068)

Support ticket CS0655833 and product issue MONE-55007

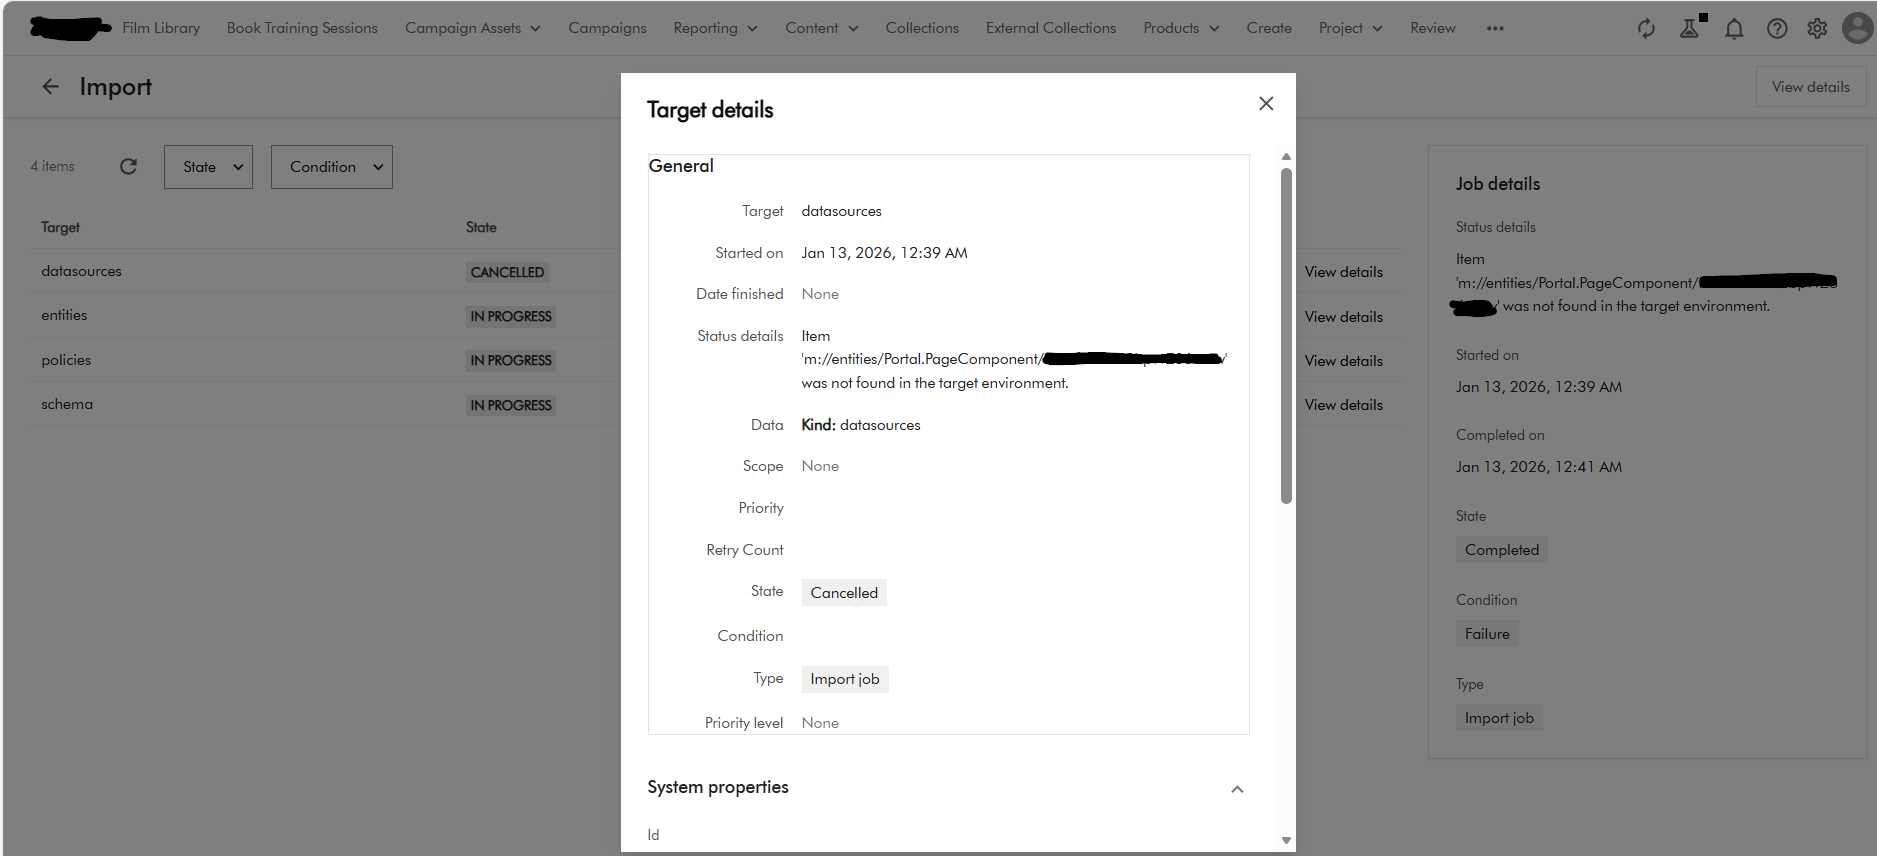
Below is a screenshot of the error I encountered when using CLI to import Pages. This error seems logically related to one above affecting self-relations in taxonomy definitions.

For pages, the issue was caused by one of the components related to the parent page not existing and causing the page import to fail. You could have thought the Import/Export engine should resolve dependencies, but clearly this was a Product issue.

Fix provided by Sitecore

Fixed an Import/Export v2 issue that caused an error when importing Creation components linked to Search components. (MONE-55007)

Support ticket CS0648899 and product docs issue MDOC-5887

While refactoring the CI/CD I noticed lack of sufficient documentation to detail what was changed in the new packaging architecture as part of Import/Export v2. I raised another support ticket CS0648899 with Sitecore, which was duly registered as MDOC-5887 to provided the needed clarity in the official docs.

I am happy to report that Sitecore have also addressed the documentation gap and fixed the MDOC-5887

Other resolved issues with Import/Export v2 engine

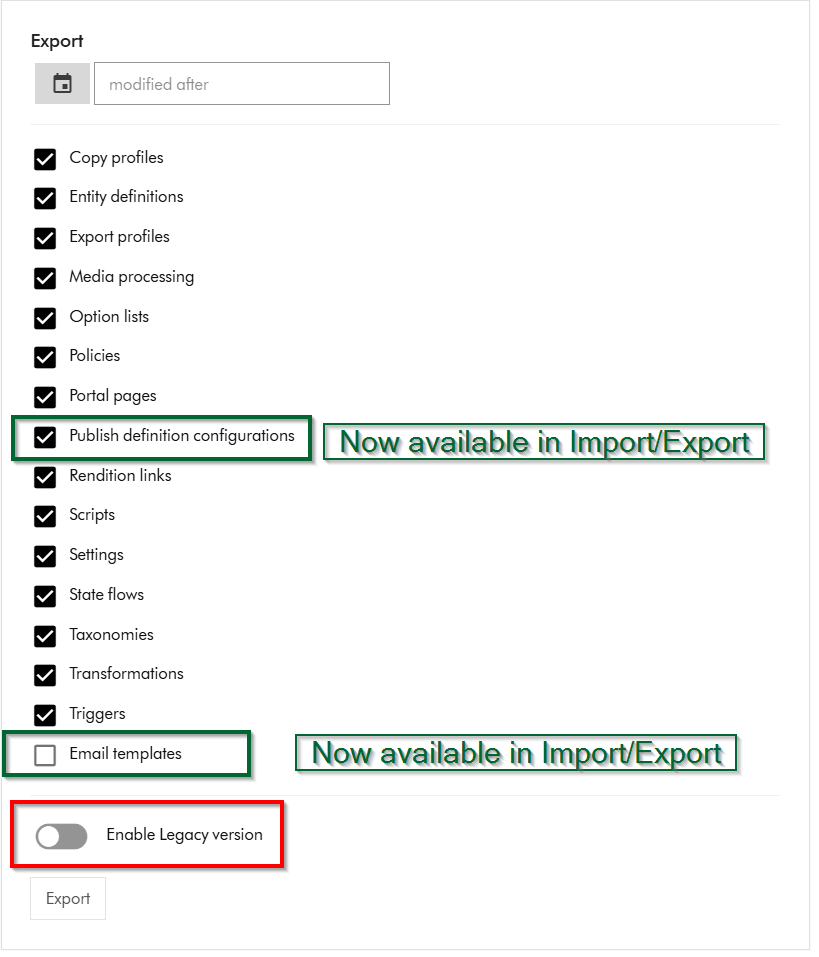
Below are the three other fixes shipped on February 6, 2026

  • Import/Export v2 now excludes M.Portal.Version entities when exporting to prevent missing-entity errors during import. (MONE-53876)
  • Import/Export v2 now correctly preserves and updates user group names with leading or trailing whitespace during import, preventing duplicate groups and import failures. (MONE-54335)
  • Import/Export v2 operations no longer swap labels between parent and child when the relation name is the same and there are no actual changes in the imported package. (MONE-54614)

Updating your CI/CD pipelines

As already covered in my previous post, it is very straight forward to update your existing CI/CD pipelines to work with the new package architecture. In simple terms, you will need to simply map your previous logic to work with the new package architecture. Ensure your Content Hub environments are re-baselined within your source control as well.

Next steps

In this blog post, I have looked at the list of issues that Sitecore have resolved for the new Content Hub Import/Export engine. I also dived into my two support tickets that I had raised that were affecting the Import/Export v2, thereby contributing to Product enchantments. I noted and appreciated how quickly Sitecore teams worked to resolve these issues within a month. I hope your Content Hub CI/CD pipelines are more robust with all these fixes going forward.

Please let me know if you have any comments above and would like me to provide further or additional details.

Foundry IQ – Agentic retrieval solution – part 2

Context

In this blog post, we are going to deep dive into the end-to-end solution, including a walk through of the source code. For background, please ensure you have read part 1 of the Foundry IQ solution.

I also presume you now have your Foundry Project as well as your local development environment setup as per the guidance provided in part 1.

Let us jump in!

Is your local Dev environment ready

In part 1, we covered Local dev environment setup. You can access the source code used in this solution from my GitHub repository to get started.

Your solution should look like the screenshot below:

Ensure you have a file named .env within the solution folder, where we are configuring the endpoints and other settings that we need for this solution.

These endpoints and resource ID are available in the Azure portal (within Foundry portal as shown below).

  • AZURE_SEARCH_ENDPOINT is on the Overview page of your search service.
  • PROJECT_ENDPOINT is on the Endpoints page of your project.
  • PROJECT_RESOURCE_ID is on the Properties page of your project.
  • AZURE_OPENAI_ENDPOINT is on the Endpoints page of your project’s parent resource

Below is a sample .env file with these endpoints and settings populated and explained

AZURE_SEARCH_ENDPOINT = https://{your-service-name}.search.windows.net
PROJECT_ENDPOINT = https://{your-resource-name}.services.ai.azure.com/api/projects/{your-project-name}
PROJECT_RESOURCE_ID = /subscriptions/{subscription-id}/resourceGroups/{resource-group-name}/providers/Microsoft.CognitiveServices/accounts/{account-name}/projects/{project-name}
AZURE_OPENAI_ENDPOINT = https://{your-resource-name}.openai.azure.com
AZURE_OPENAI_EMBEDDING_DEPLOYMENT = text-embedding-3-large
AGENT_MODEL = gpt-4.1-mini

Activate the environment

Use the steps below to activate your Python virtual environment. These were already covered in part 1, however I am sharing them again here for your convenience.

  • For macOS / Linux (in Terminal) source ai-env/bin/activate
  • For Windows (in Command Prompt or PowerShell): .\ai-env\Scripts\activate
  • You’ll know it worked because your terminal prompt will change to show the name of your environment, like this: (ai-env) C:\Users\YourName\Desktop\MyProject>.

Install required packages

With the environment active, install required packages 

#Bash
pip3 install azure-ai-projects==2.0.0b1 azure-mgmt-cognitiveservices azure-identity ipykernel dotenv azure-search-documents==11.7.0b2 requests openai

Authenticate with Azure CLI

For keyless authentication with Microsoft Entra ID, sign in to your Azure account.

From your Terminal, run az login as shown below. Follow the prompts to authenticate

If you have multiple subscriptions, select the one that contains your Azure AI Search service and Microsoft Foundry project.

Start Jupyter Notebook

To start the application, type:

#Bash
jupyter-lab

If successful, you will have JupyterLab launcher accessible on your browser. For example, on http://localhost:8888/lab

Start building and running code

At this point, we are setup to run code snippets in our ai-agentic-retrieval.ipynb Notebook, as shown below

How to run Jupyter Notebook code listings

To run the code, simply select and highlight the cell or code block within the Jupyter Notebook. Once highlighted, press the ‘Run’ or ‘Play’ button on the top navigation bar.  Alternatively, you can press Shift + Enter keyboard short cuts as well.

Any expected response or output will then appear below the cell or code block, as shown below.

Step 1 – run code to Load environment variables

The following code loads the environment variables from your .env file and establishes connections to Azure AI Search and Microsoft Foundry.

Step 2 – run code to Create a search index

In Azure AI Search, an index is a structured collection of data. The following code creates an index to store searchable content for your knowledge base.

The index schema contains

  • field for document identification
  • field for page content
  • embeddings
  • configurations for semantic ranking and vector search

Step 3 – run code to Upload documents to the index

The following code populates the index with JSON documents from NASA’s Earth at Night e-book. As required by Azure AI Search, each document conforms to the fields and data types defined in the index schema.

Step 4 – run code to Create a knowledge source

A knowledge source is a reusable reference to source data. The following code creates a knowledge source that targets the index you previously created.

source_data_fields specifies which index fields are included in citation references. This example includes only human-readable fields to avoid lengthy, uninterpretable embeddings in responses.

Step 5 – run code to Create a knowledge base

The following code creates a knowledge base that orchestrates agentic retrieval from your knowledge source. The code also stores the MCP endpoint of the knowledge base, which your agent will use to access the knowledge base.

For integration with Foundry Agent Service, the knowledge base is configured with the following parameters:

  • output_mode is set to extractive data, which provides the agent with verbatim, unprocessed content for grounding and reasoning. The alternative mode, answer synthesis, returns pregenerated answers that limit the agent’s ability to reason over source content.
  • retrieval_reasoning_effort is set to minimal effort, which bypasses LLM-based query planning to reduce costs and latency. For other reasoning efforts, the knowledge base uses an LLM to reformulate user queries before retrieval.

Step 6 – run code to Set up a project client

Use AIProjectClient to create a client connection to your Microsoft Foundry project. Your project might not contain any agents yet, but if you’ve already completed this tutorial, the agent is listed here.

Step 7 – run code to Create a project connection

The following code creates a project connection in Microsoft Foundry that points to the MCP endpoint of your knowledge base. This connection uses your project managed identity to authenticate to Azure AI Search.

Step 8 – run code to Create an agent with the MCP tool

The following code creates an agent configured with the MCP tool. When the agent receives a user query, it can call your knowledge base through the MCP tool to retrieve relevant content for response grounding.

The agent definition includes instructions that specify its behavior and the project connection you previously created. Based on our experiments, these instructions are effective in maximizing the accuracy of knowledge base invocations and ensuring proper citation formatting.

Review of Foundry portal changes

At this point, you can explore Foundry portal to review our agent, the knowledge base among other resources we created for this solution,

Screenshot 1 – Agents page

Screenshot 2 – knowledge base page

Screenshot 3 – our knowledge base details page

Screenshot 4 – our knowledge source (showing Azure AI Search index)

Step 9 – run code to Chat with the agent

Your client app uses the Conversations and Responses APIs from Azure OpenAI to interact with the agent.

The following code creates a conversation and passes user messages to the agent, resembling a typical chat experience. The agent determines when to call your knowledge base through the MCP tool and returns a natural-language answer with references. Setting tool_choice="required" ensures the agent always uses the knowledge base tool when processing queries.

The response should be similar to the following:

Step 10 – run code to Clean up resources

When you work in your own subscription, it’s a good idea to finish a project by determining whether you still need the resources you created. Resources that are left running can cost you money.

In the Azure portal, you can manage your Azure AI Search and Microsoft Foundry resources by selecting All resources or Resource groups from the left pane.

You can also run the following code to delete individual objects:

Full source code and references

You can access the full source code used in this solution from my GitHub repository. It is worth mentioning that I have adopted my solution from a similar tutorial from Microsoft Learn page.

Next steps

In this blog post, we deep dived into part 2 of our Foundry IQ – Agentic retrieval solution. We leveraged Jupyter Notebook to run through the various steps for our source code for implementing the end-to-end solution. The complete code listing in GitHub repository was also shared for your reference.

Stay tuned for future posts, feel free to leave us comments and feedback as well.