
I previously blogged about Sitecore Stream Brand Management and looked at a high level architecture on how the Brand Kit works under the hood. Today, I continue this conversation and look at a more detailed step-by-step guide on how you can start integrating with the Stream Brand Management APIs.
As a quick recap, Sitecore have evolved the Stream Brand Management to provide a set of REST APIs to manage life-cycle of the brand kit as well as getting a list of all brand kits. You can now use REST APIs to create a new brand kit, including sections and subsections, and create or update the content of individual subsections. You can also upload brand documents and initiate the brand ingestion process.
- Brand Management REST API (brand kits, sections/subsections)
- Document Management REST API (upload/retrieve brand documents).
These new capabilities opens opportunities such as allowing you to ingest brand documents directly from your existing DAM. You could also integrate them with your AI agents so that you can enforce you brand rules
Step 1 – Register and get Brand Kit keys
Brand Management REST APIs use OAuth 2.0 to authorize all REST API requests. Follow these steps below:
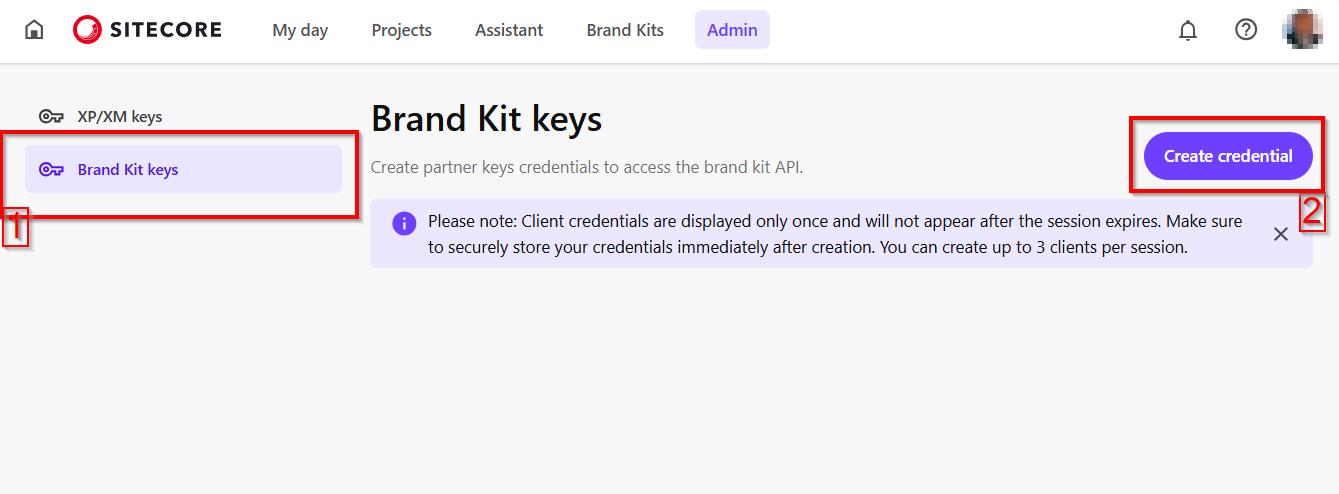
a) From your Sitecore Stream portal navigate to the the Admin page and then navigate to Brand Kit Keys section, as shown below.

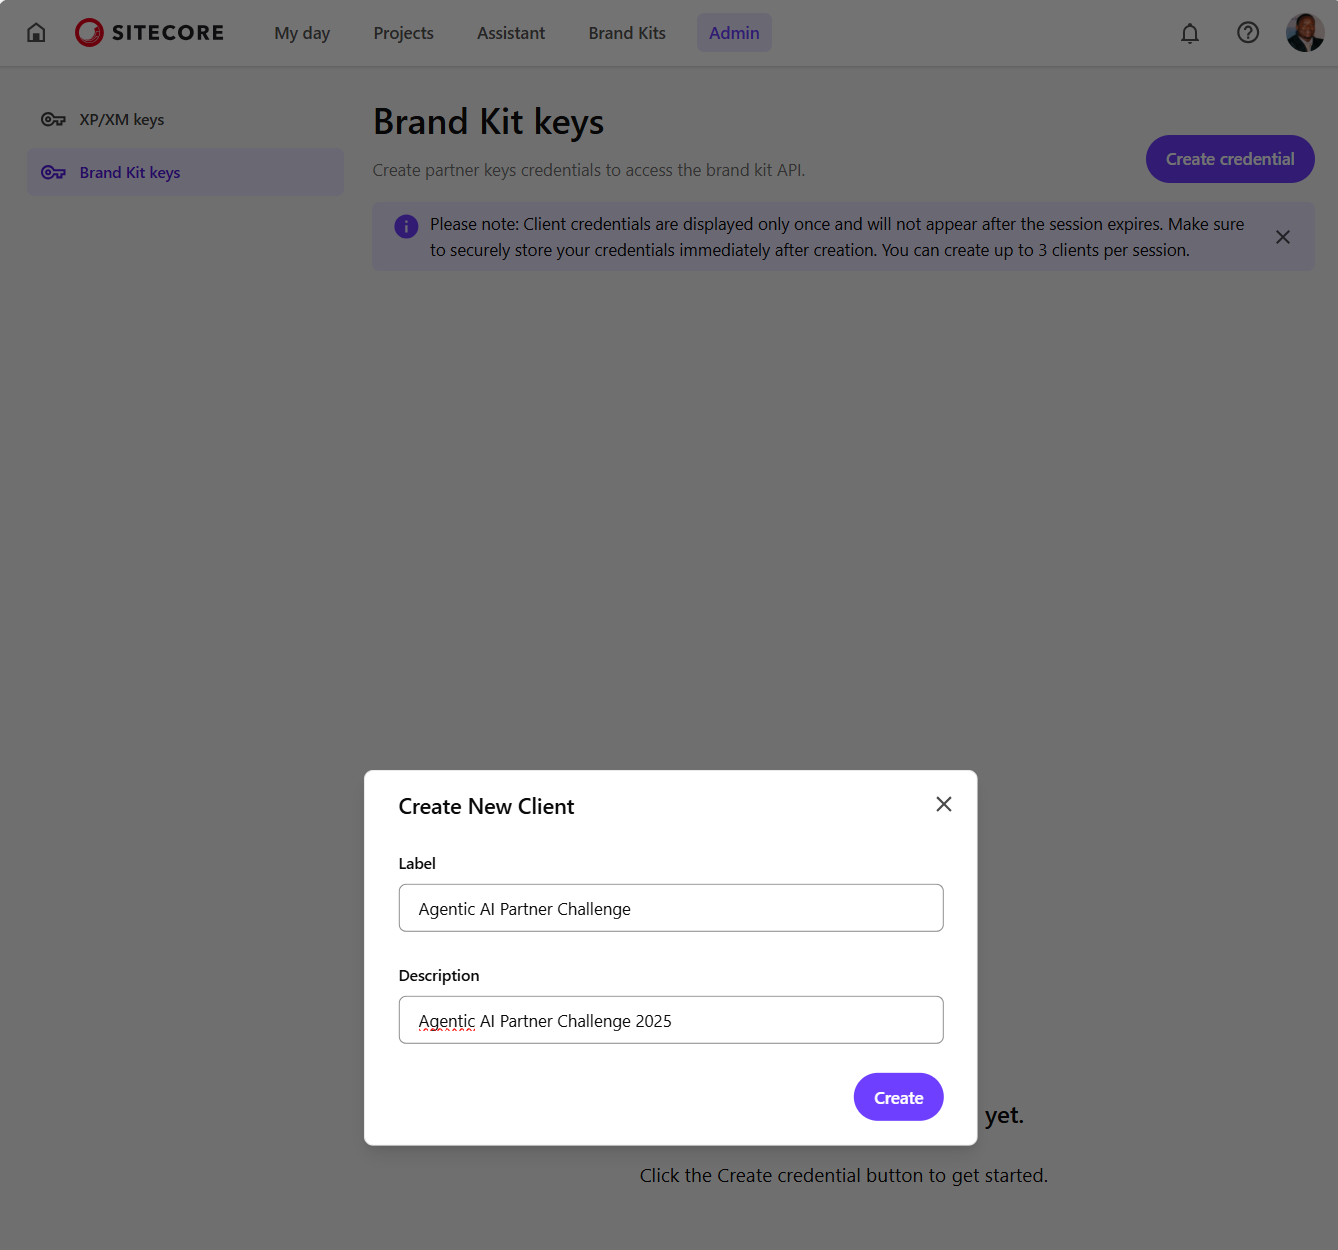
b) Then click on Create credential button which opens the Create New Client dialog similar to one shown below. Populate with the required client name and a description, then click on Create
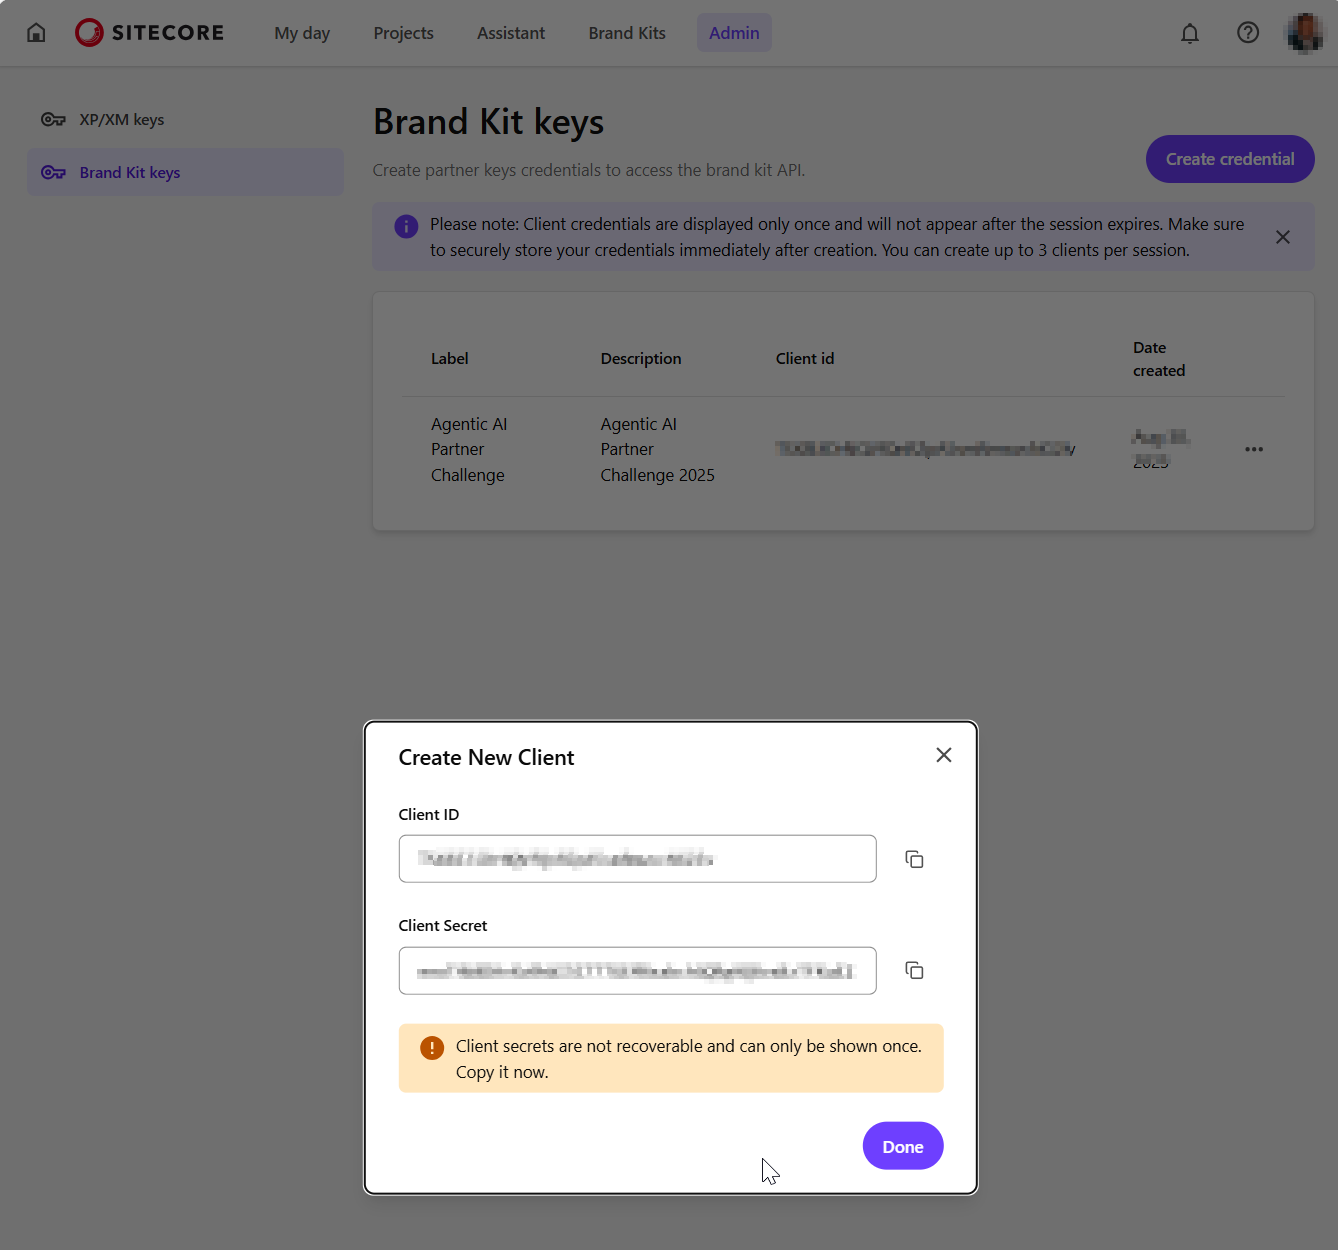
c) Your new client will be created as shown below. Ensure you copy the Client ID and Client Secret and keep them in a secure location. You will not be able to view the Client Secret after you close the dialog.
Step 2 – Requesting an access token
You can use your preferred tool to a request the access token. In the sample below, I am leveraging Postman to send a POST request to the https://auth.sitecorecloud.io/oauth/token endpoint.
- client_id This is the Client ID from previous step
- client_secret This is the Client Secret from previous step
- grant_type This defaults to
client_credentials - audience This defaults
https://api.sitecorecloud.io
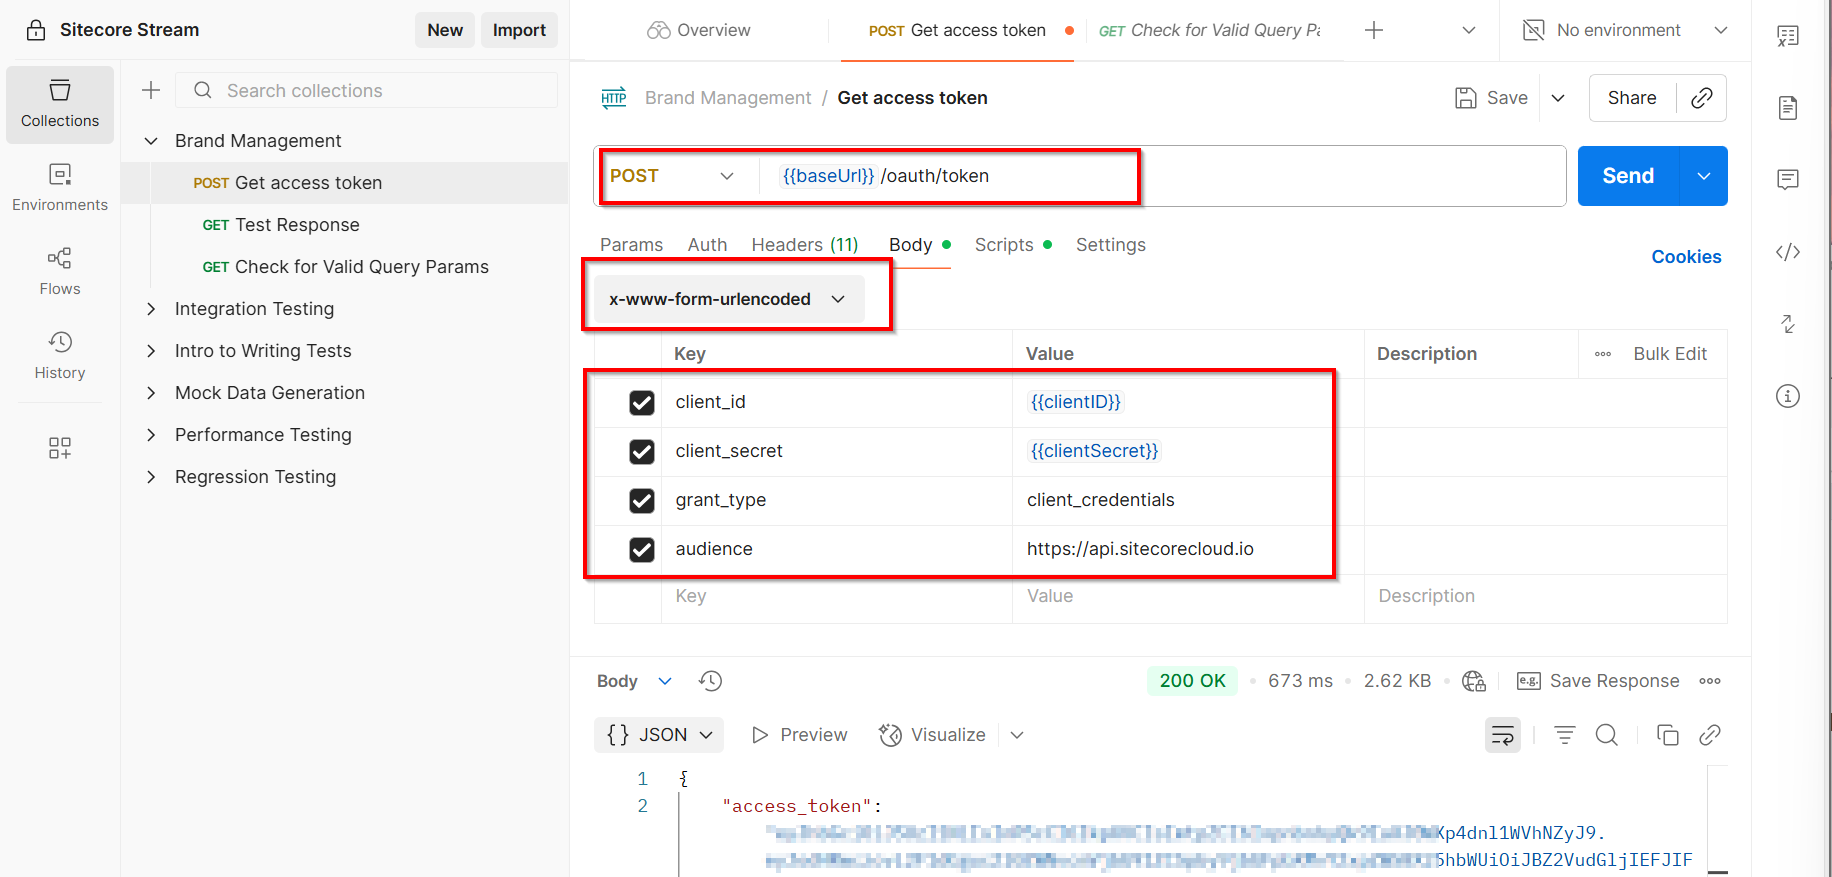
If successful, you will get the response that contains the access_token as shown below
  {
    "access_token": "{YOUR_ACCESS_TOKEN}",
    "scope": "ai.org.brd:w ai.org.brd:r ai.org.docs:w ai.org.docs:r ai.org:adminai.org.brd:w ai.org.docs:w ai.org:admin",
    "expires_in": 86400,
    "token_type": "Bearer"
  }
Step 3 – Query Brand Kit APIs
You can start making REST APIs securely by using the access token in the request header.
Get list of all brand kits
Below is a sample request that I used to get a list of available brand kits for my organisation. I am leveraging Postman to send a GET request to the https://ai-brands-api-euw.sitecorecloud.io/api/brands/v1/organizations/{{organizationId}}/brandkits endpoint.
You can get your organisationId from your Sitecore Cloud portal
https://portal.sitecorecloud.io/?organization=org_xyz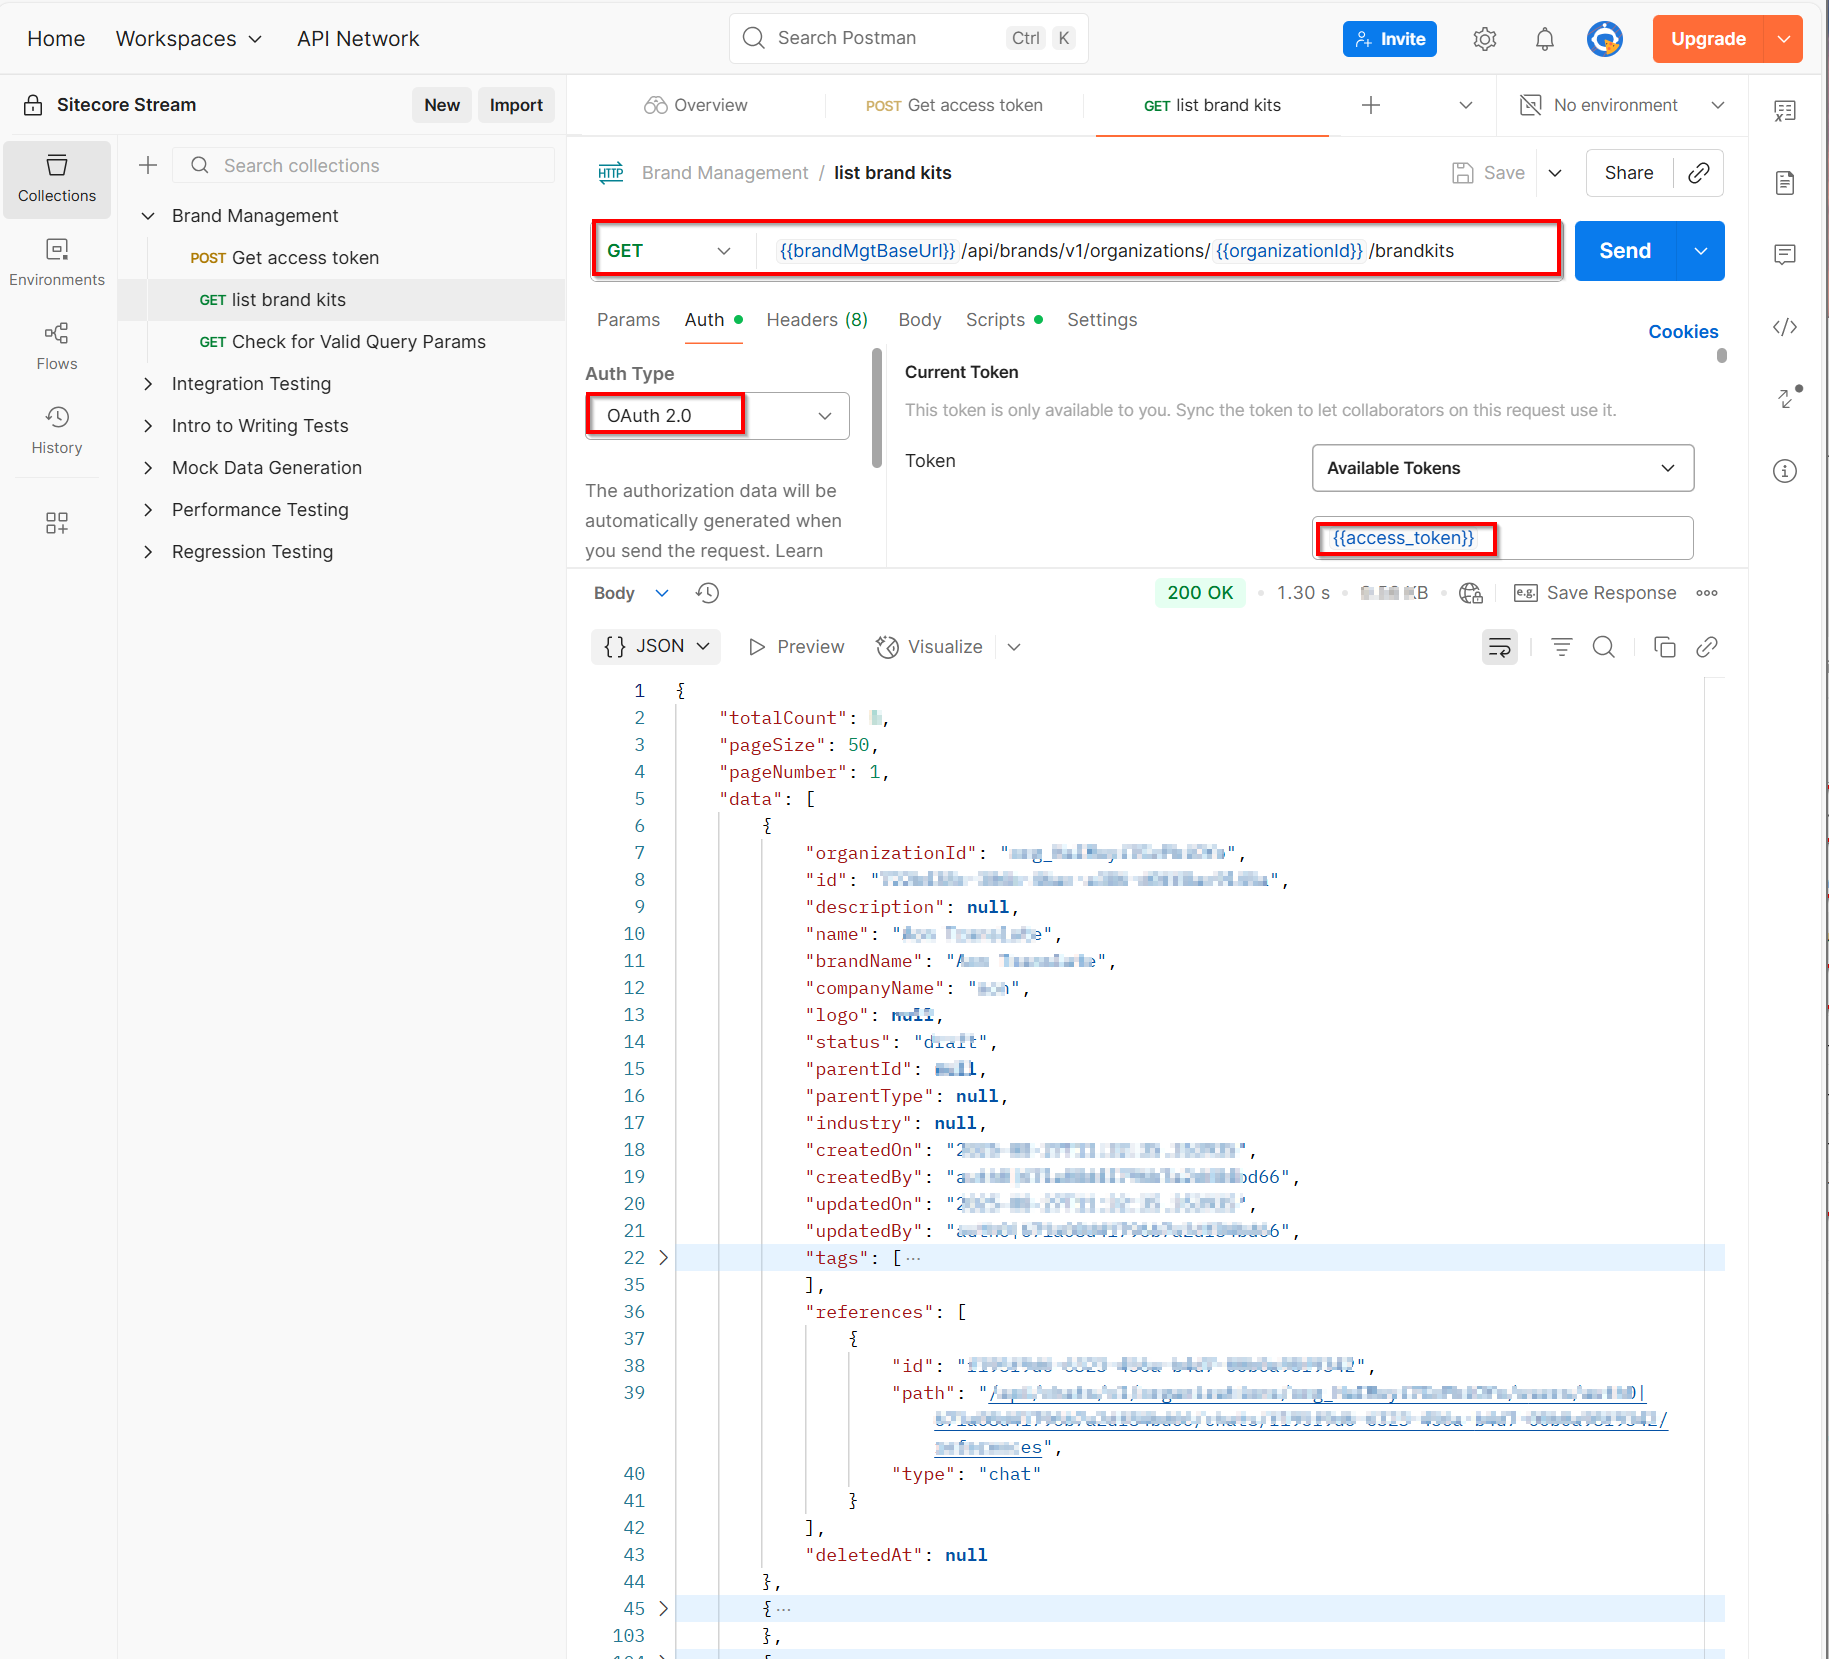
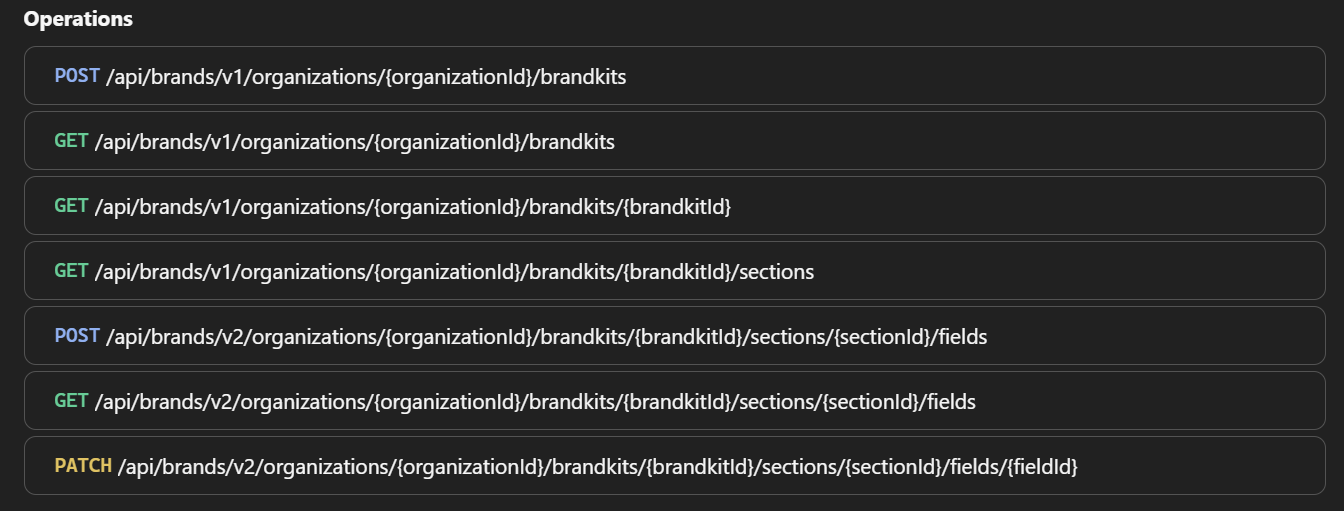
Full list of Brand Kit REST APIs
Sitecore API Catalog lists all the REST APIs plus sample code on how to integrate with them. Below is a snapshot of the list of operations at the time of writing this post:
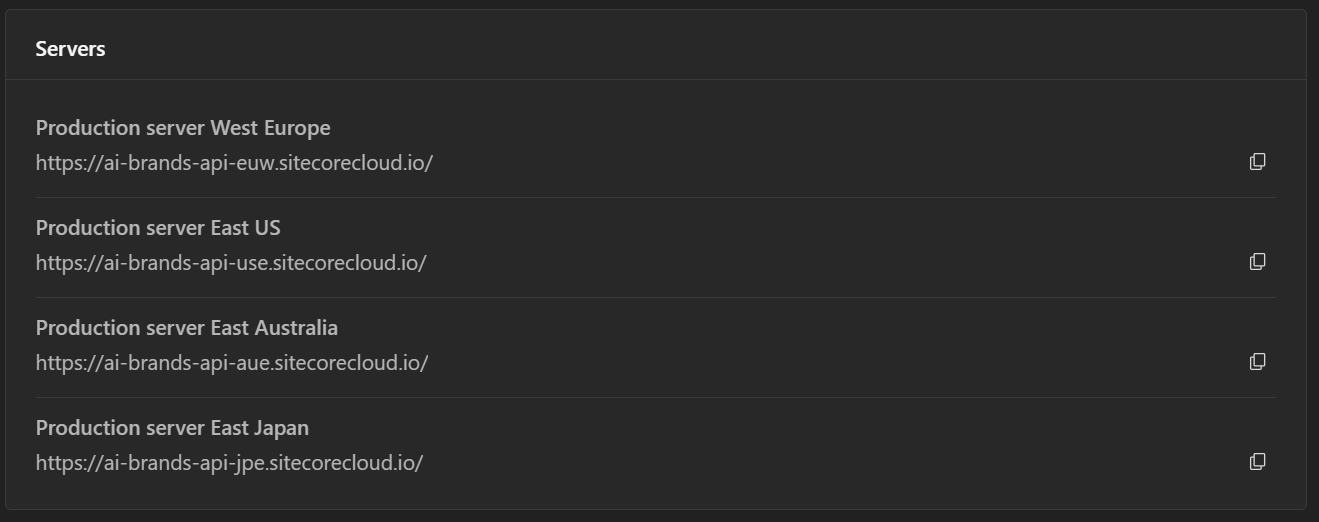
Ensure you are using the correct Brand Management server. Visit Sitecore API catalog for list of all the servers. Below is a snapshot of the list at the time of writing this post:
Next steps
Have you started integrating Sitecore Stream Brand Management APIs yet? I hope this step-by-step guide helps you start exploring the REST APIs so you can integrate them with your systems.
Stay tuned for future posts, feel free to leave us comments and feedback as well.
