

Background
I recently shared a video playlist on how I built a Content Hub custom connector that allows you to publish video assets into your existing video streaming platforms
On this blog post, I wanted to share details on how to setup your Visual Studio project and solution as well us how to deploy or publish the connector to your Microsoft Azure cloud.
Create a function app project
Using latest Visual Studio IDE, create a new Azure Functions project, using C# template as shown below

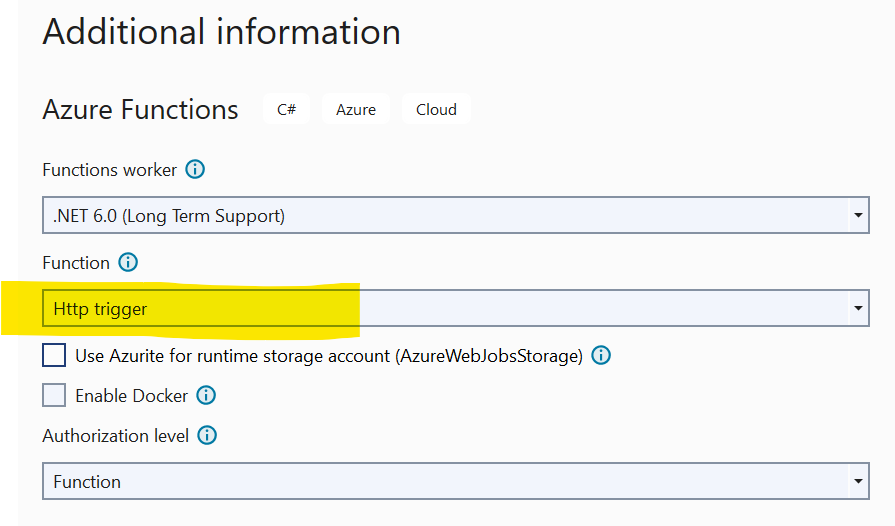
Choose a meaningful name for your project and progress through the next step. Ensure you select Http triggered function as show below.
Finalise the create project wizard to get your project created.
Add Content Hub web SDK reference
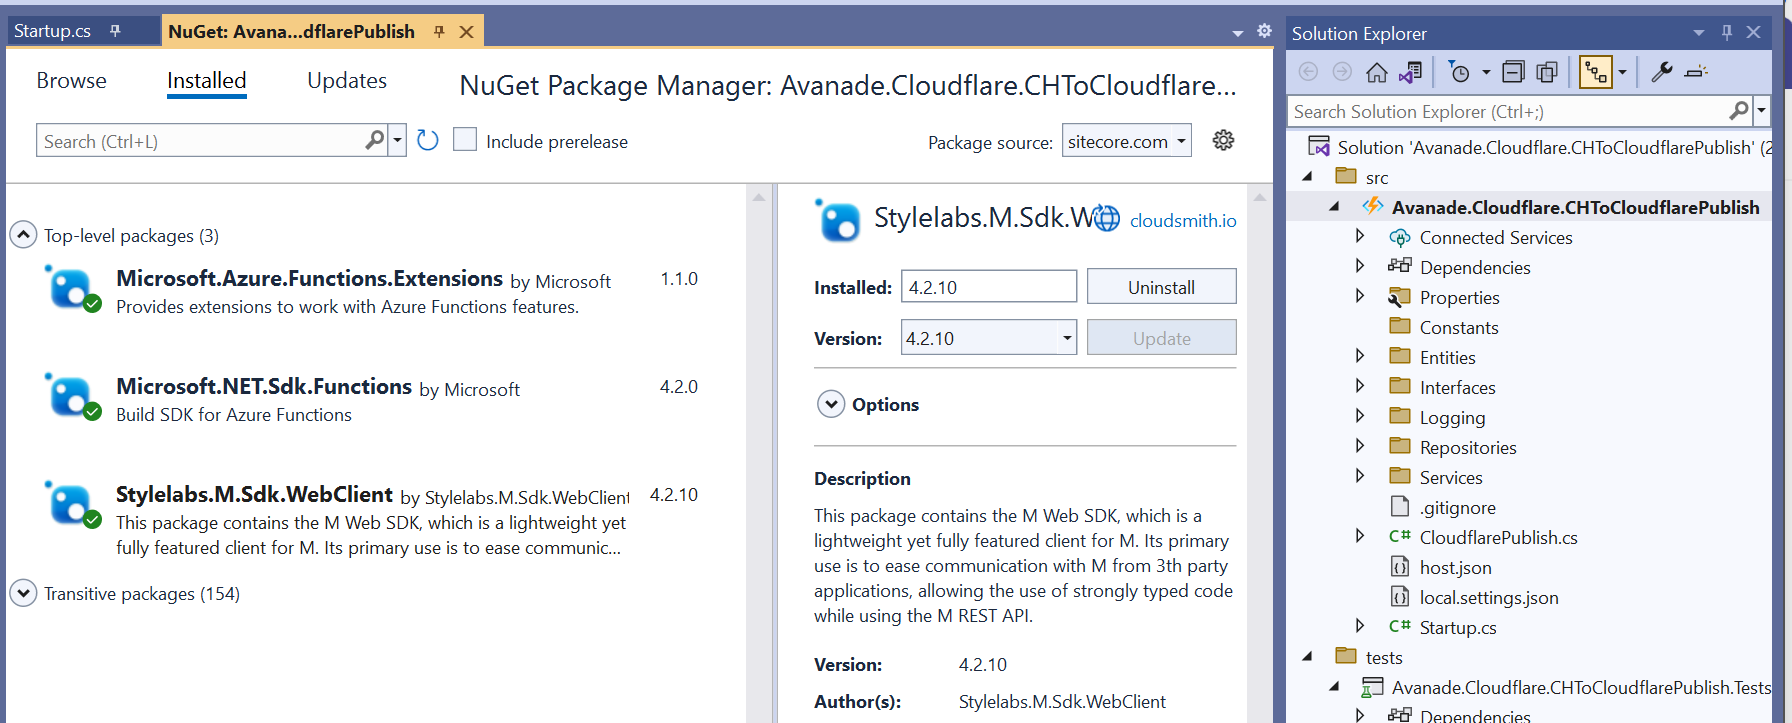
As shown below, add a reference to Stylelabs.M.Sdk.WebClient NuGet Package to your project.
In addition, ensure you have added the Microsoft NuGet Packages below to enable dependency injection to your Func app.
Enabling FunctionStartup in your Func app
To enable dependency injection in your project, add a Startup class similar to the one shown below. The Startup class needs to inherit the FunctionStartup, which allows us to configure and register our interfaces.

Creating Function App on Microsoft Azure portal
As explained in the video playlist, you will need to publish your Func app into your Microsoft Azure subscription.
You will need to create a Function App app in your Microsoft Azure subscription using the create template as shown below. Ensure you select relevant Subscription, Resource Group and .NET Runtime stack.

Progress through the create wizard screens to stand up your Function app in the portal.
Getting publish profile from the Microsoft Azure portal
On your newly created Function app, navigate to the Deployment Center as shown below

Clicking on the the Manage publish profile link should present a pop up window, from which you can download the publish profile. Keep note on the location where you have downloaded this publish profile file.
Importing publish profile into your Visual Studio project
Right-click on your project within VS, which should pop-up the menu shown below.

Click on the Publish… menu to launch the Publish window similar to the one shown below.

Using the Import Profile option will allow you to browse and select the publish profile file that you previously downloaded from Microsoft Azure portal. This will then successfully setup the publish profile to your Microsoft Azure subscription.
Publishing the custom connector from VS into Microsoft Azure portal
On the Publish window, you will notice your publish profile is selected, similar to one below.
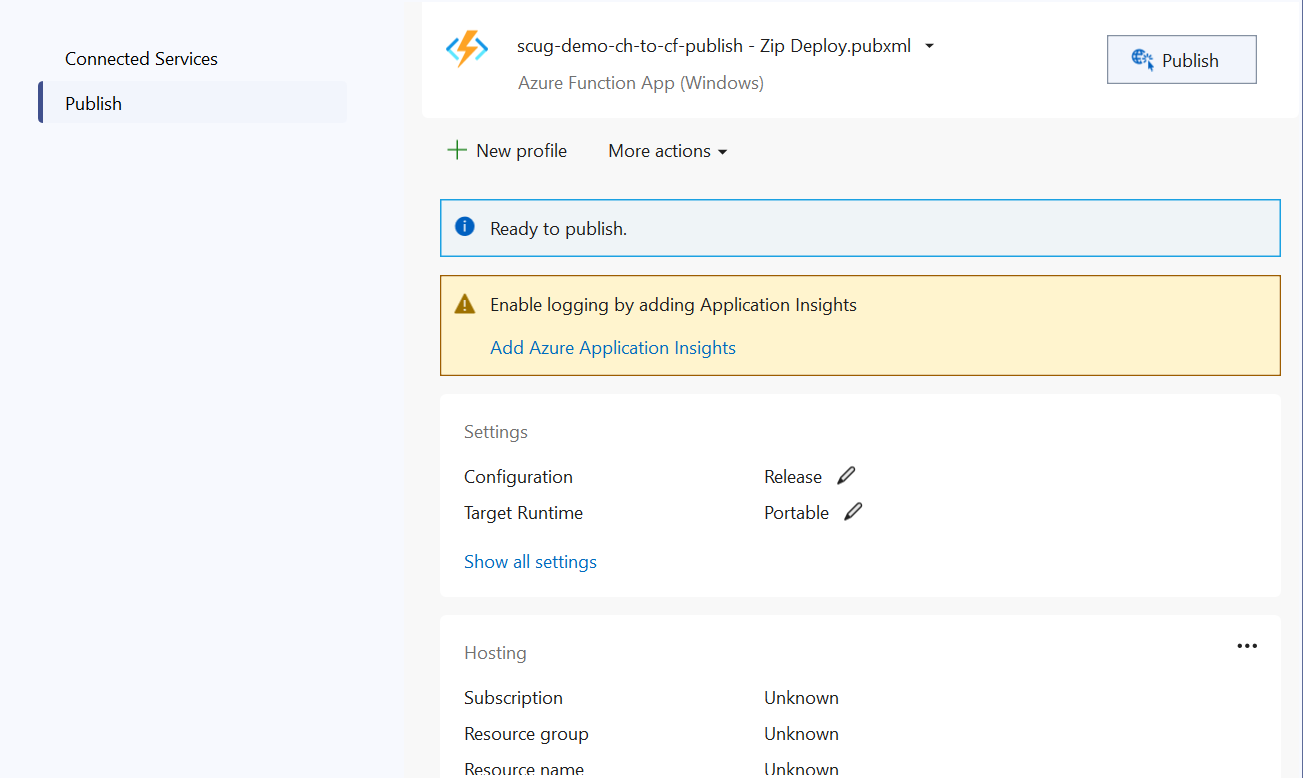
Clicking on Publish button will deploy the Function app to your Microsoft Azure subscription.
Next steps
In this blog post, we have explored at how to set-up a Function app in your local developer environment, add required NuGet Packages as well us publishing it to your Microsoft Azure subscription
Feel free to watch the rest of my YouTube playlist where I am demonstrating the end-to-end custom connector in action. Stay tuned.

