If you have bulk imported DAM assets into your Sitecore Content Hub using the Excel Import, then you are already familiar with the process. In fact, I recently blogged on how to bulk import video subtitles with multi-languages.
However, Sitecore Content Hub is a great platform with many hidden gems. In this blog post, I will be exploring the hidden gems on how the bulk import CMP content items. Hopefully save you valuable time of having to figure out on your own.
What is Sitecore Content Hub CMP?
CMP stands for Content Marketing Platform.
Below is an excerpt from the Sitecore official docs
Sitecore official docsA Content Marketing Platform allows the planning, authoring, collaboration, curation and distribution of the different content types that drive the execution of a content marketing strategy while allowing campaign management. CMP is a central hub providing an overall view of all content and how it is performing. It is an essential platform to help with planning and analyzing content marketing campaigns and individual pieces of content.
I will highly recommend watching the Sitecore Content Hub Content Marketing Platform (CMP) Walkthrough video from Sitecordial
For my use case, I will be looking at Blogs, which is one of the out of the box content types in CMP.
Creating a Blog entity within Content Hub CMP
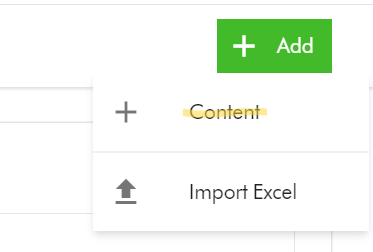
- To create a Blog entity, on the Content creation page, select Add Content
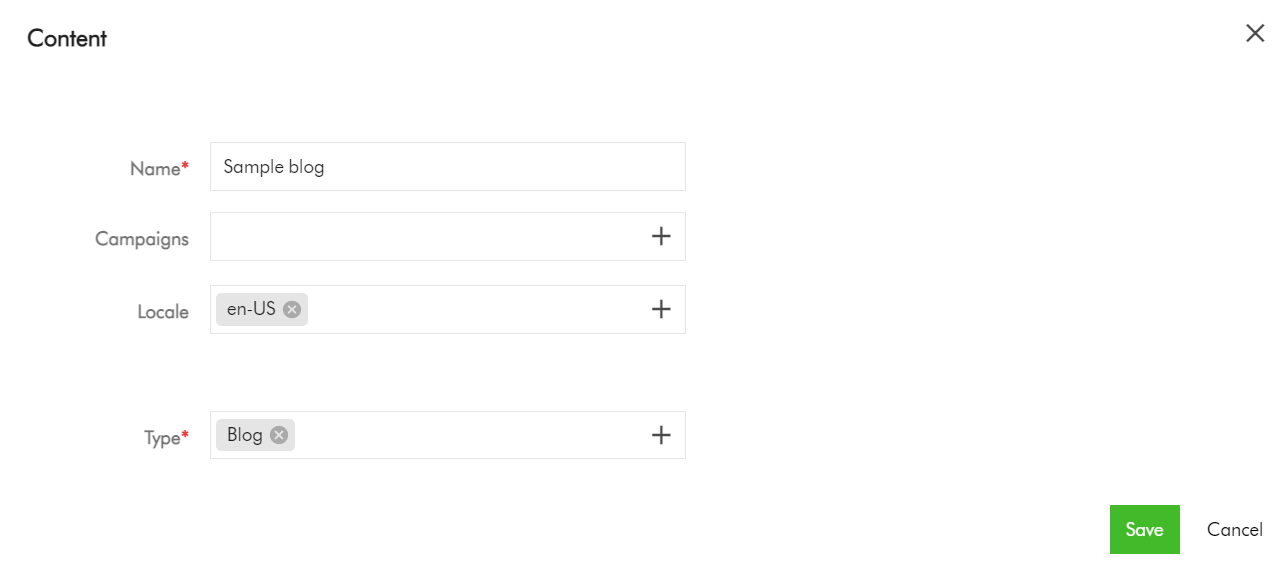
- On the add Content dialog, enter the Name and Type, which are mandatory fields. For Type, select Blog from the list of available Content Types. You can also specify the Locale (although this will default to your current Locale). Click Save to save your entry.
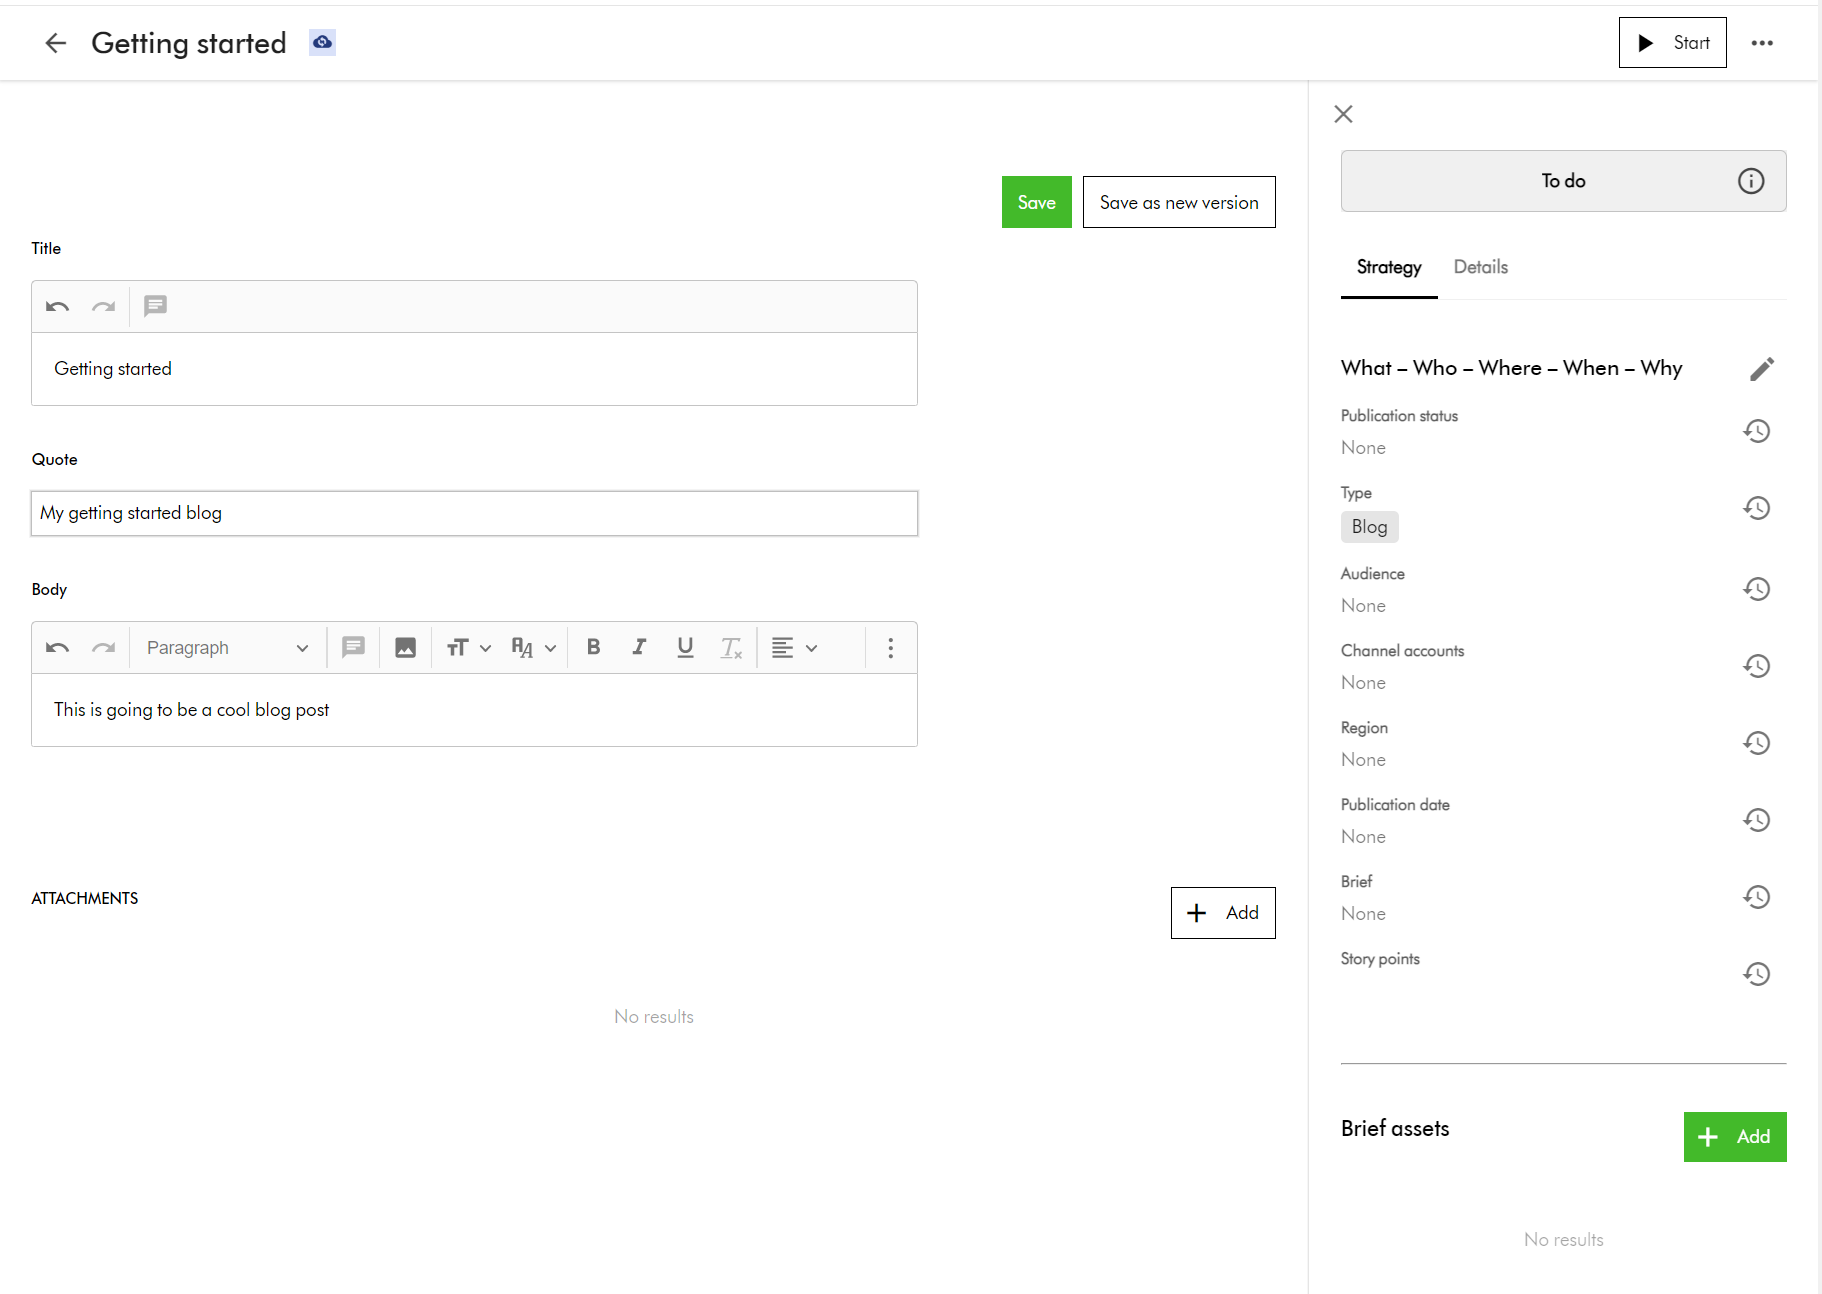
- Now select your new Blog item to edit. You should see the edit screen shown below. Enter content for the blog title, quote and body, then click Save to commit your changes.
Adding translations for multi-languages for your Blog entity
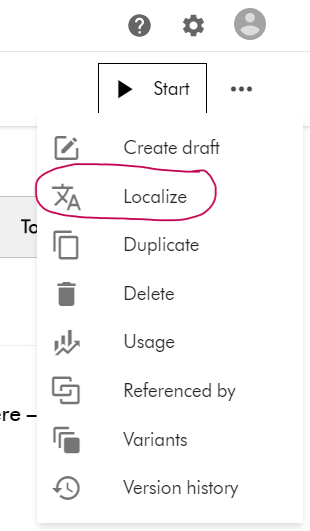
- To add a new translation, select the Localize action item from the Action menu, available from the top right-hand side of the edit screen.
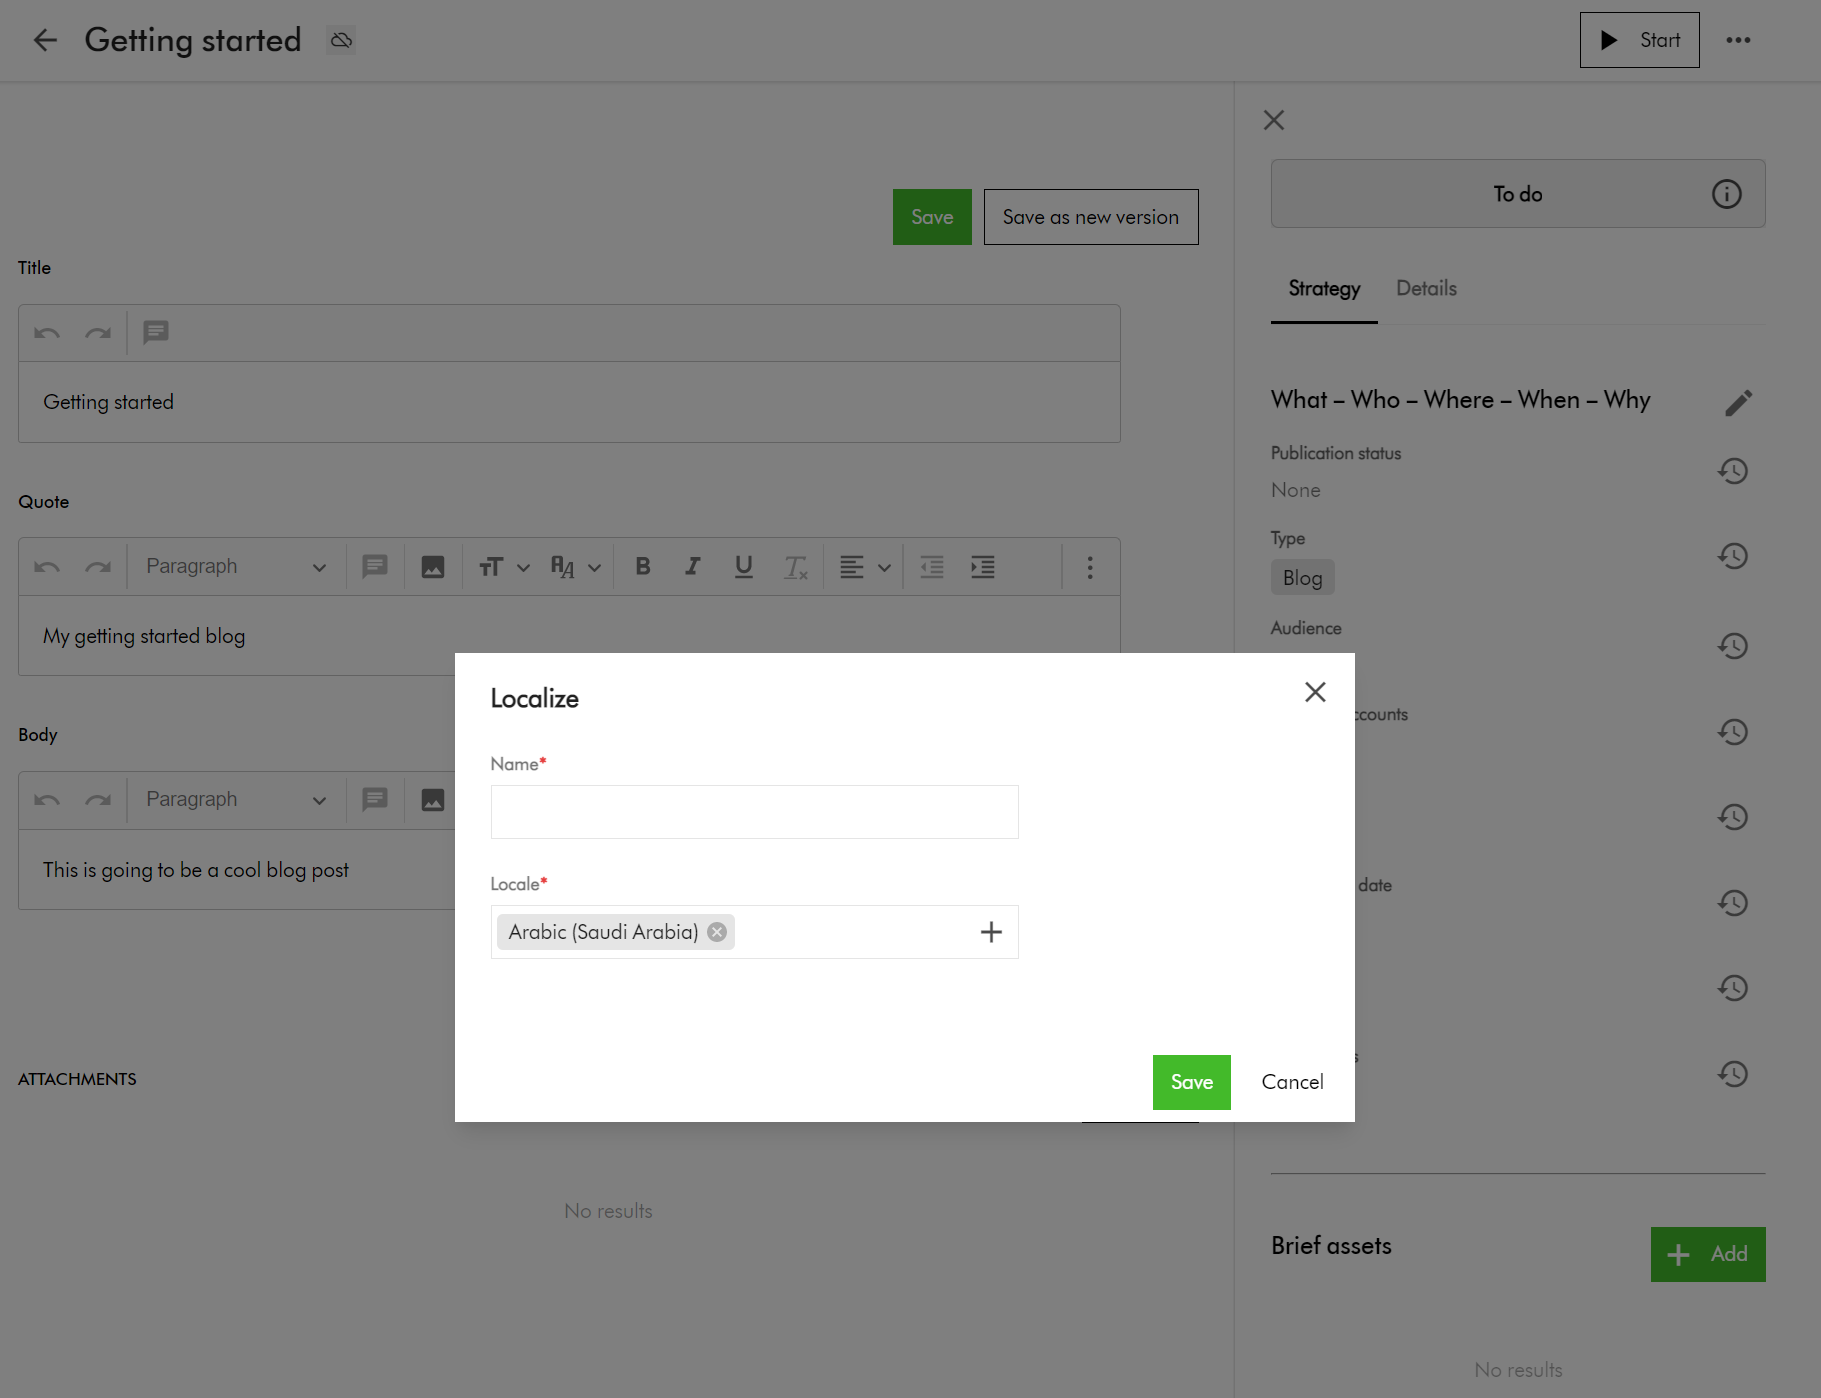
- This will prompt you to enter name and locale on a popup shown below.
- Click Save to create this variant for the selected language
- This will then open the edit screen for you to edit the translated content for the blog item.
Preparing your CMP content items for Bulk Import
Now that we have familiarized ourselves on how to add a single Blog item and a single translation using the portal, let us look at bulk import.
As usual, we will leverage the Excel Import template for the bulk import. In my related blog post, I already explained the pre-requisites you need for Excel Imports.
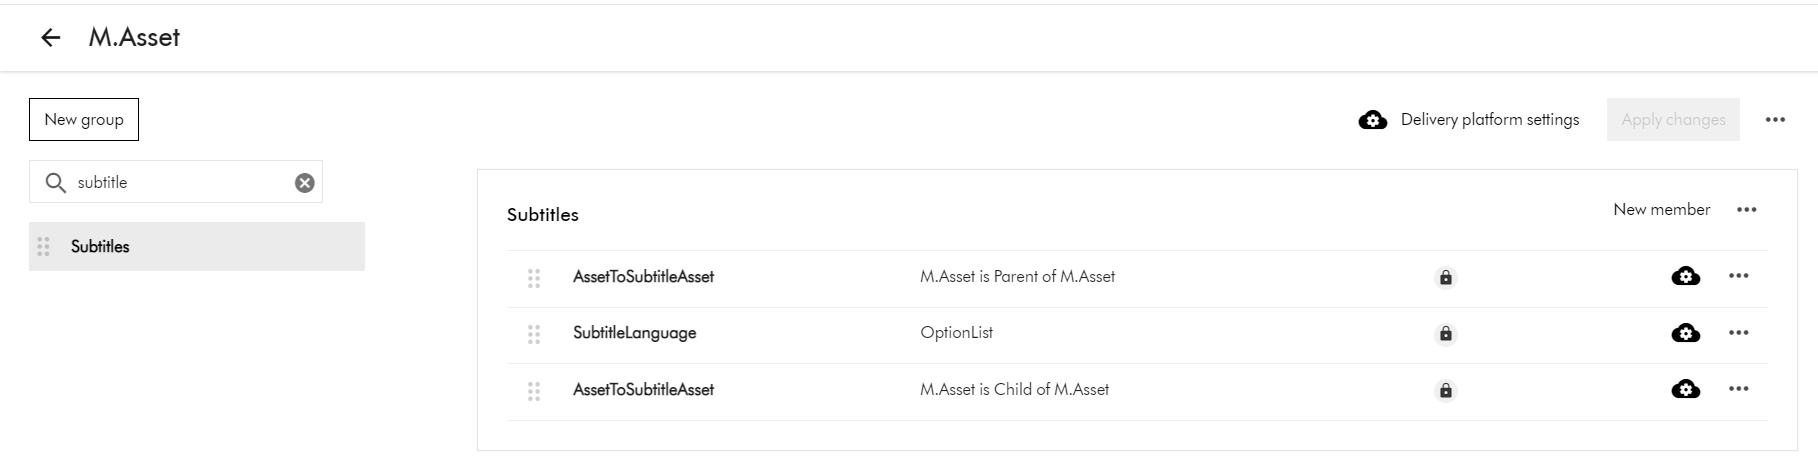
Blog items are M.Content entities, therefore we need to ensure our import worksheet is named M.Content
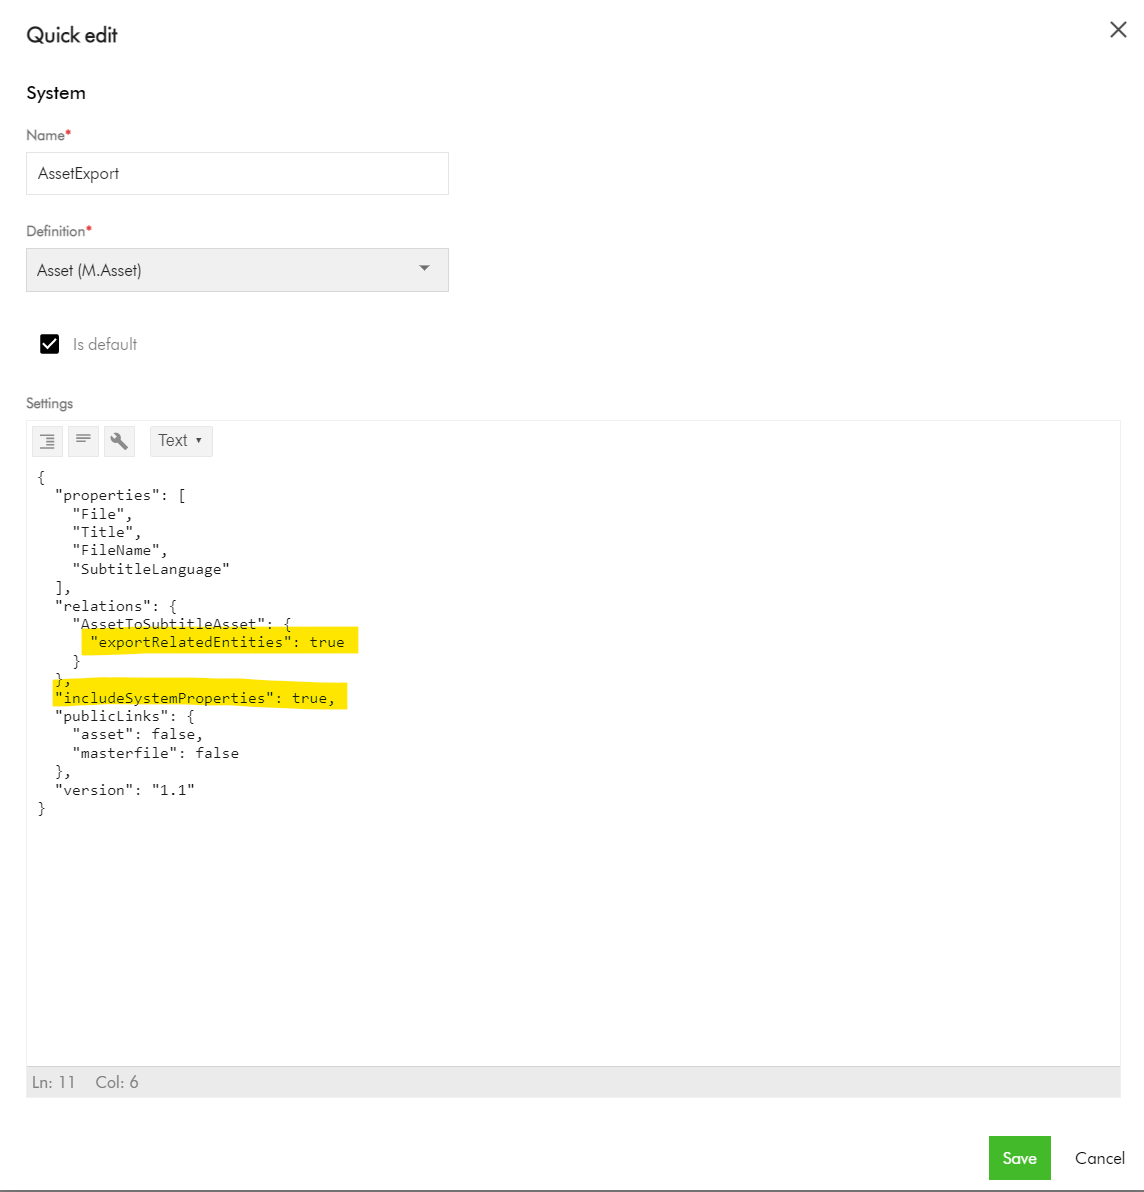
I have prepared an Export profile for exporting Blogs for your reference. You can access the Export Profiles area using the steps below.
Manage -> Export Profiles -> Create new export profile
The screenshot below shows my BlogContent export profile.
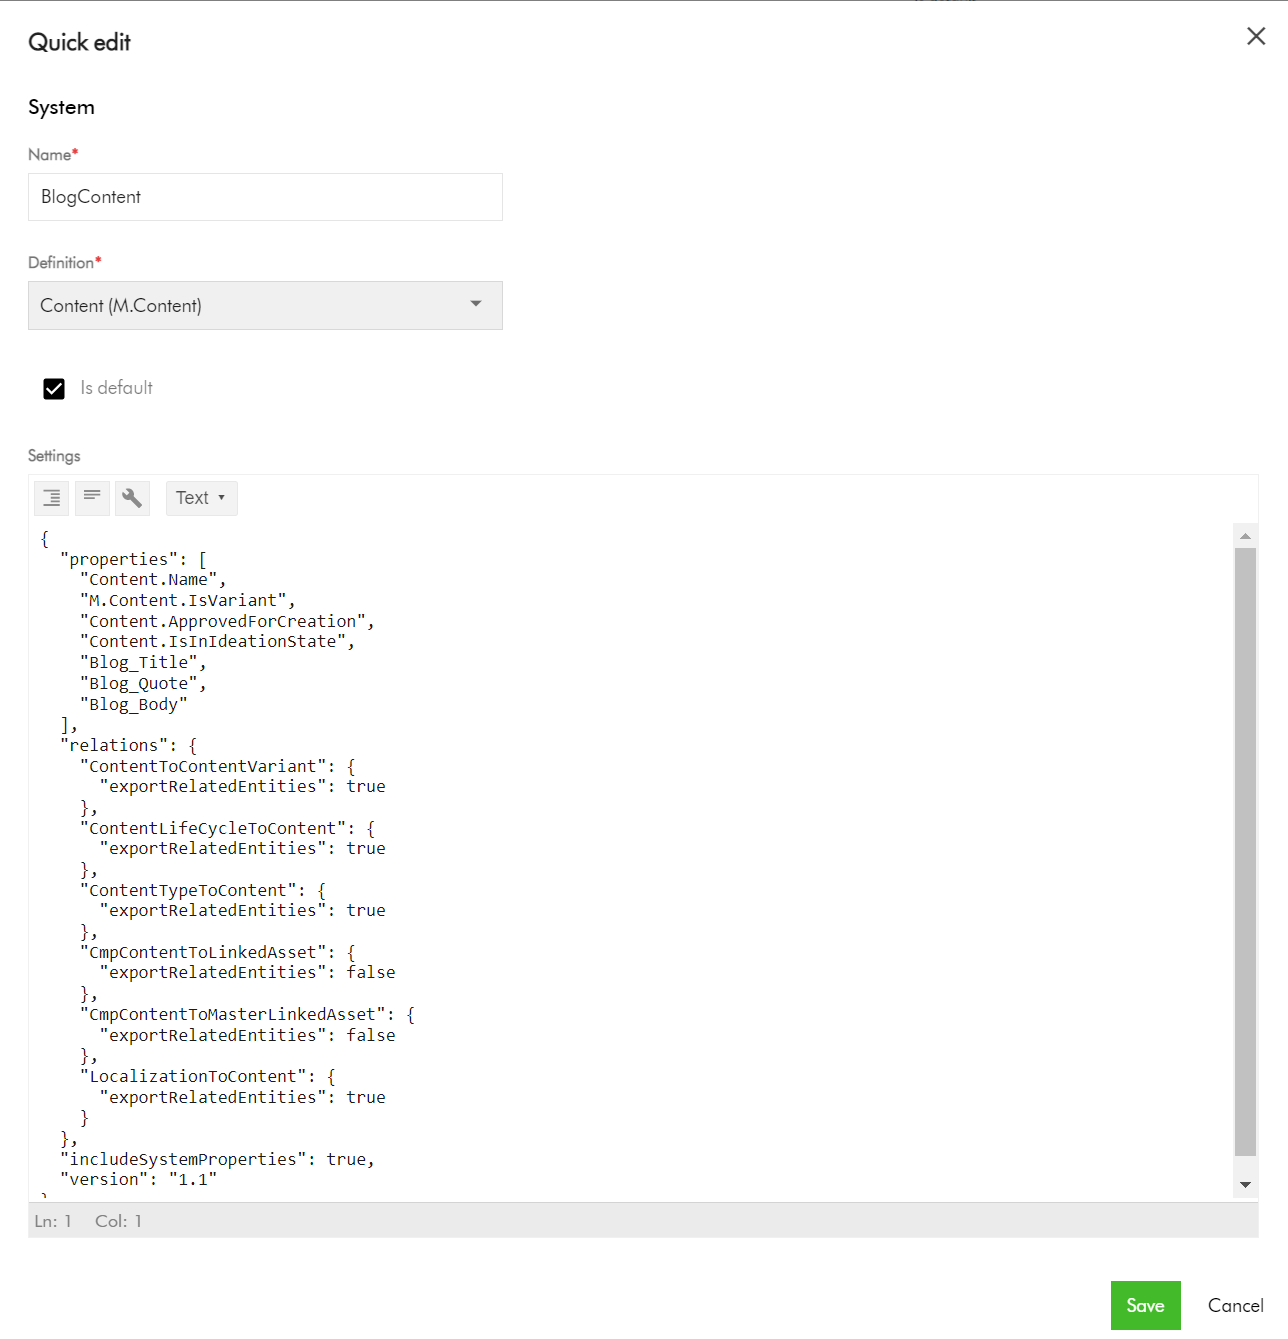
Key highlights on the Content export profile
Pay attention to the Relations section, where we are enabling the export of the related entities for:
- ContentToContentVariant
- ContentLifeCycleToContent
- ContentTypeToContent
- LocalizationToContent
Also, ensure includeSystemProperties is enabled.
This export profile will output worksheets for these Relations for your reference when generating the Excel Import template.
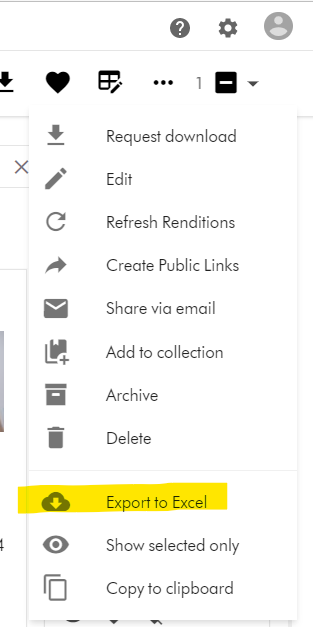
Export your CMP Blog entities into Excel
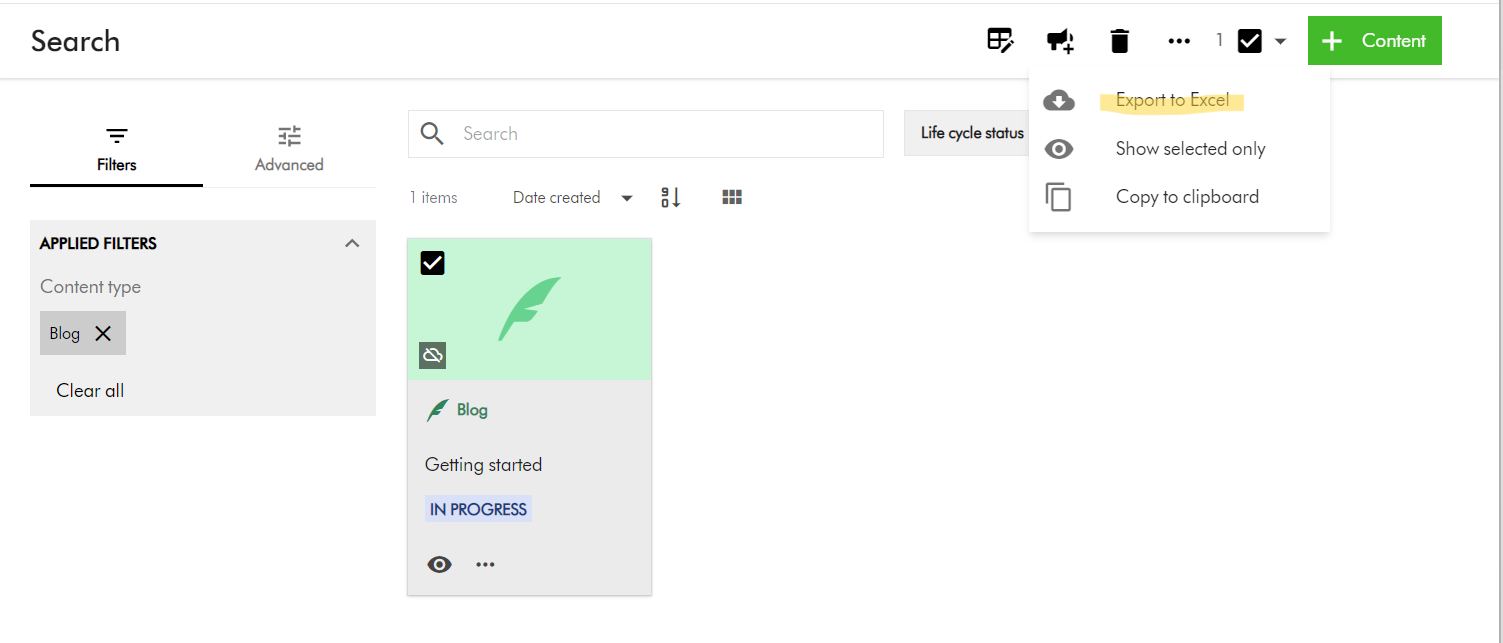
- Navigate to your Content search portal page.
- Search and locate your blog(s). You can use the Filters section to filter Content type of Blog.
- Select the blog(s) entities (by ticking the checkbox of your selection component)
- On the right-hand side, access the Actions dropdown menu, and click on “Export to Excel” as shown below.
- Your download should be ready and accessible from Profile -> Downloads link
A look at M.Content Excel Import template
Your M.Content import template will look similar to this one below.

You can now view or download the full Excel template file that I have used
Key highlights:
- Row 1 – this is the default blog entity based on your default language, e.g., en-US
- Row 2 through 4 – these are the variants of the blog entity for my localized languages. In your case, you many more or less, as per your localized languages you are supporting.
- Pay special attention to the ContentToContentVariant:Parent which is how the variants are linked to the default blog entity using identifier id123456789-blog-en-US in my example.
- Pay special attention to the ContentToContentVariant:Child which is how the default blog entity is linked to all variants. This will have pipe delimited list of variant identifiers (e.g., id123456789-blog-ar-AE|id123456789-blog-zh-CN|id123456789-blog-da-DK)
- Please note, you need to pre-generate unique values for the identifier column for your variant blog entities. This ensures you can script and control how to link them with parent blog as shown above. This will be key to successful bulk import of the blog entities with multi-language support.
- Use M.Content.IsVariant to mark which blog entities are variants
- Use the CmpContentToLinkedAsset column to link the blog entities to existing assets (images or videos) from your DAM if required. You can link multiple assets by using a pipe delimited list of assets identifiers.
- Use the CmpContentToMasterLinkedAsset column to assign a Cover Image to the blog entities
- The LocalizationToContent has the M.Localization taxonomy values corresponding to each localized language
- I have provided default values for the columns Content.ApprovedForCreation, Content.IsInIdeationState, ContentLifeCycleToContent as per my use case. In your case, provide appropriate values that meet your content strategy.
Finally, let us do bulk import of Blog entities into CMP
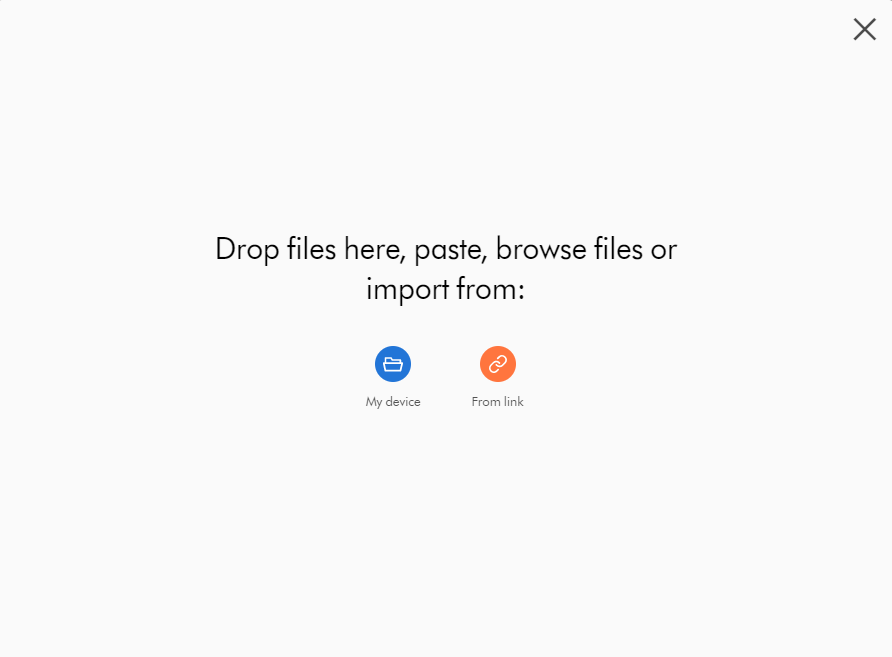
And finally, to bulk import, use the Content Creation page. Ensure the creation component on your page has Import Excel option enabled.
- On the Content creation page, select Import Excel

- Do one of the following:
- Drag the Excel file you want to upload into the dialog box.
- Click browse, then pick the Excel file you want to upload.
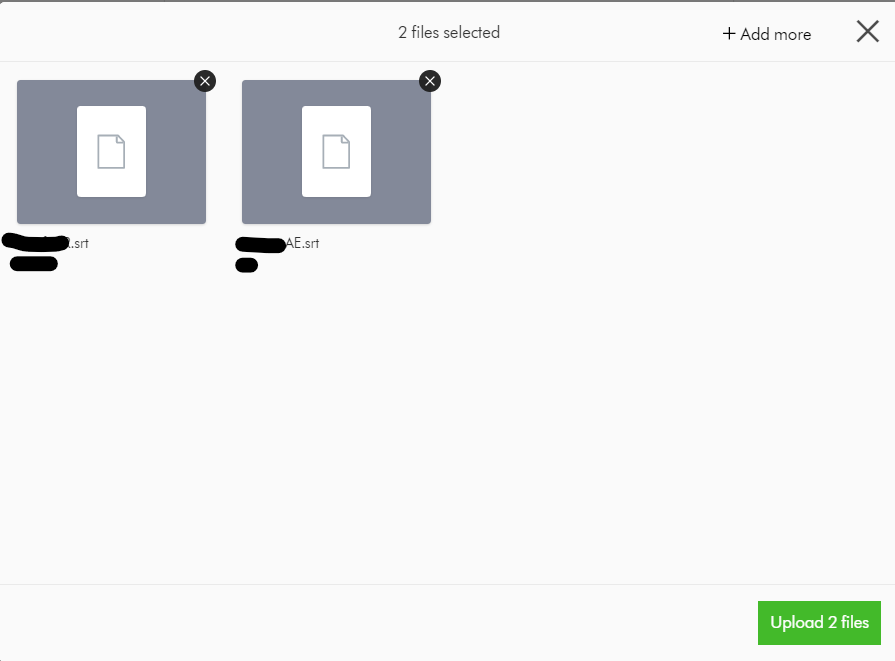
- Optionally, click Add more to add more files if needed.
- Click Upload files.
Next steps
On this blog post, we have looked at how to bulk import Blogs to your Sitecore Content Hub CMP. I am keen to hear your feedback or comments. Please do use the comments section for that.
Stay tuned for future posts as well look and feel free to look around at my existing posts on Sitecore platform.