Sitecore Horizon 9.3 – installation guide

Sitecore-Horizon-Hero

What is Sitecore Horizon?

Sitecore Horizon 9.3 (referred as Horizon for brevity in this blog) is the new alternative approach to editing content that is now available together with release of Sitecore Experience Platform 9.3 since late November 2019. Horizon is a separate Module that can be installed and is hosted separately from the main Sitecore XP 9.3 instance.

Sitecore previously announced Horizon in Symposium 2017 with a preview version released with Sitecore XP 9.1

The new editing environment in Sitecore XP 9.3, known as “Horizon” offers brands an easy to use, intuitive, and contextual interface with everything a user needs for easy navigation. The new editor user interface sets a foundation for the future and also provides real-time contextual insights as content is created and published, giving marketers the knowledge they need to drive improved conversions
~~~~
Sitecore official Symposium 2019 announcement

Horizon architecture at a glance

  • Horizon introduces a new IIS website instance, the content Authoring host application
  • Horizon deploys an integration module to every CM  instance
  • Horizon client application is built with Angular 7.2 utilizing Node.js for server-side rendering
  • Horizon client application uses GraphQL-based backend API to communicate with backend. This is similar to Sitecore JSS services
  • HTTPs requirement for communications between CM instance and the Authoring host application
  • User authentication via the Sitecore Identity Service

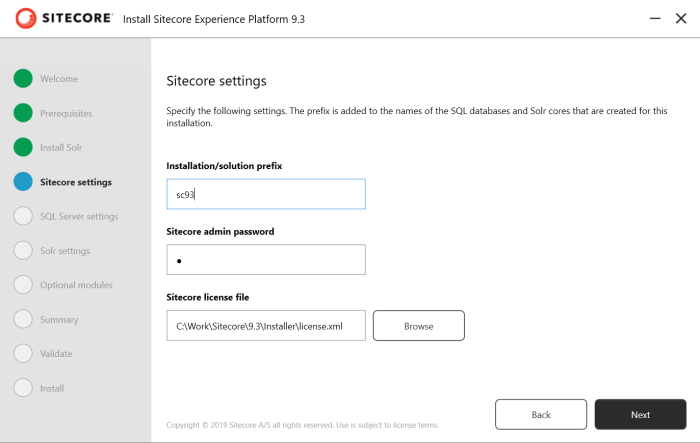
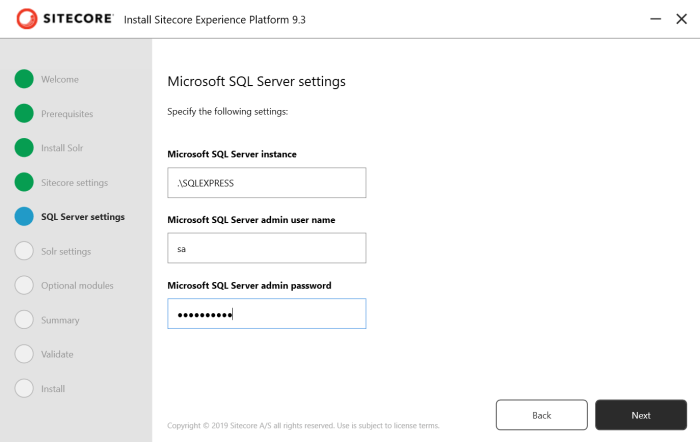
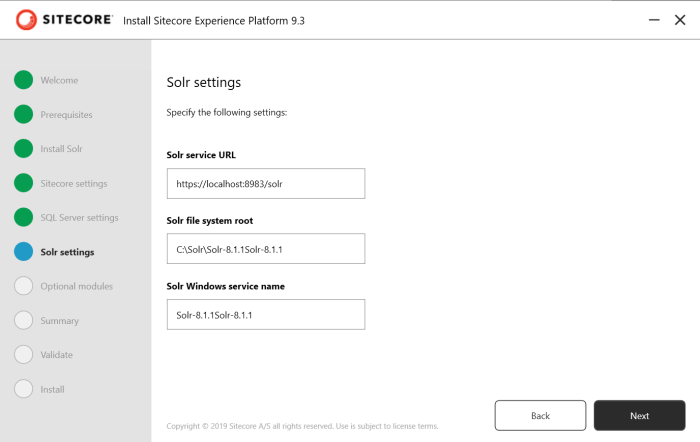
Horizon Installation – Prerequisites

  • Installation assets and guide available from dev.sitecore.net on the Sitecore Horizon 9.3.0 page
  • As prerequisite you must install Sitecore Experience Platform 9.3 or later. Also verify that
    • Sitecore CM instance has HTTPS enabled
    • Sitecore Identity must be installed
    • WebSocket Protocol is enabled in Windows Server Manager. Please see the screenshot below, where you need to tick to enable this feature and update your system.

5.0 horizon-websocket-protocol

  • The following tooling must be installed
    • Sitecore Install Framework 2.2.0 or later
    • .NET Core runtime and hosting bundle 2.1
    • Node v10.16.0 and npm 6

Horizon Installation – step by step guide

  1. This is based on an existing XP0 Developer Workstation Sitecore XP 9.3 installation. Please follow my blog post for a guide on how to setup Sitecore XP 9.3 on your on-premises developer instance.
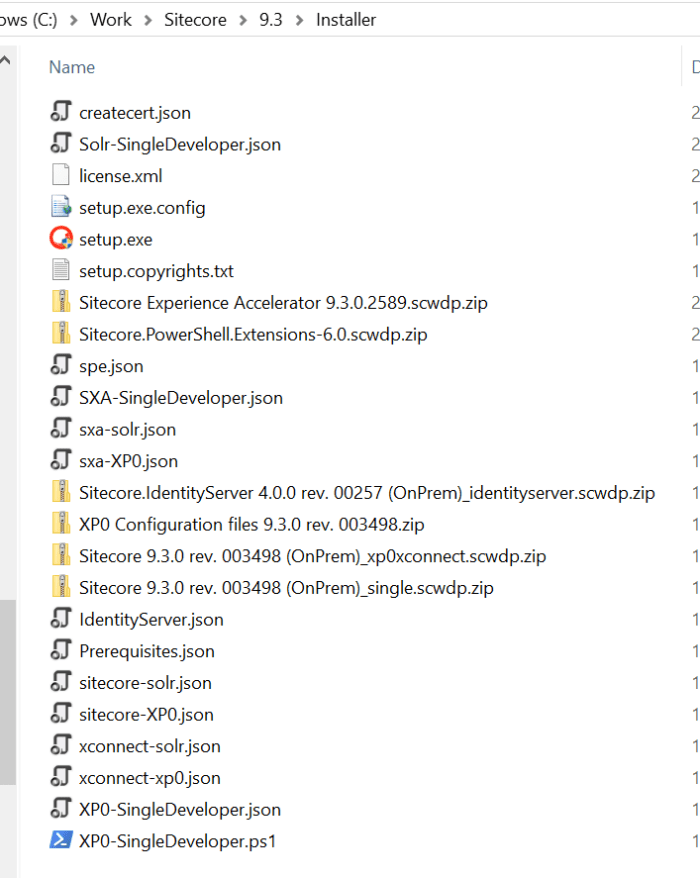
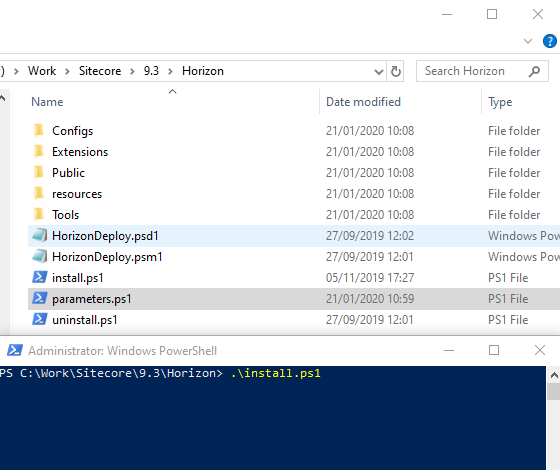
  2. Unpack the Sitecore Horizon 9.3.0.zip package to a working folder (as shown in screenshot below). You will then need to update the parameter.ps1 PowerShell script with parameters for the following:
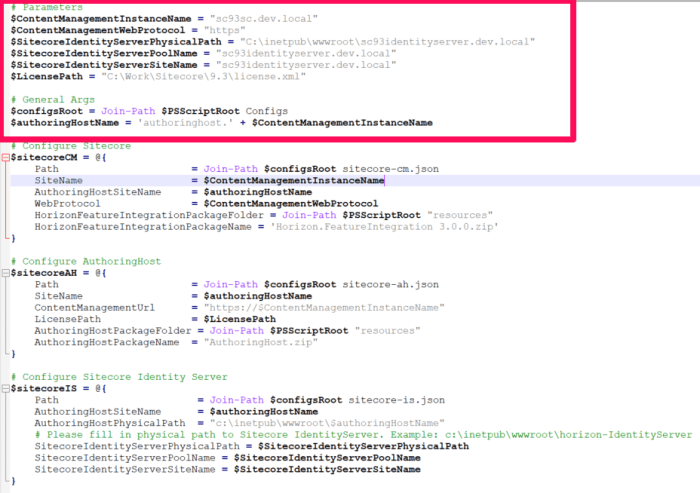
    • ContentManagementInstanceName – specify CM instance name
    • ContentManagementWebProtocol – this must be HTTPS
    • SitecoreIdentityServerPhysicalPath – specify path to Identity Server
    • SitecoreIdentityServerPoolName – specify Identify Server application pool name
    • SitecoreIdentityServerSiteName – specify Identity Server site name
    • LicensePath – specify your license full path (including file name)
    • AuthoringHostName – (recommended authoringhost.cmdomain.com as sub-domain of CM instance)
  3. After you save your changes to parameter.ps1 PowerShell script, simply run the install.ps1 PowerShell script from your command prompt or PowerShell command to install Horizon

5.1 horizon-installps1

Horizon install package extracted showing parameters.ps1 script

Below is a sample parameters.ps1 script with the parameters specified. Notice the license path must include the file name.

5.2.1. horizon-parameters-sample
Sample parameters.ps1 script with values

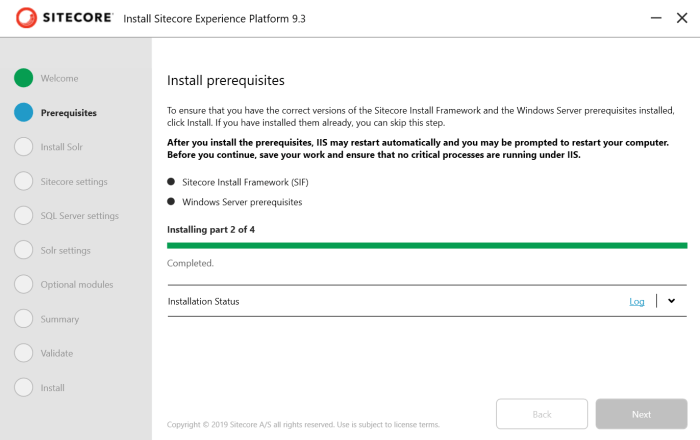
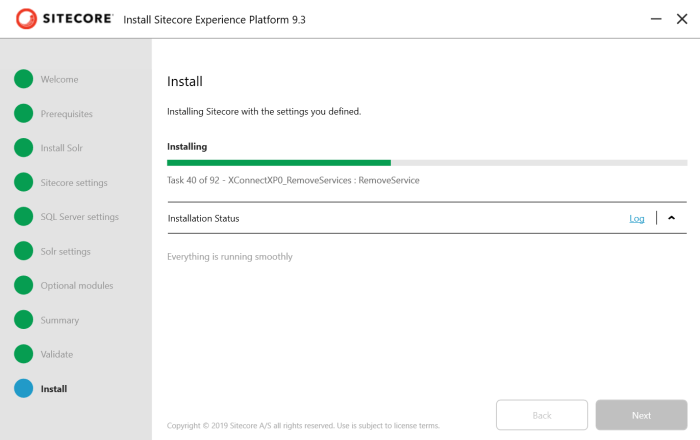
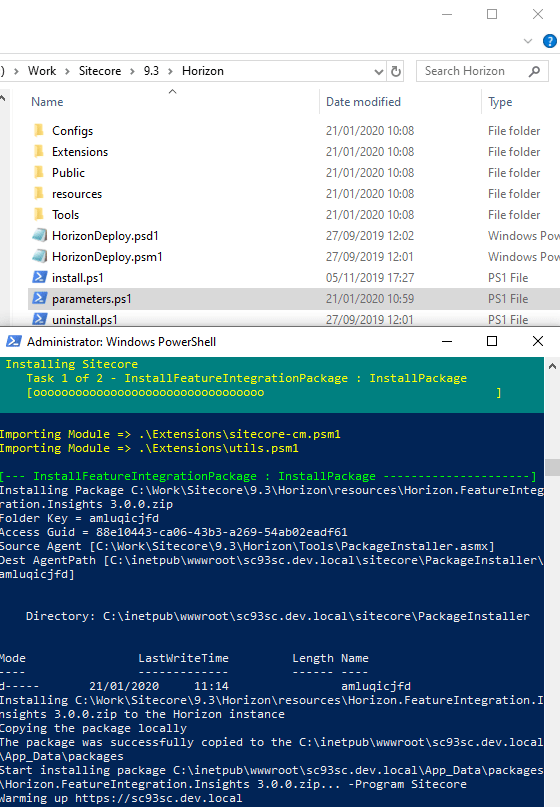
Whilst Horizon is installing, you will see the progress screen similar to the one shown below

5.3 horizon-install-progress
Horizon installation in progress

Launching Sitecore Horizon

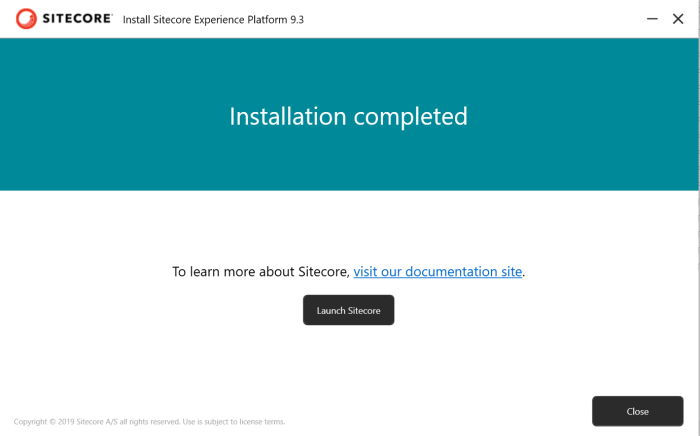
Sitecore Horizon 9.3 once successfully installed can be launched from the Launchpad of your main Sitecore XP 9.3 as shown below

5.4 horizon-install-complete

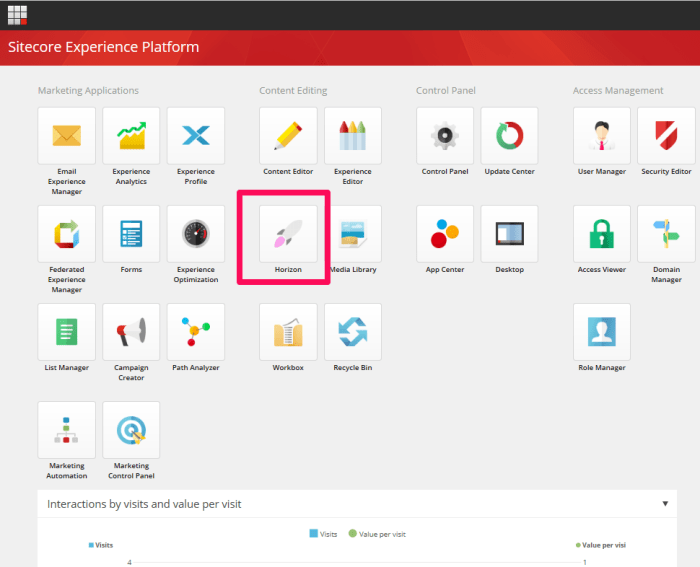
Click on Horizon “missile” icon to launch the Horizon Authoring host application, as shown below

5.6 horizon-autoring-instance

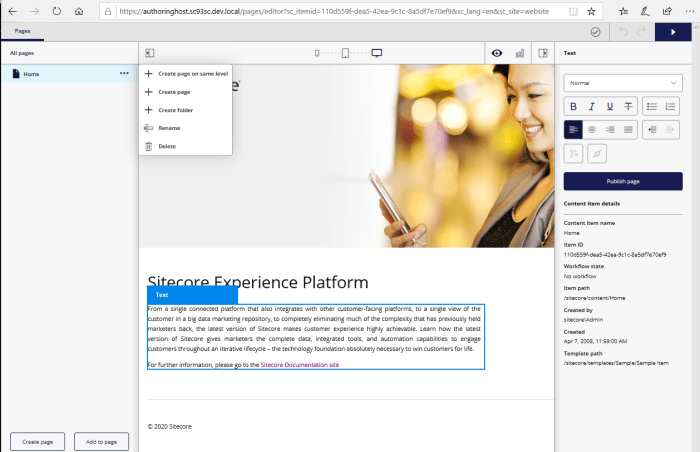
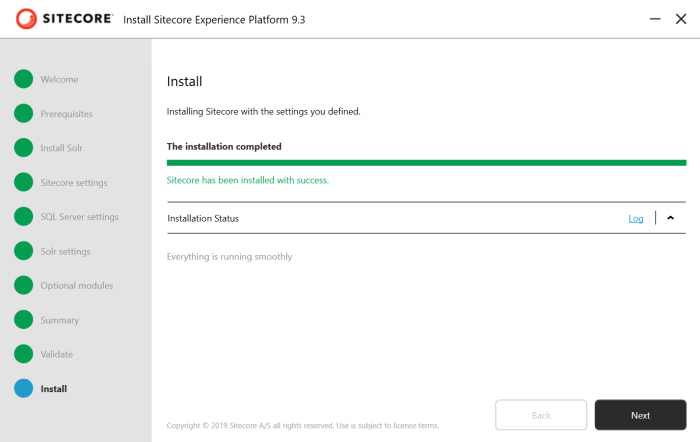
Congratulations! You have successfully installed Horizon when you see the above page. You will notice that Horizon is opened on a separate tab from your main Sitecore instance Launchpad

What changes does Horizon introduce to wwwroot

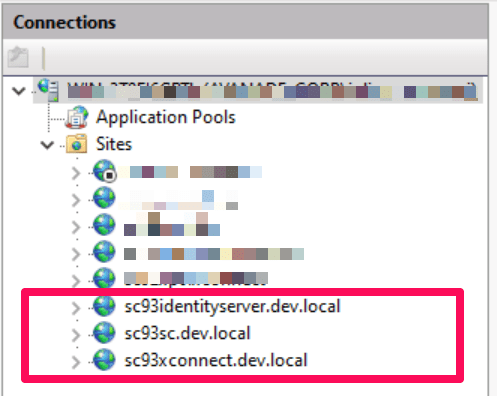
As mentioned above in the architecture at a glance, Horizon create a new IIS website as well as integration module to every CM instance.

Below is a screenshot showing IIS websites before and after Horizon is installed.

IIS Websites before horizon

5.4.1-horizon-install-complete-iiswebsites_edited

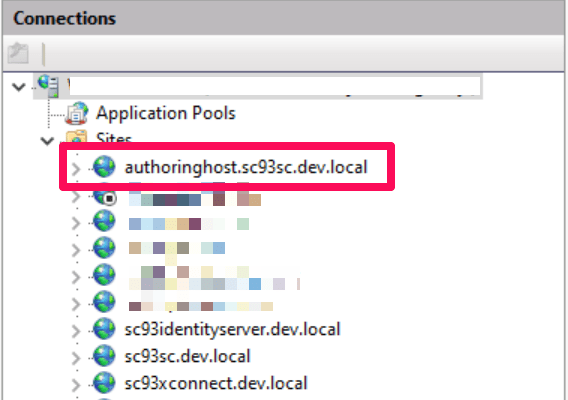
And below are the changes to your main Sitecore instance (wwwroot changes).

Red highlight indicates the file(s) were modified. Blue/Purple indicates new files were introduced

wwwroot changes introduced by Horizon to CM instance

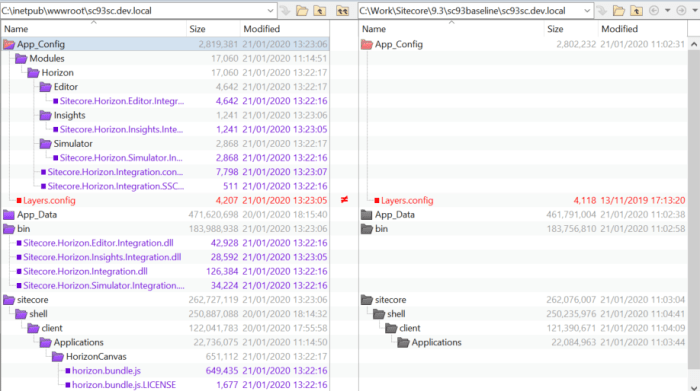
And below are the changes to your Sitecore Identity server (wwwroot changes).

Red highlight indicate the file(s) were modified.

6.2 horizon-updates-to-identity-server

Troubleshooting Installation Issues

You may come across installation issues. Below is how you can troubleshoot them

Node.js issues

You may come across Node.js issues which means Horizon will not load successfully when launched. You may get the error message below on your browser after launching Horizon

Failed to render a page: InternalServerError when launching Horizon, see screenshot below 

5.5.1 horizon-nodejs-error

You may get exceptions reported in the logs similar to this one below

An unhandled exception was thrown by the application.
System.InvalidOperationException: Failed to start Node process. To resolve this:.
[1] Ensure that Node.js is installed and can be found in one of the PATH directories.
    Current PATH enviroment variable is:
    Make sure the Node executable is in one of those directories, or update your PATH.

To resolve the Node.js issue, try the following options:

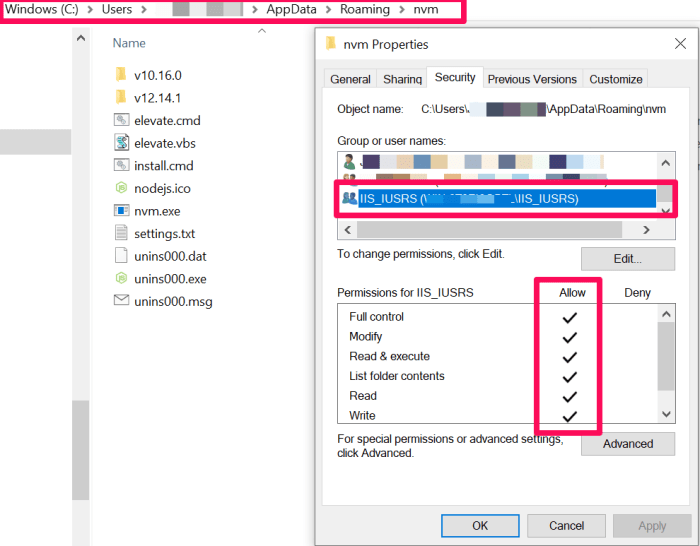
A) If you are using Node.js version management utility (NVM) to manage your NodeJS versions, ensure you have given the IIS application pool permissions to your NVM Roaming folder. Below is a screenshot showing how to give permissions

5.5.3 horizon-nodejs-error-nvm-permissions
setting permission on nvm roaming folder

B) If you are not using NVM, then please try uninstall Node.js and then re-install it again using the Windows Installer. Please refer to the Sitecore Horizon 9.3 Installation guide on the required Node.js version

Enabling logging on Authoring.Host.dll

Horizon logs are written on the logs sub-folder located at the wwwroot of the Horizon instance, as shown below:

update web.config to enable logs

If you can’t see any log files in the logs sub-folder, you can update the web.config file located at the wwwroot of the Horizon instance as shown below. Simply set the stdoutLogEnabled =”true” save your changes, and then recycle the Horizon app pool

Hope you find this post useful. Please watch this space as I will blog more about Horizon, including a deep dive on its features among other areas.

Sitecore XP 9.3 Initial Release

sitecore93-bannar

A guide to installing by Sitecore Install Assistant

Sitecore Experience Platform (XP) 9.3 was released late November 2019. In this blog, I will walk you through installing this release on your local on-premises development or testing environment.

The team at Sitecore have done a great work in documenting what is new in this release which I highly recommend you review as well.

Without further ado, I will now jump straight into installing a brand new instance of Sitecore XP 9.3

Sitecore® Experience Platform™ 9.3 focuses on product updates and enhancements that increase usability and improve performance – all centered around making it easier and faster to build digital experiences so brands can accelerate their time to value. The new editing environment offers an intuitive interface with everything a user needs for easy navigation as well as real-time contextual insights as content is created and published, giving marketers the knowledge they need to drive improved conversions.

Getting required downloads and installation package

  • Installation assets and guides available from dev.sitecore.net
  • Our download option is for On Premises deployment
  • We will be using Graphical setup package for XP Single option. Download this package to your computer. The package is a zip file named Sitecore 9.3.0 rev. 003498 (Setup XP0 Developer Workstation rev. 1.1.1-r4).zip

Extract the package and launch Sitecore Install Assistant (SIA)

  1. Ensure you “unblock” the zip package as shown in the screenshot 1 below
  2. Then extract the zip package to your working folder as shown in screenshot further below
Screenshot 1 - unblock the package before extracting the contents
Screenshot 1 – unblock the package before extracting the contents

Review prerequisites and requirements

Sitecore XP 9.3 supports the following database servers:

  • Microsoft SQL Server 2016 SP2 and 2017 – This is required if you are going to use SQL Server for the Experience Database (xDB).
  • MongoDB Server 4.0.5 – This is required if you are going to use MongoDB for the Experience Database (xDB) or as a Session State Provider.

SIA requires .NET Framework 4.7.2.

Install all the operating system updates.

Have a valid Sitecore license file

For a comprehensive guidance on the prerequisites and requirements, review the Quick Installation Guide for a Developer Workstation

Once ready, double click the setup.exe file below to launch the Sitecore Install Assistant

Screenshot showing extracted package for Sitecore 9.3.0 rev. 003498 (Setup XP0 Developer Workstation rev. 1.1.1-r4)

Running setup.exe should launch the Sitecore Install Assistance, which I will walk through step by step below

Sitecore Install Assistant step by step

1.1 SIA-start-page

Click on Start button to advance to the Prerequisites screen

SIA prerequisites screen

This step will install the correct version of Sitecore Install Framework (SIF) and Windows Server prerequisites needed for Sitecore XP 9.3. Note if you already have SIF and Windows server prerequisites, you can skip this step

1.3 SIA-prereqs-installing

1.4 SIA-prereqs-install-complete

Once prerequisites are successfully installed, advance to the next screen to install Solr 8.1.1

1.5 SIA-install-solr

Sitecore xP 9.3 requires Solr 8.1.1 search service. On this screen, specify the Solr port, Windows Service and Install path and then click install. If Solr 8.1.1 is already installed, you can skip this step by clicking on the Skip button.

1.6 SIA-install-solr-inprogress
SIA Solr 8.1.1 installing
1.7 SIA-install-solr-complete
SIA Solr 8.1.1 install complete

You can verify Solr 8.1.1 is successfully installed and running at this point by accessing the URL https://localhost:8983/solr/#/ (please note the port number configured in previous screen). You should see a page similar to one below

1.8 SIA-solr-instance-running
Solr 8.1.1 portal up and running

Once Solr 8.1.1 is successfully installed, advance to next screen to configure Sitecore Settings

1.9 SIA-sitecore-settings

  • Installation/solution prefix – specify a prefix to be added to names of Sitecore instance, SQL databases and Solr cores
  • Sitecore admin password – specify a strong password for Sitecore instance admin account
  • Sitecore license file – specify the full path including the filename for your license file
  • Click next to advance to SQL Server settings screen

1.10 SIA-sql-server-settings

Specify the name of the SQL Server instance, the admin user (sa) and admin user password. Then click Next to advance to Solr settings screen

1.11 SIA-solr-settings
SIA Solr 8.1.1 settings

On this screen enter the Solr 8.1.1 setting

  • Solr service URL – should be https://localhost:8983/solr (note the port number if different)
  • Solr file system root – enter your the path to Solr 8.1.1 you installed previously
  • Solr Windows Service name – enter the Solr windows service name configured previously
  • Click Next to advance to next screen for Optional modules

1.12 SIA-optional-modules

You can skip Sitecore Experience Accelerator (SXA) as we don’t need it in this case

1.13 SIA-summary

The summary screen showing list of the settings you specified. Allows you to verify everything is correct, if not use the Back button to go back and edit them. Once happy click on Next button to advance to Validate screen

1.14 SIA-validate

The installer validates you have

  • Sitecore license file
  • SIF configuration files
  • WDP files

Once validated you should see green ticks against each item, then click Install to initial the install process

1.15 SIA-install-progress

The installation may take about 15-30 minutes depending how quickly the install operations execute on your system

1.16 SIA-install-complete

If everything goes to plan, you will see the installation completed message. Then click Next to advance to Installation completed screen, with a link to Launch Sitecore

1.17 SIA-launch-sitecore

Post Install Notes

SIA graphical setup tool was introduced in Sitecore XP 9.2 It is nice to see some impovements to this tool, such as optional installation of Solr and SXA.

I hope this guide here gives you motivation to go and try this on your own.

Once again, visit Sitecore XP 9.3 Release Notes page for a full list of hightlights, new features or impovements, any deprecated features among others